AWS (Amazon Web Services)
AWS is Amazon’s cloud platform that provides on-demand compute, storage, networking, and security services. Instead of running hardware in a physical data center, we can deploy virtual infrastructure in minutes and scale it as needed.
Here, the goal is to deploy a FortiGate firewall virtual machine inside AWS. The plan covers preparing the AWS environment, selecting the correct FortiGate AMI, designing the network layout (VPC, subnets, routing, and security groups), and finally launching and configuring the FortiGate instance to handle traffic securely.
Setting up AWS Access
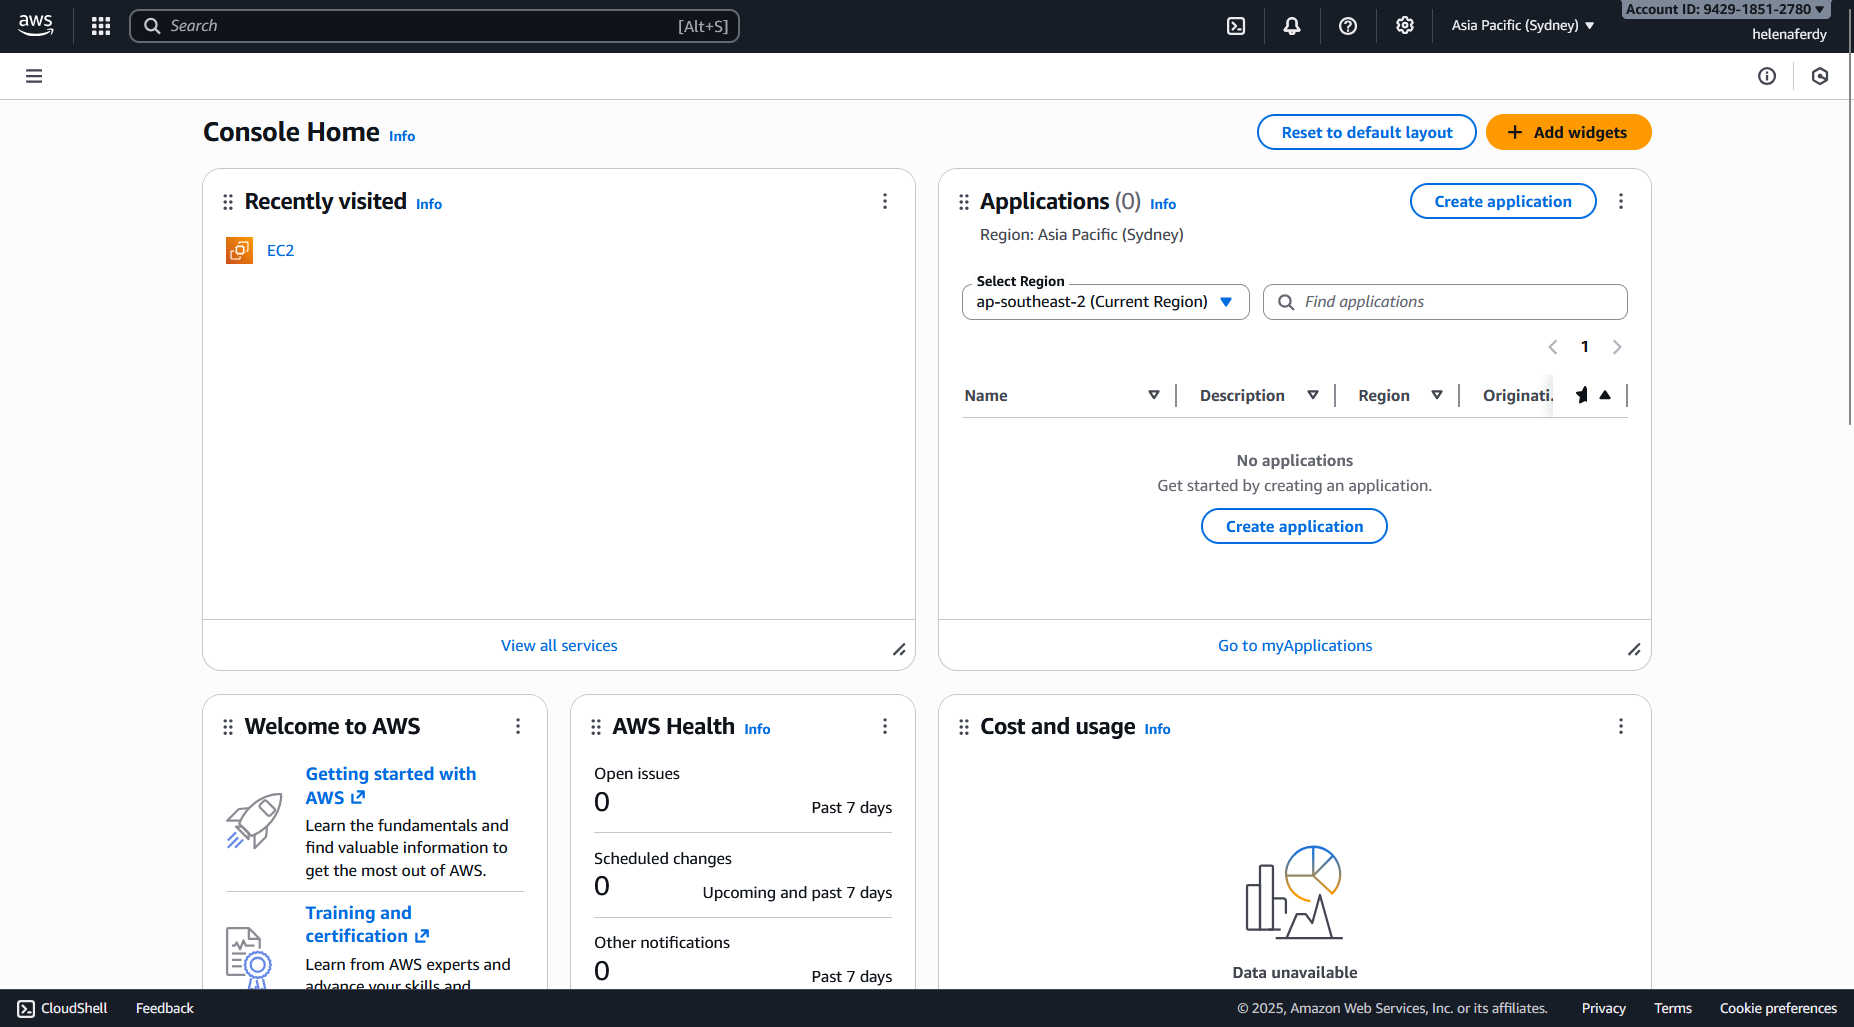
AWS allows free use of $200 credit for 180 days that we can utilize to buid this lab
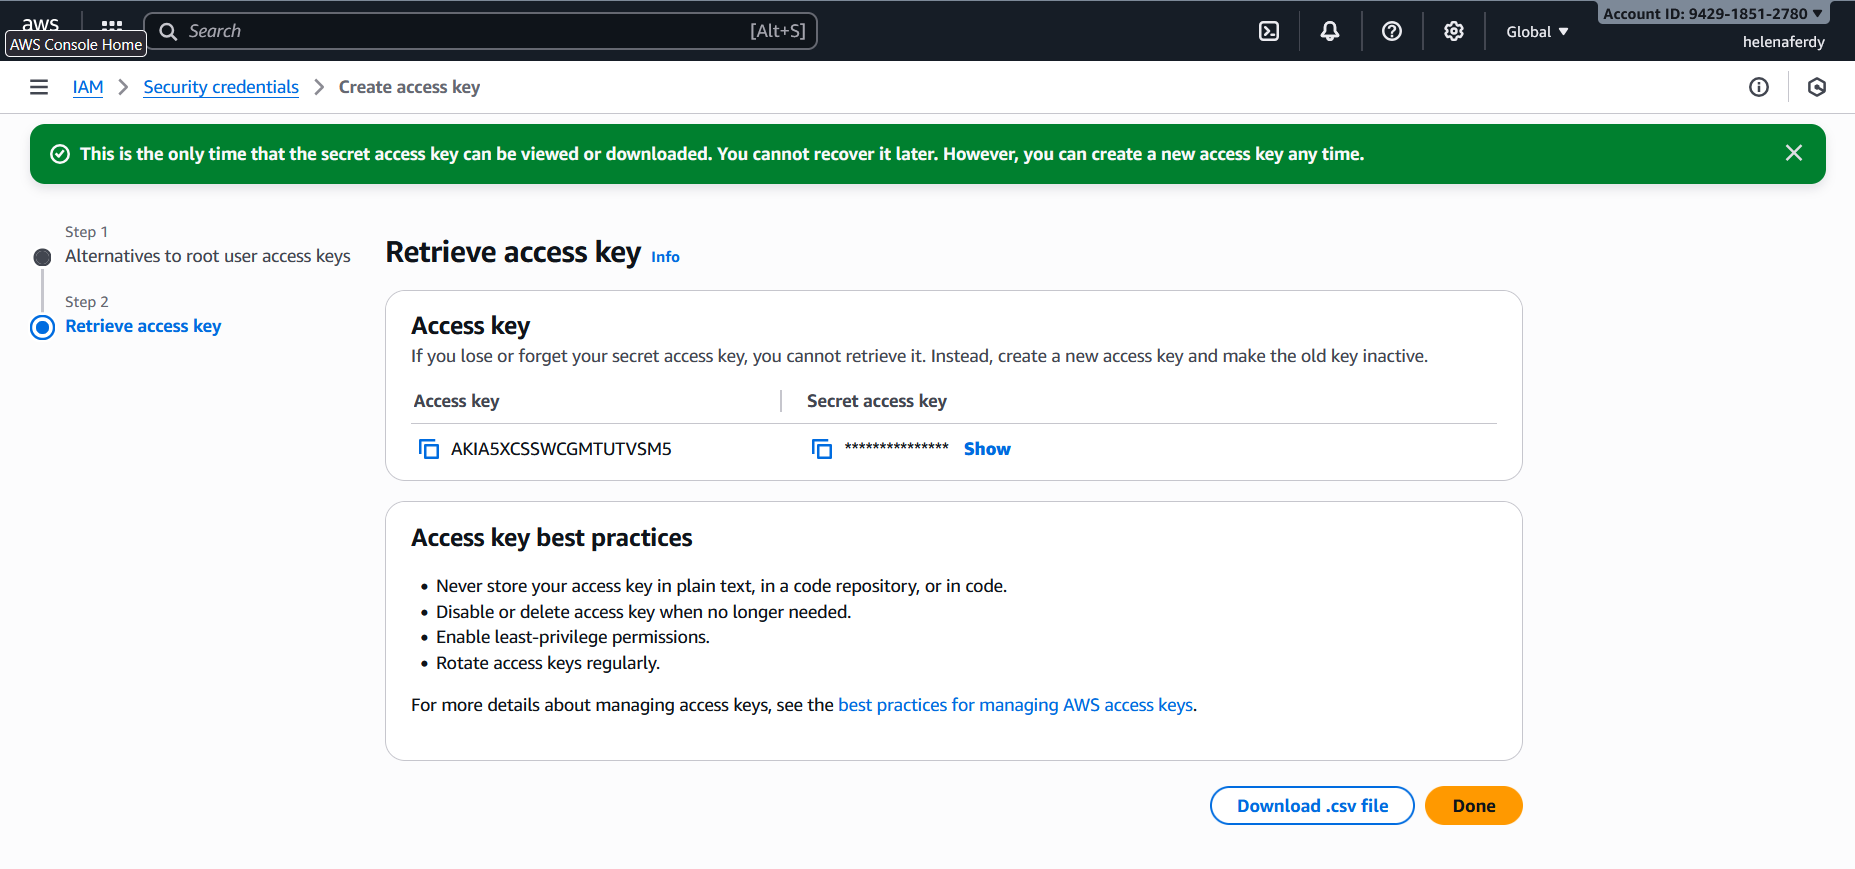
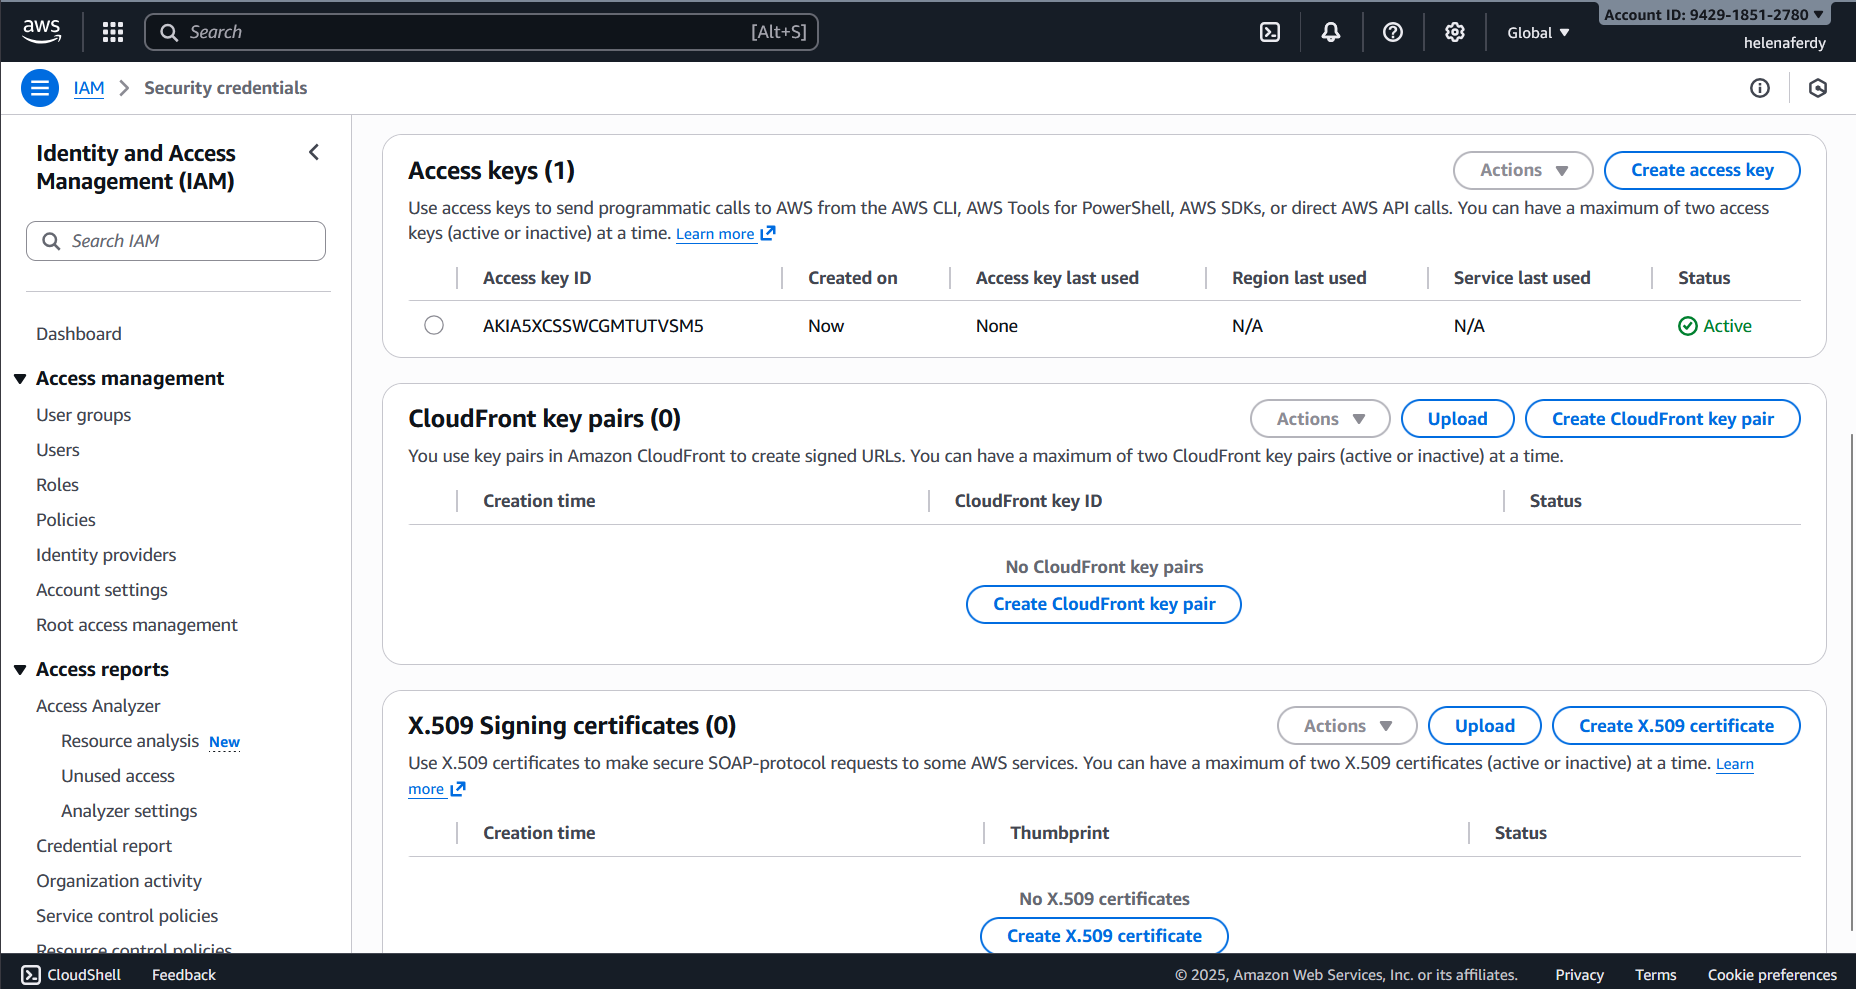
Next we will setup a Access Key so we can access the AWS Shell Console from a linux host, we can do that on IAM » Security Credentials » Create Access Key
Next install the AWS CLI package
1
2
3
4
5
6
7
sudo apt update
sudo apt install unzip -y
curl "https://awscli.amazonaws.com/awscli-exe-linux-x86_64.zip" -o "awscliv2.zip"
unzip awscliv2.zip
sudo ./aws/install
aws --version
Then run “aws configure” to setup the credentials

Run “aws sts get-caller-identity” to verify the entered credentials

Importing Fortigate VM Image
Next we’ll create an IAM Role that we will use to Import Fortigate VM
1
2
3
4
5
6
7
8
9
10
aws iam create-role --role-name vmimport --assume-role-policy-document '{
  "Version": "2012-10-17",
  "Statement": [{
    "Effect": "Allow",
    "Principal": {"Service": "vmie.amazonaws.com"},
    "Action": "sts:AssumeRole",
    "Condition": {"StringEquals": {"sts:ExternalId": "vmimport"}}
  }]
}'

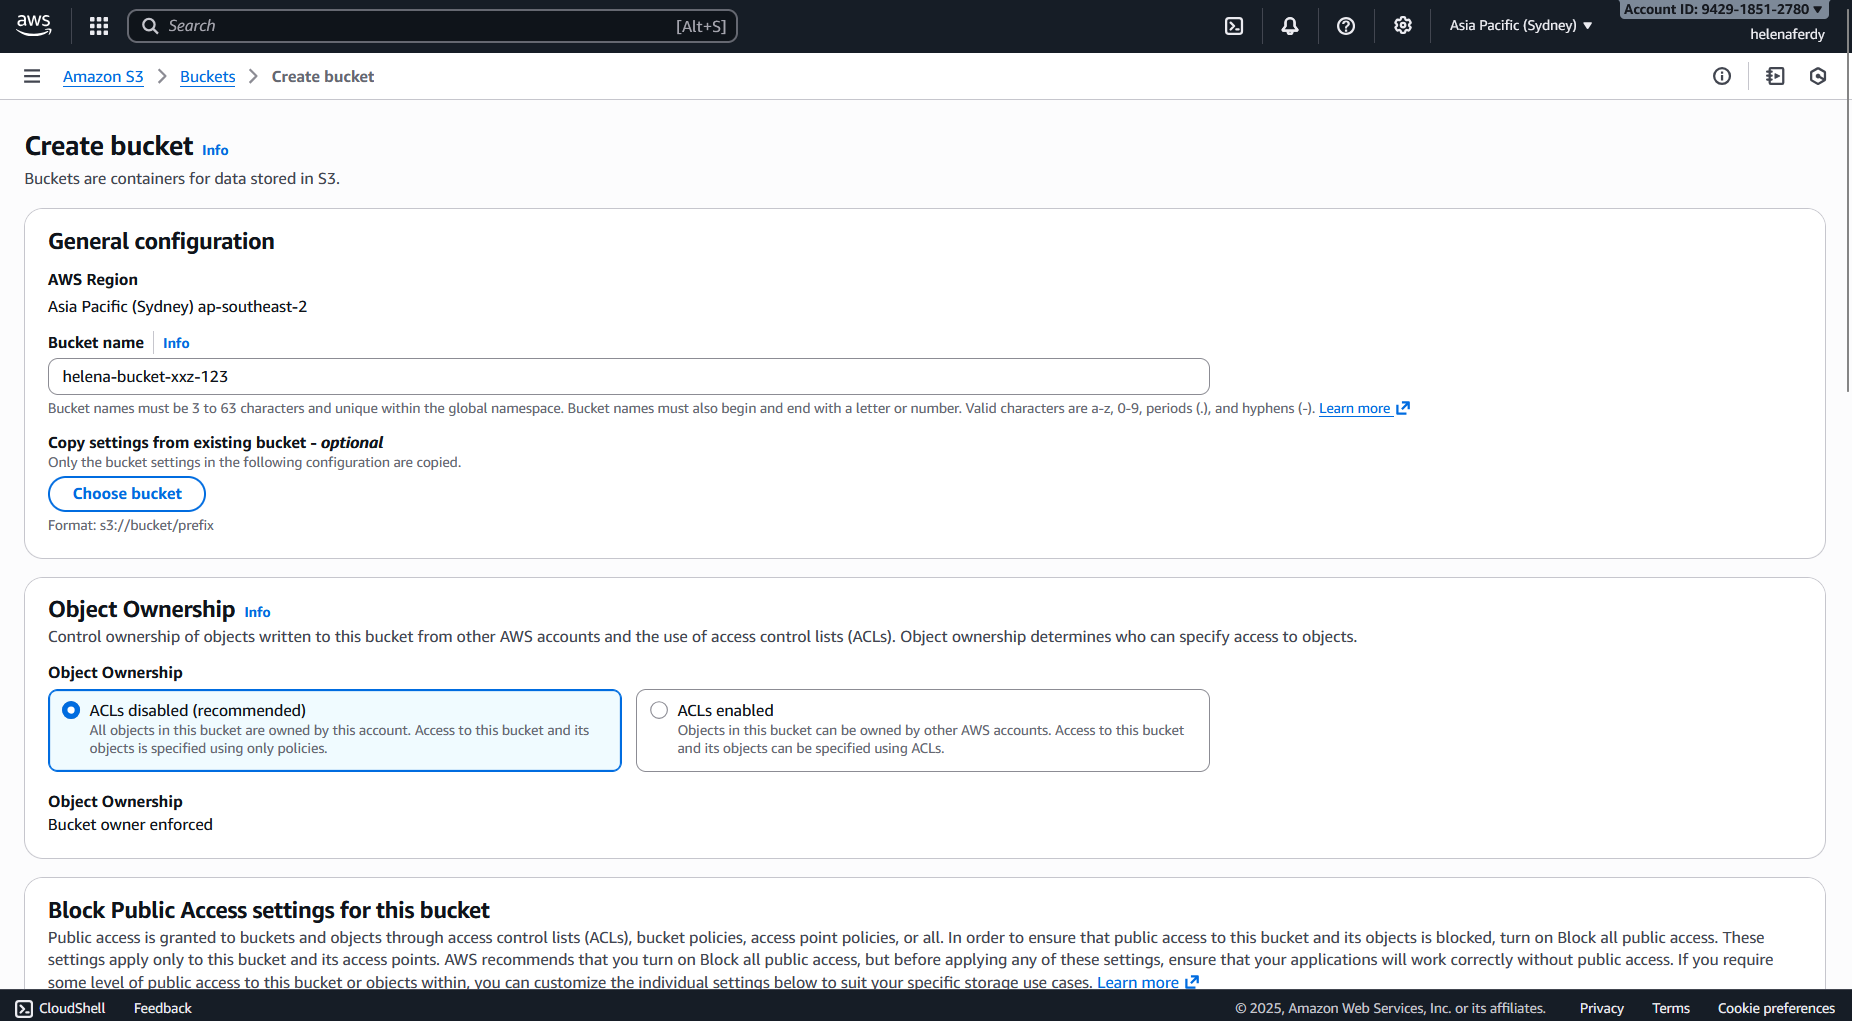
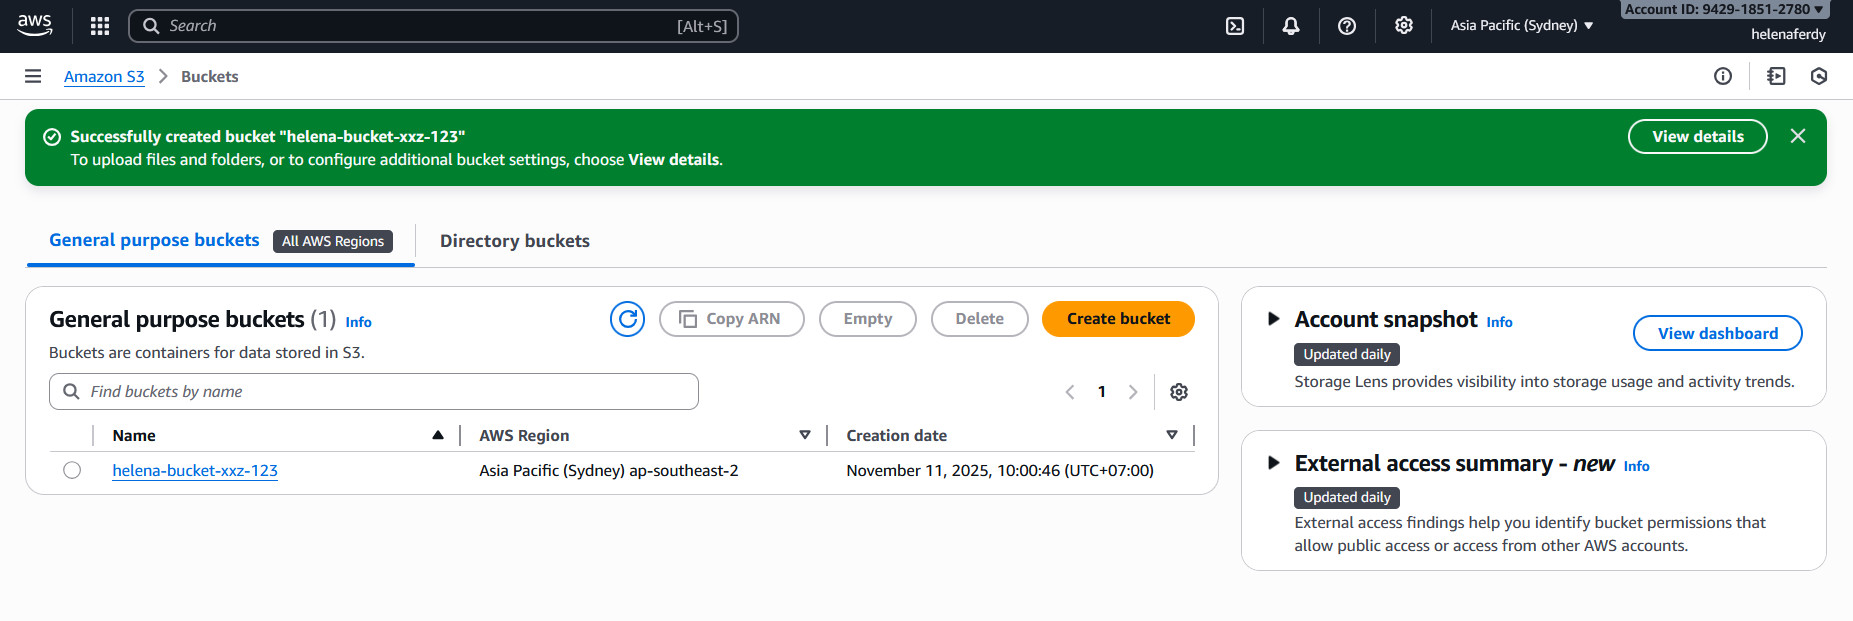
After that we set up an S3 Bucket that we will use to store the VM Image, to do that go to Amazon S3 » Buckets » Create Bucket
Back to CLI Shell, we will attach permission to the ‘vmimport’ role to access the bucket ‘helena-bucket-xxz-123’
1
2
3
4
5
6
7
8
9
10
aws iam put-role-policy --role-name vmimport --policy-name vmimport --policy-document '{
  "Version": "2012-10-17",
  "Statement": [
    {"Effect":"Allow","Action":["s3:GetBucketLocation","s3:GetObject","s3:ListBucket"],
     "Resource":["arn:aws:s3:::helena-bucket-xxz-123","arn:aws:s3:::helena-bucket-xxz-123/*"]},
    {"Effect":"Allow","Action":["ec2:ModifySnapshotAttribute","ec2:CopySnapshot","ec2:RegisterImage","ec2:Describe*"],
     "Resource":"*"}
  ]
}'

Next download the AWS version of the VM on fortinet’s site
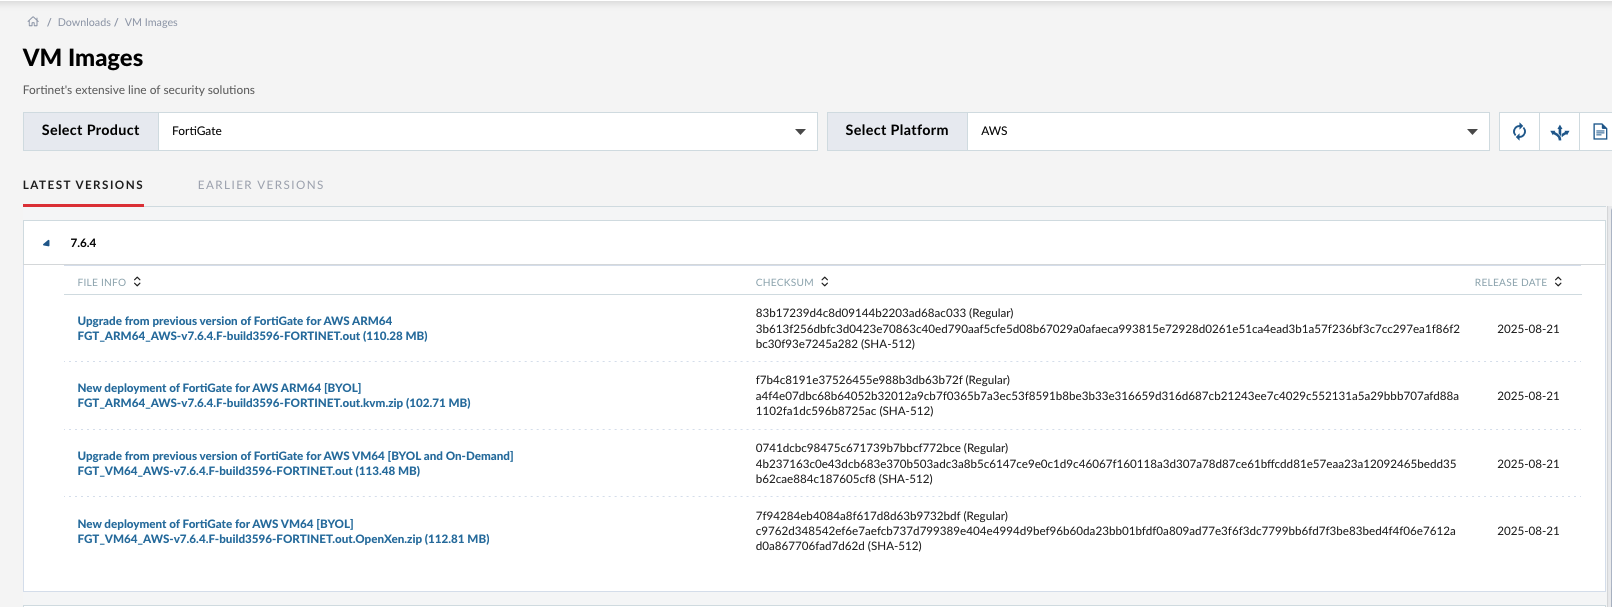
This method doesn’t allow direct import of .qcow2 file format, so we need to convert it to .raw first and then upload it to the bucket
1
2
3
4
apt install -y qemu-utils
qemu-img convert -p -f qcow2 -O raw fortios.qcow2 fortios.raw
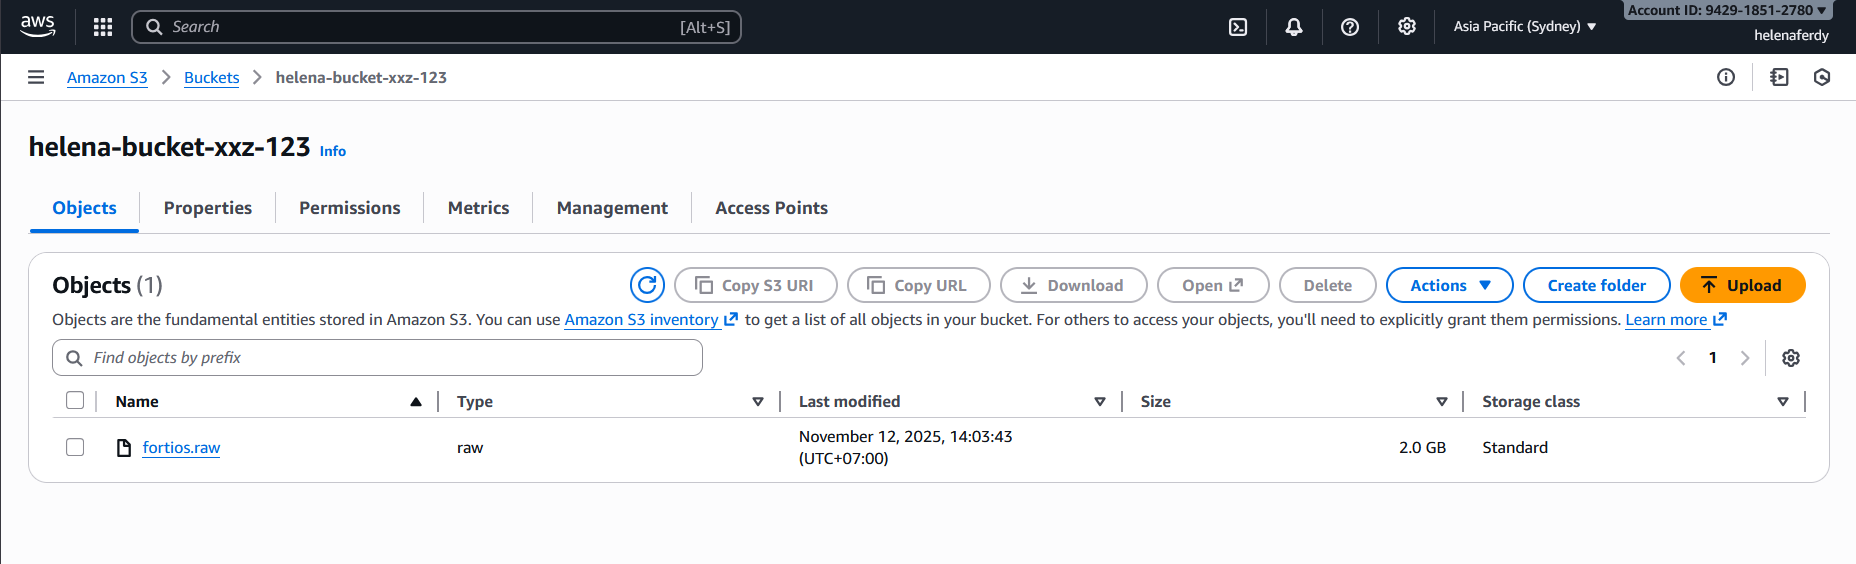
aws s3 cp fortios.raw s3://helena-bucket-xxz-123/fortios.raw

Now we have the fortios.raw file inside the S3 bucket
Next we’ll create a snapshot based on the uploaded .raw file
1
2
3
4
5
aws ec2 import-snapshot --description "FortiGate Snapshot" --disk-container "{
  \"Format\":\"raw\",
  \"UserBucket\":{\"S3Bucket\":\"helena-bucket-xxz-123\",\"S3Key\":\"fortios.raw\"}
}"
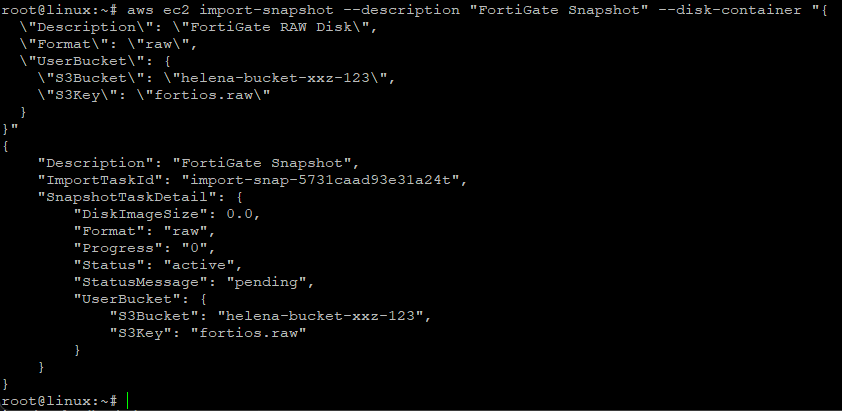
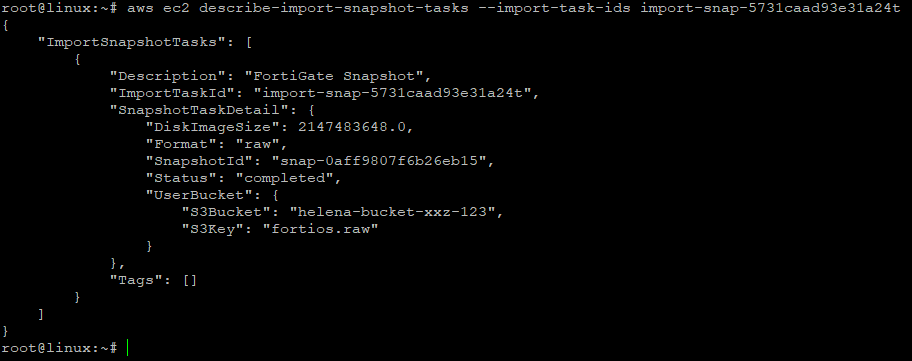
Take the import-snap-id and run this command to monitor the progress
1
aws ec2 describe-import-snapshot-tasks --import-task-ids -import-snap-xxxx
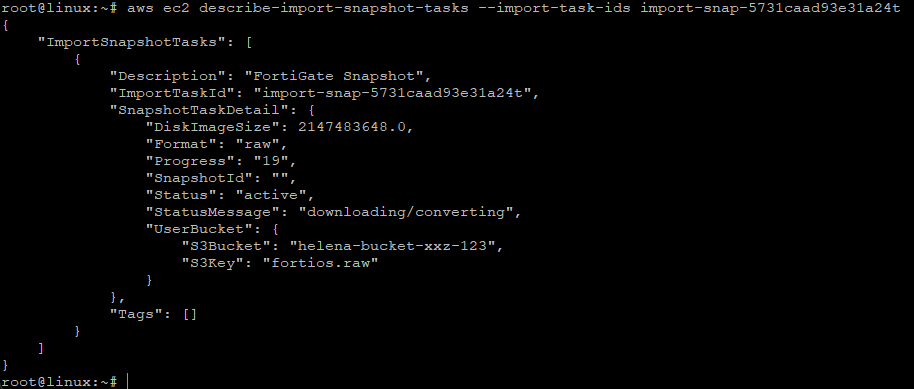
It usually takes a couple minutes for it to be complete
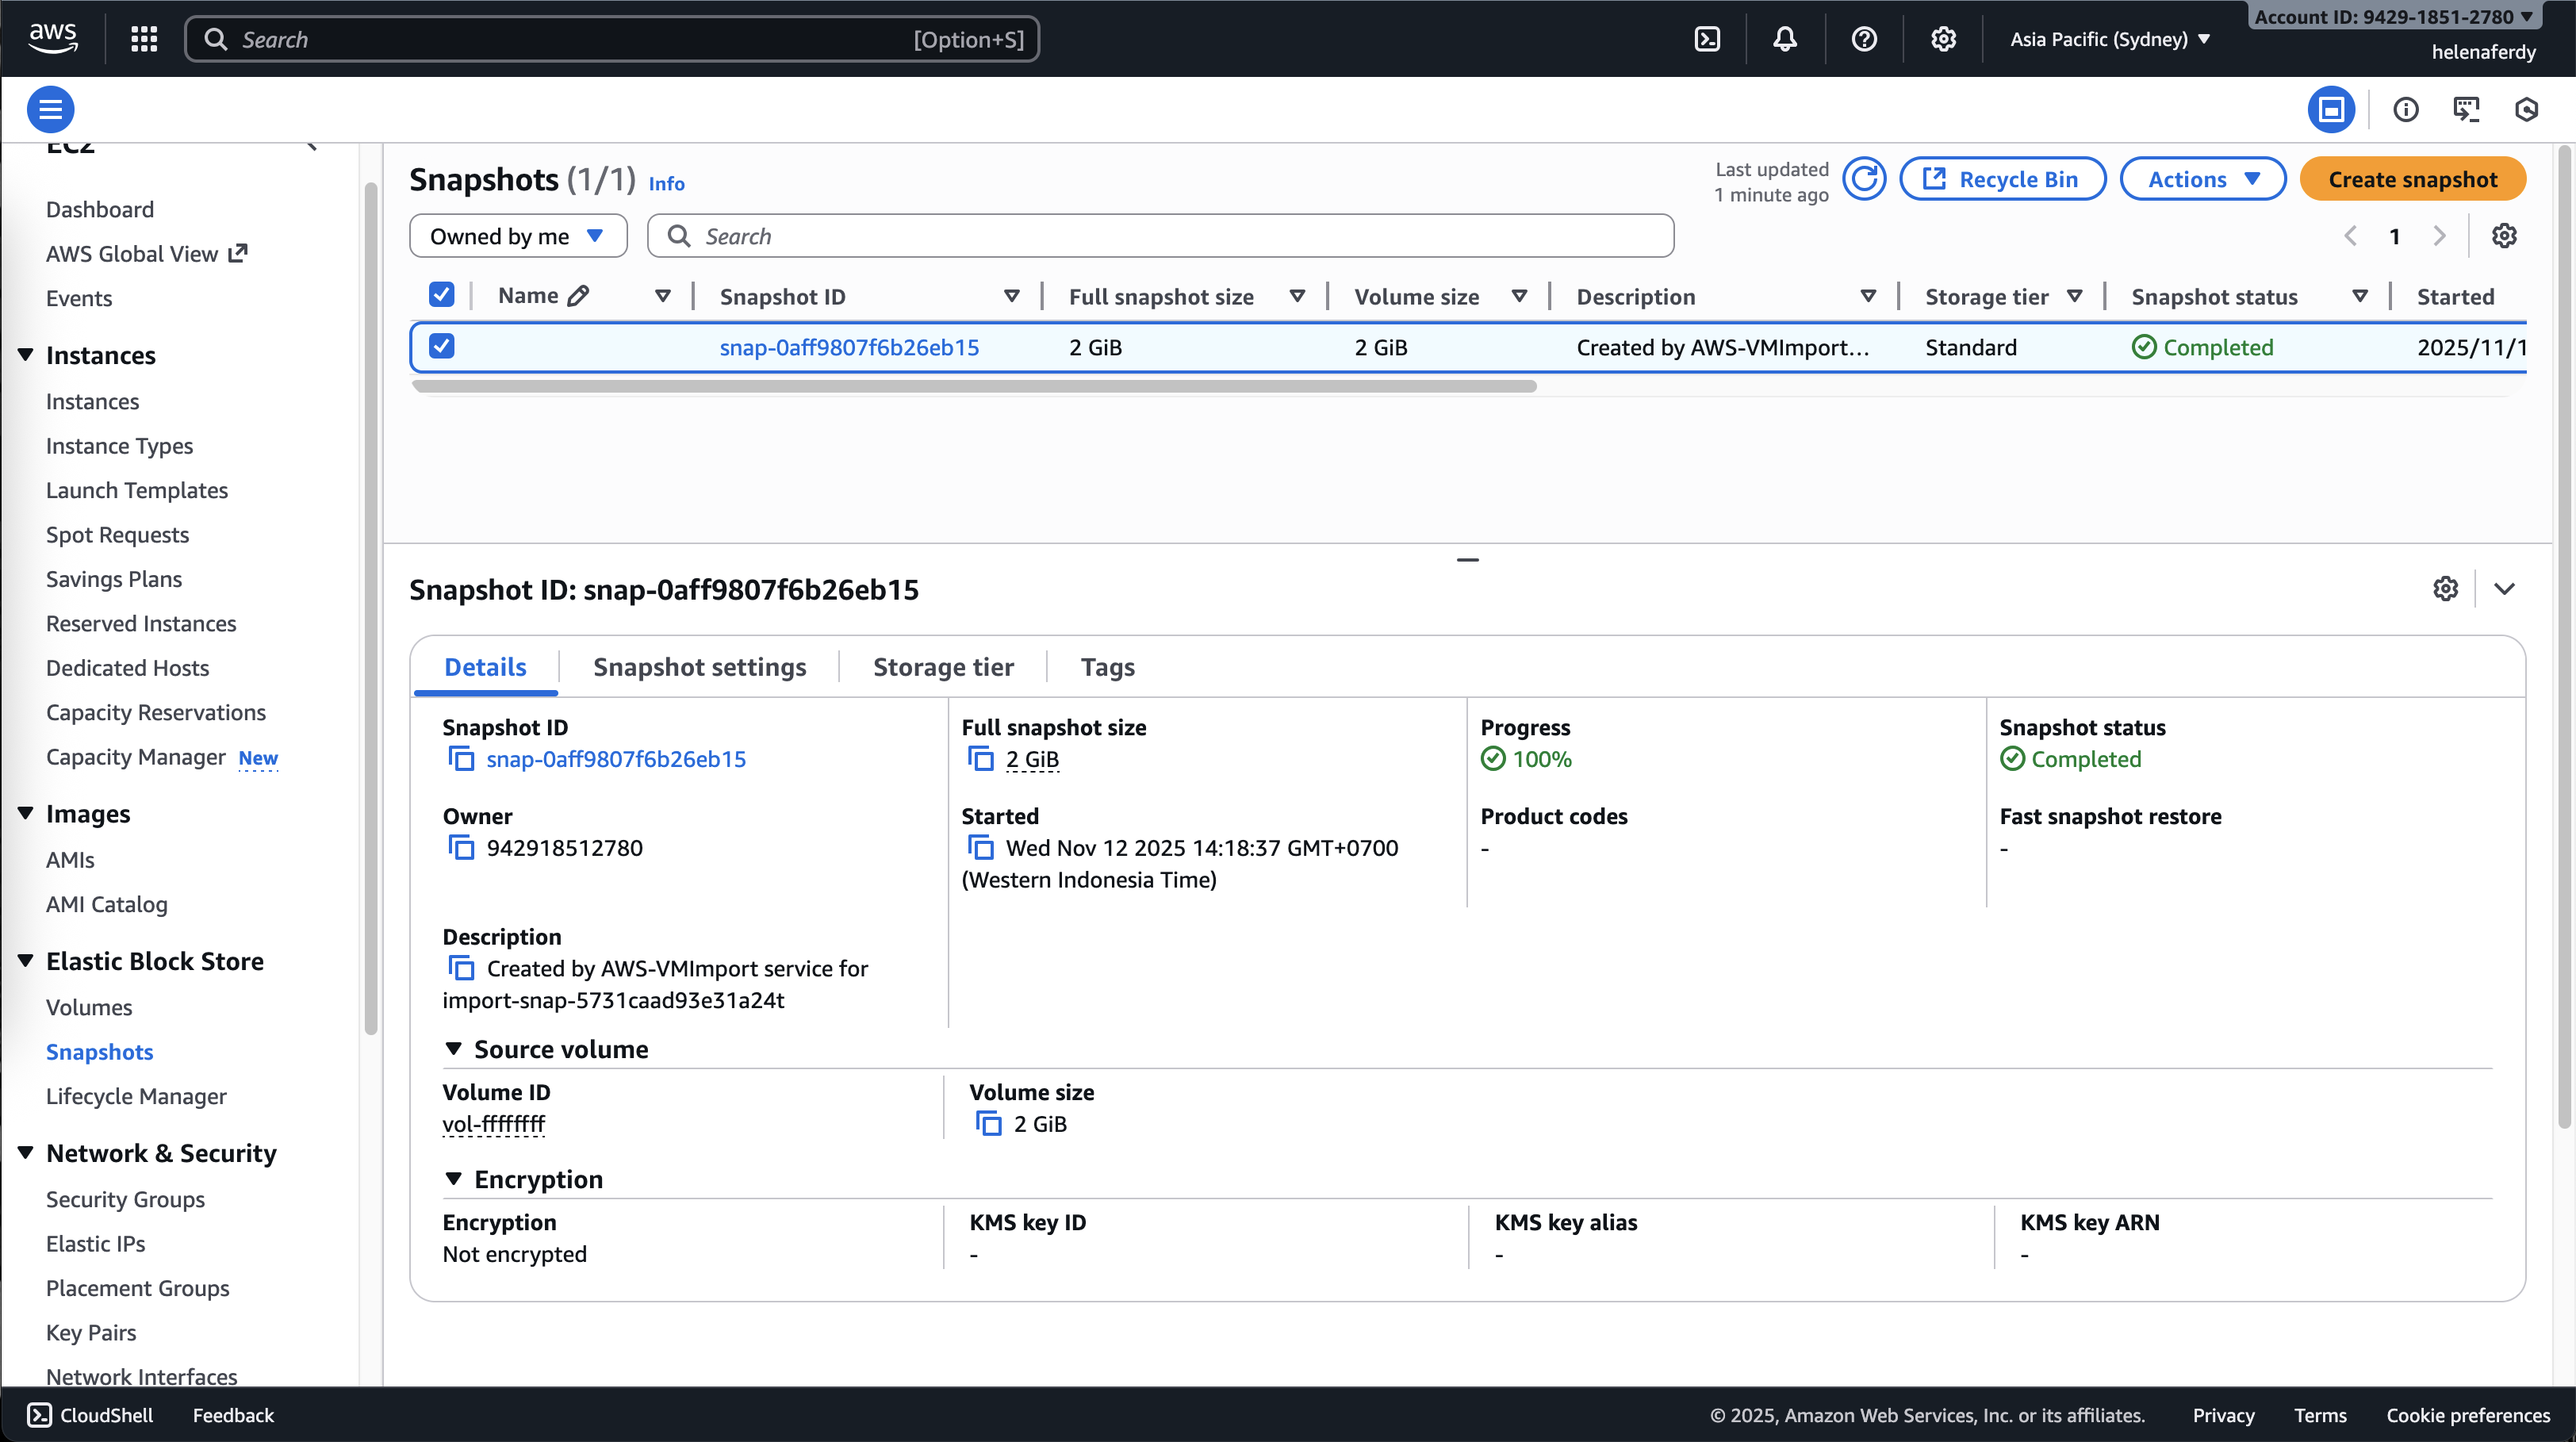
Now on EC2 » Snapshots, we should see the imported snapshot
Finally we can create an AMI (Amazon Machine Image) using the snapshot
1
2
3
4
5
6
aws ec2 register-image \
  --name "FortiGate-AMI" \
  --architecture x86_64 \
  --ena-support \
  --root-device-name /dev/sda1 \
  --block-device-mappings "[{\"DeviceName\":\"/dev/sda1\",\"Ebs\":{\"SnapshotId\":\"snap-xxx\"}}]"

And the AMI should be available now
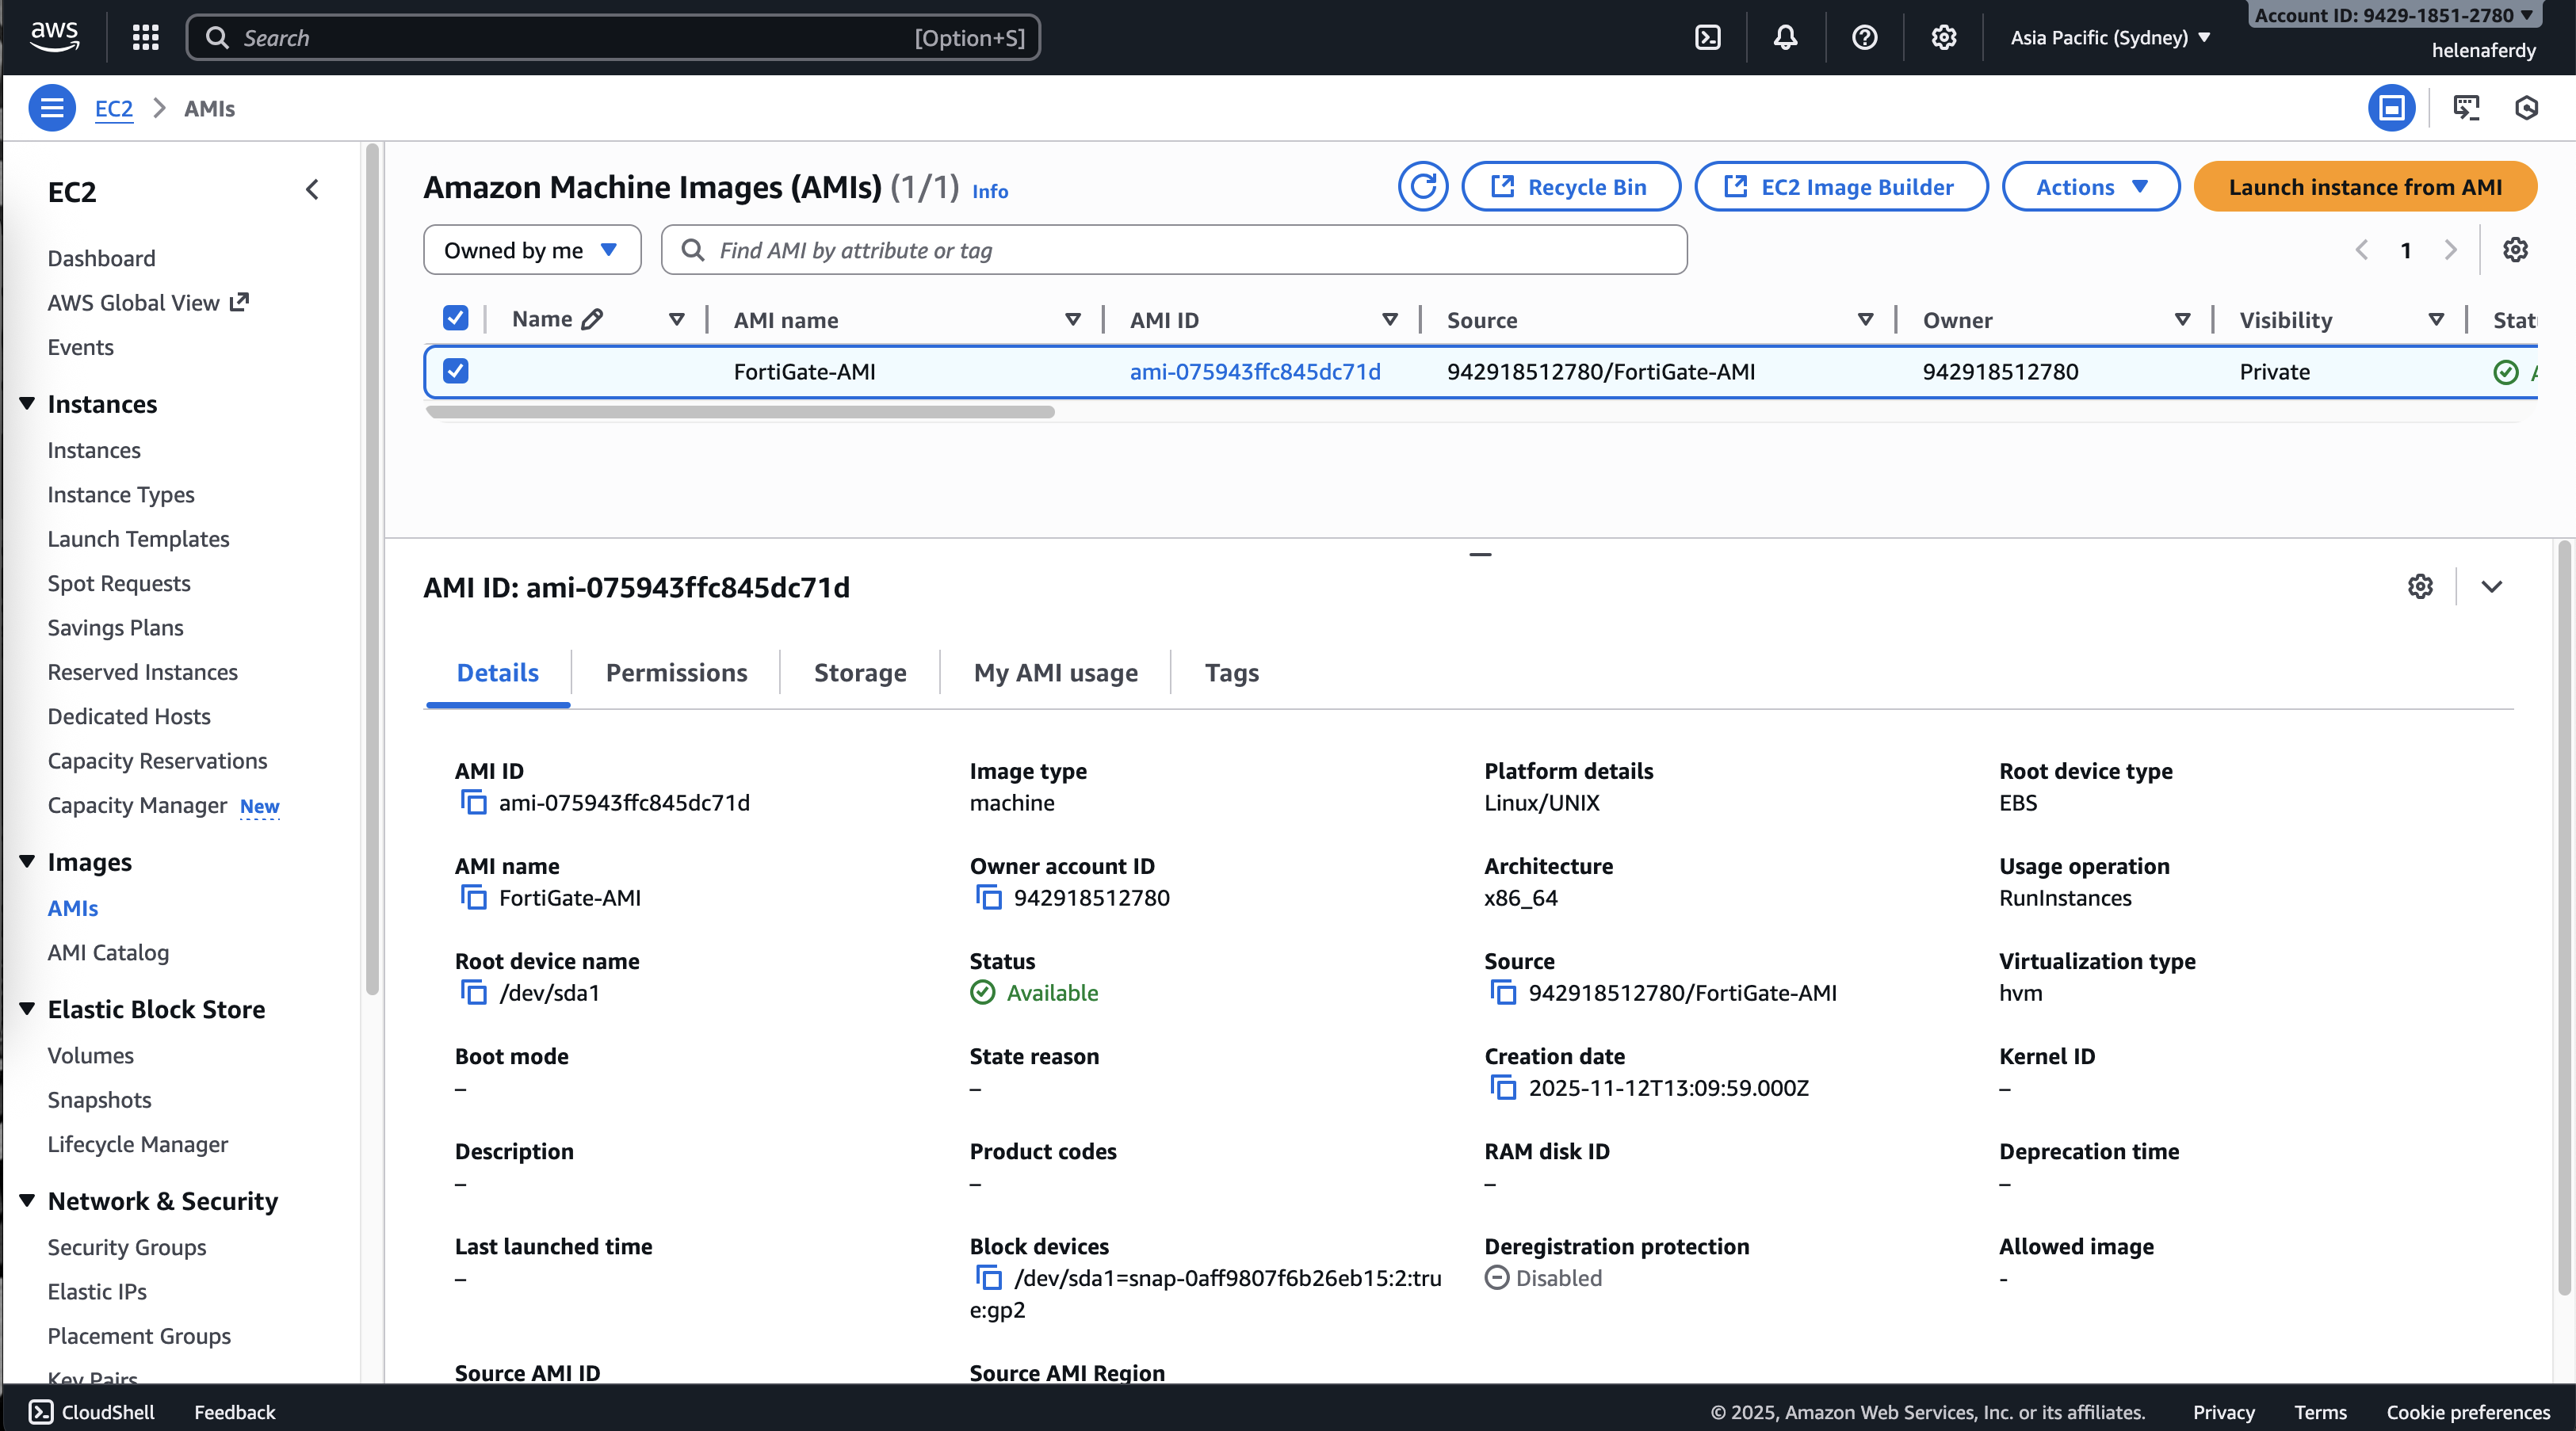
Configuring VPC
Now we’ll create 1 VPC with 2 Subnets as the inside and outside network for our fortigate, to do that go to VPC » Your VPCs » Create VPC on 10.0.0.0/16 CIDR
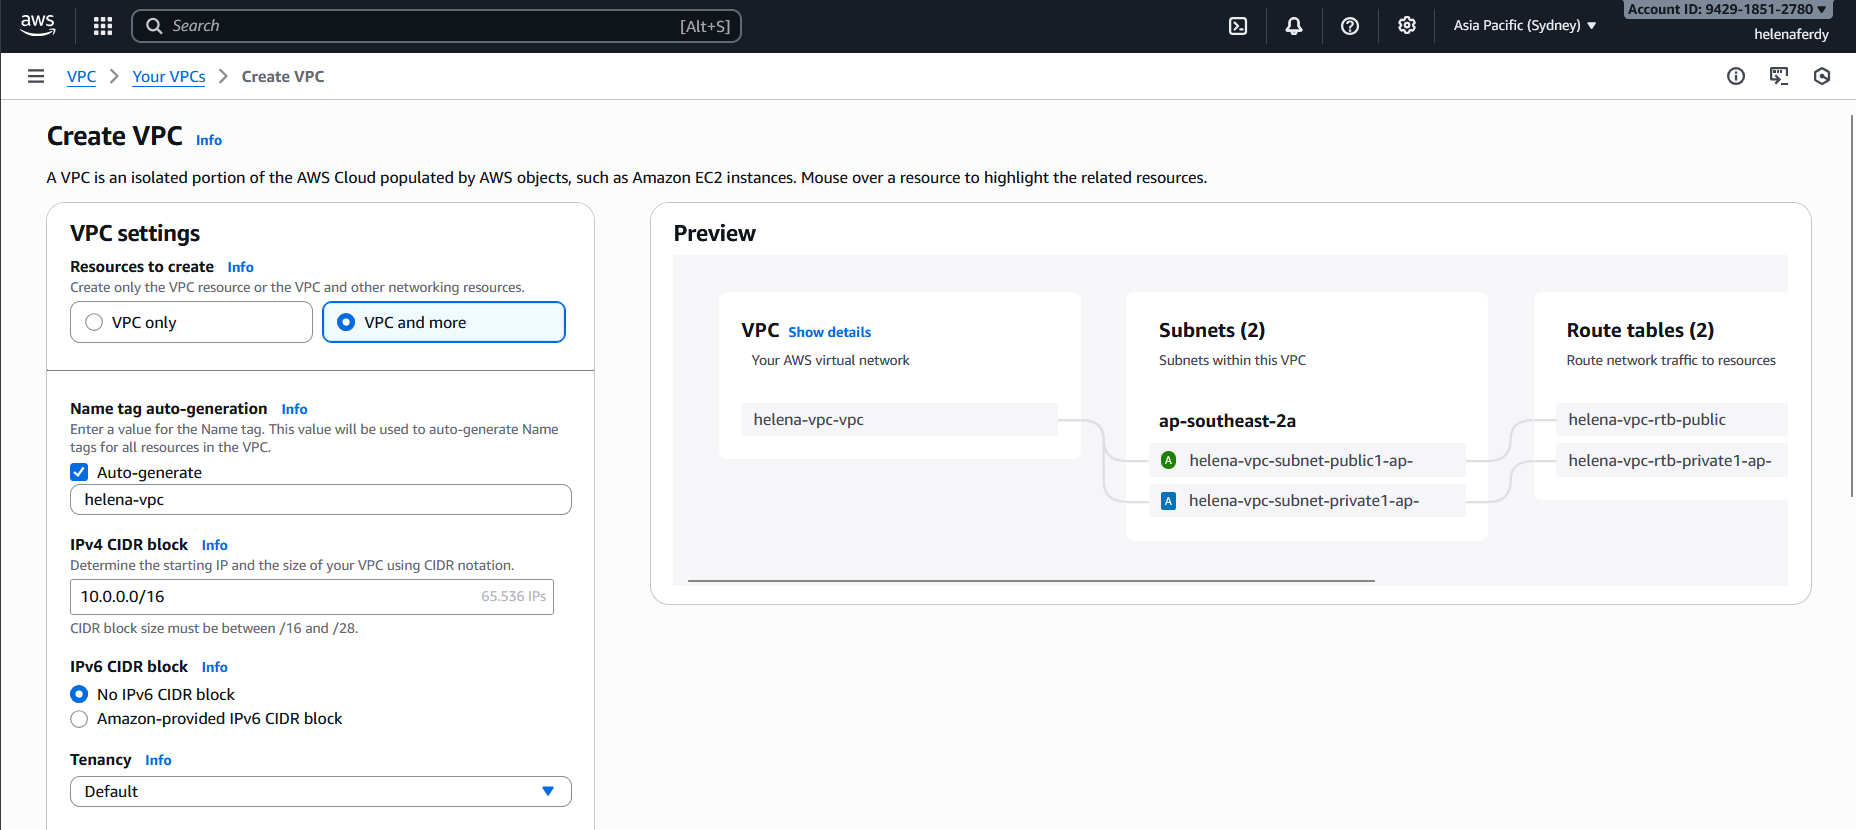
Here we create 1 public subnet and 1 private subnet and assign the network subnets respectively
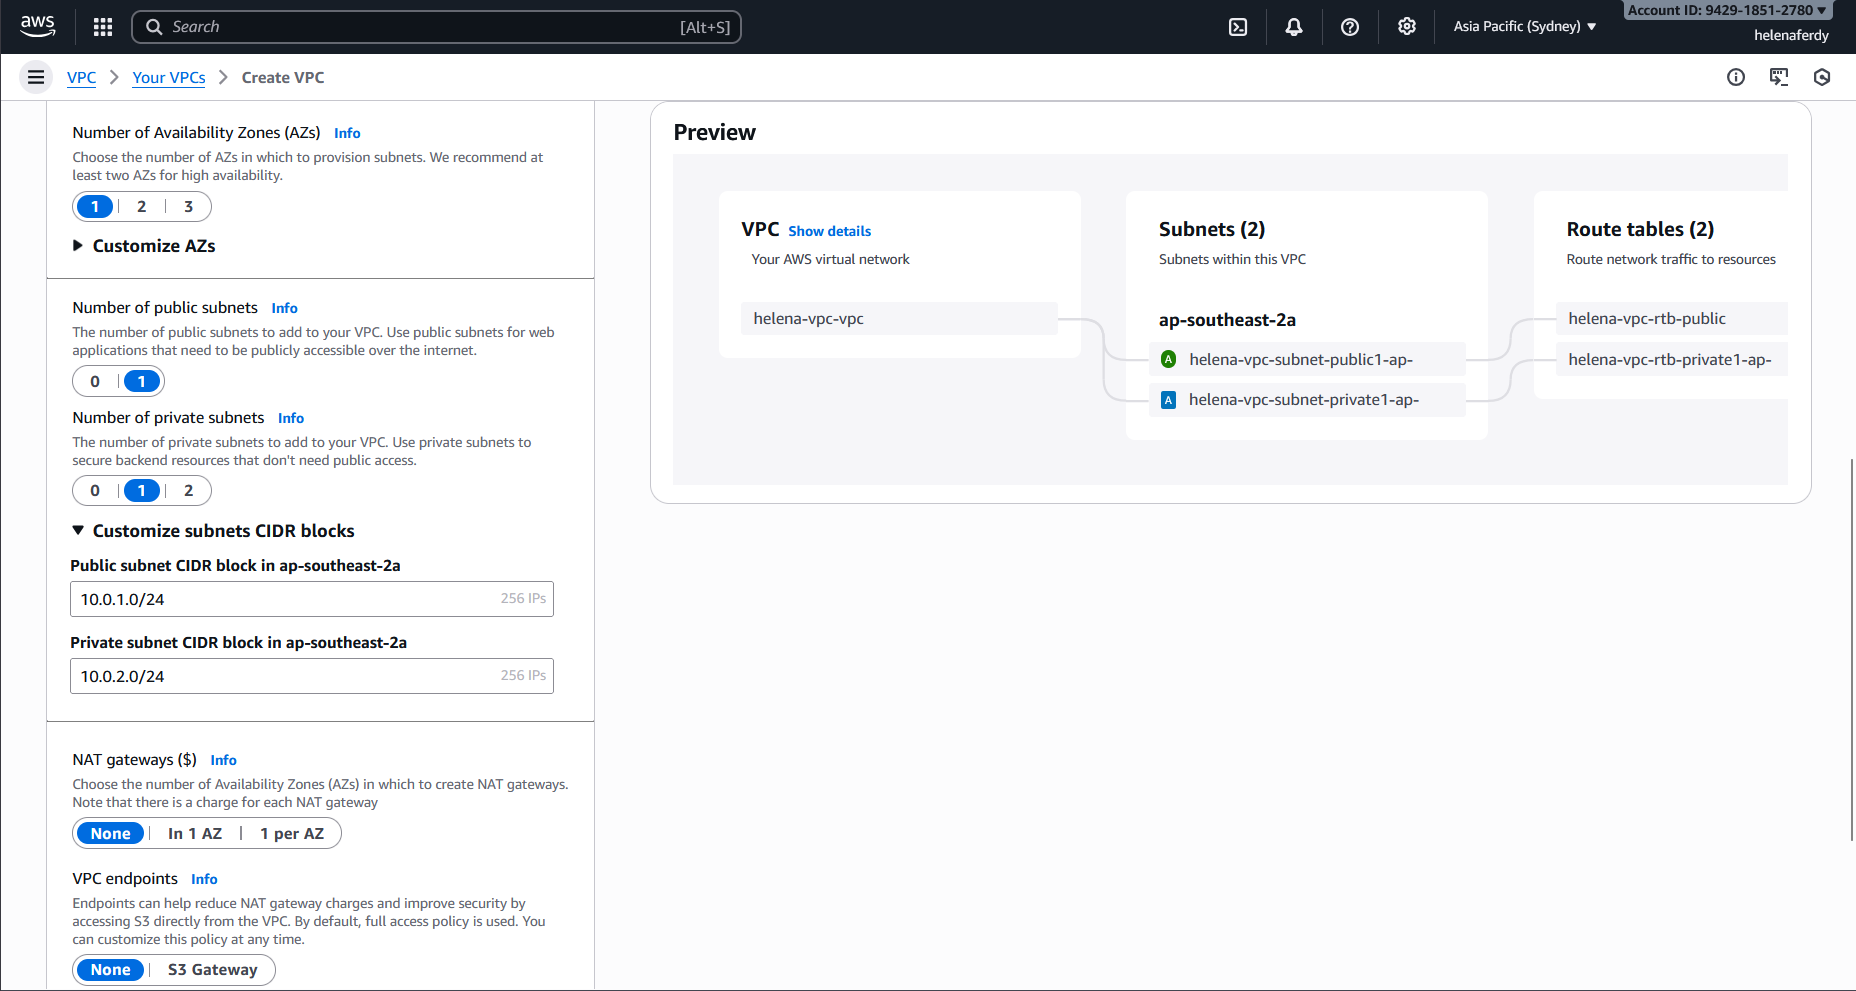
And here we have our helena-vpc configured
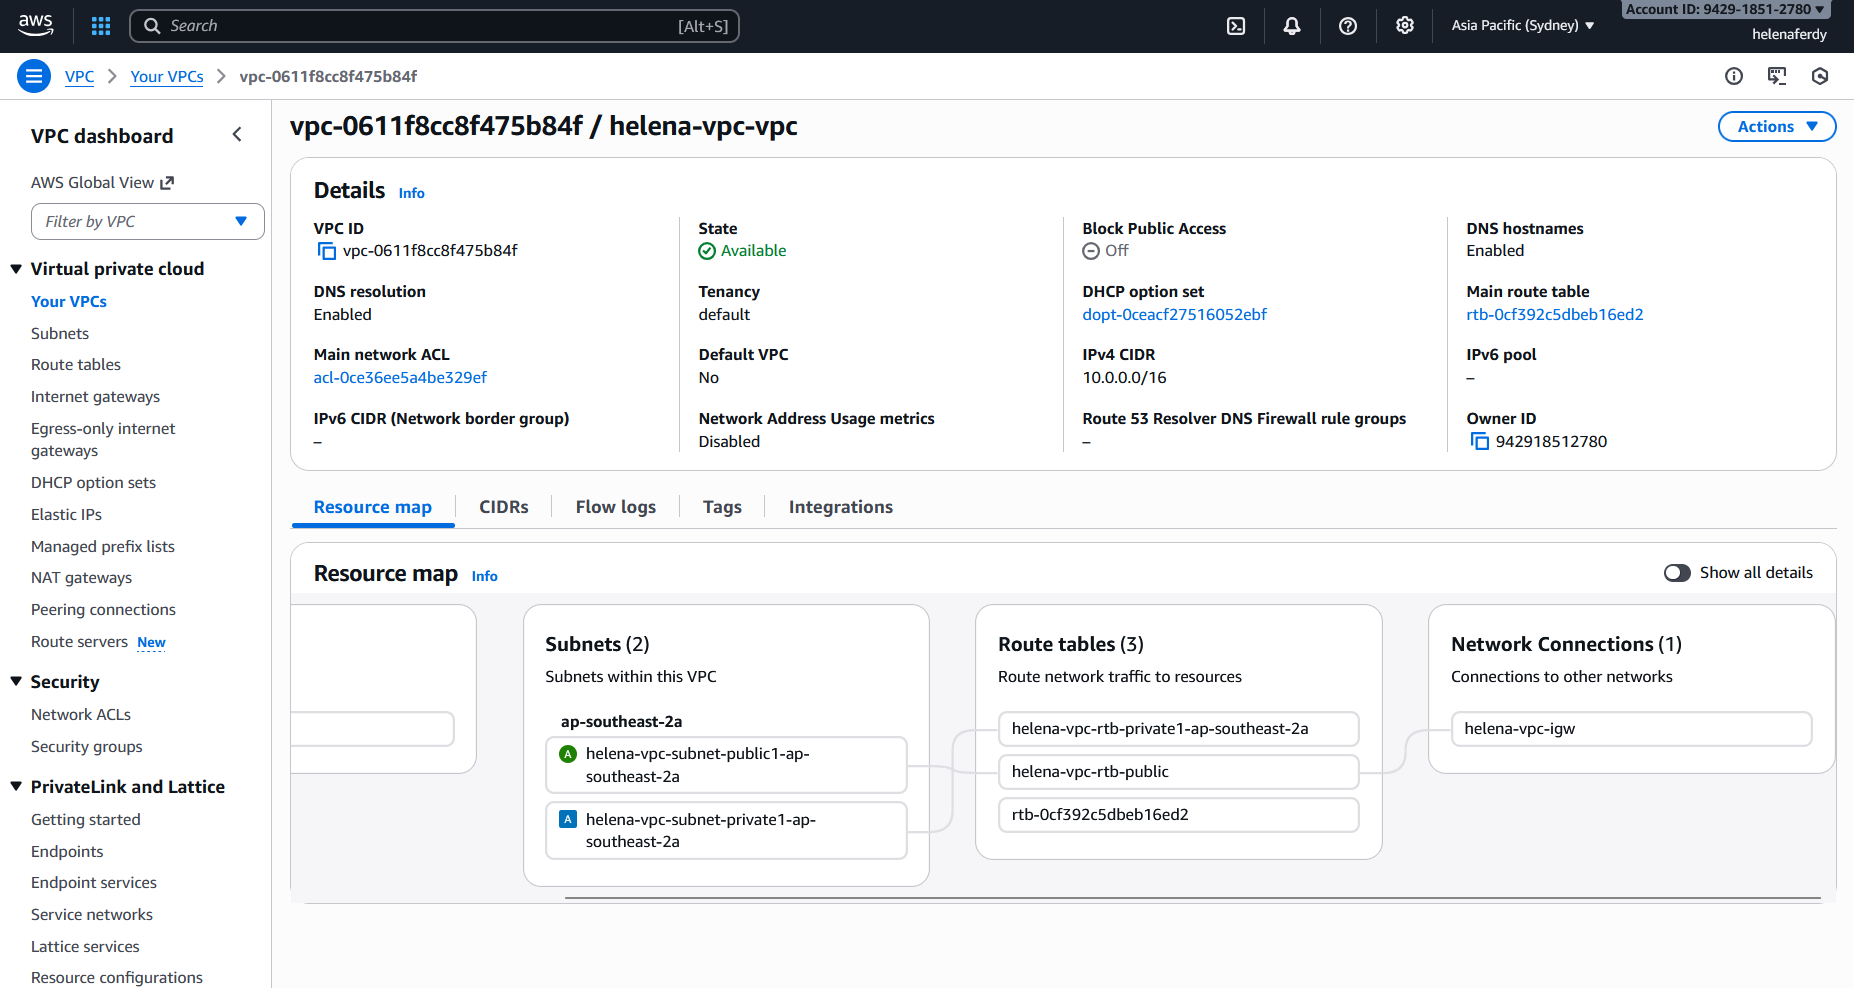
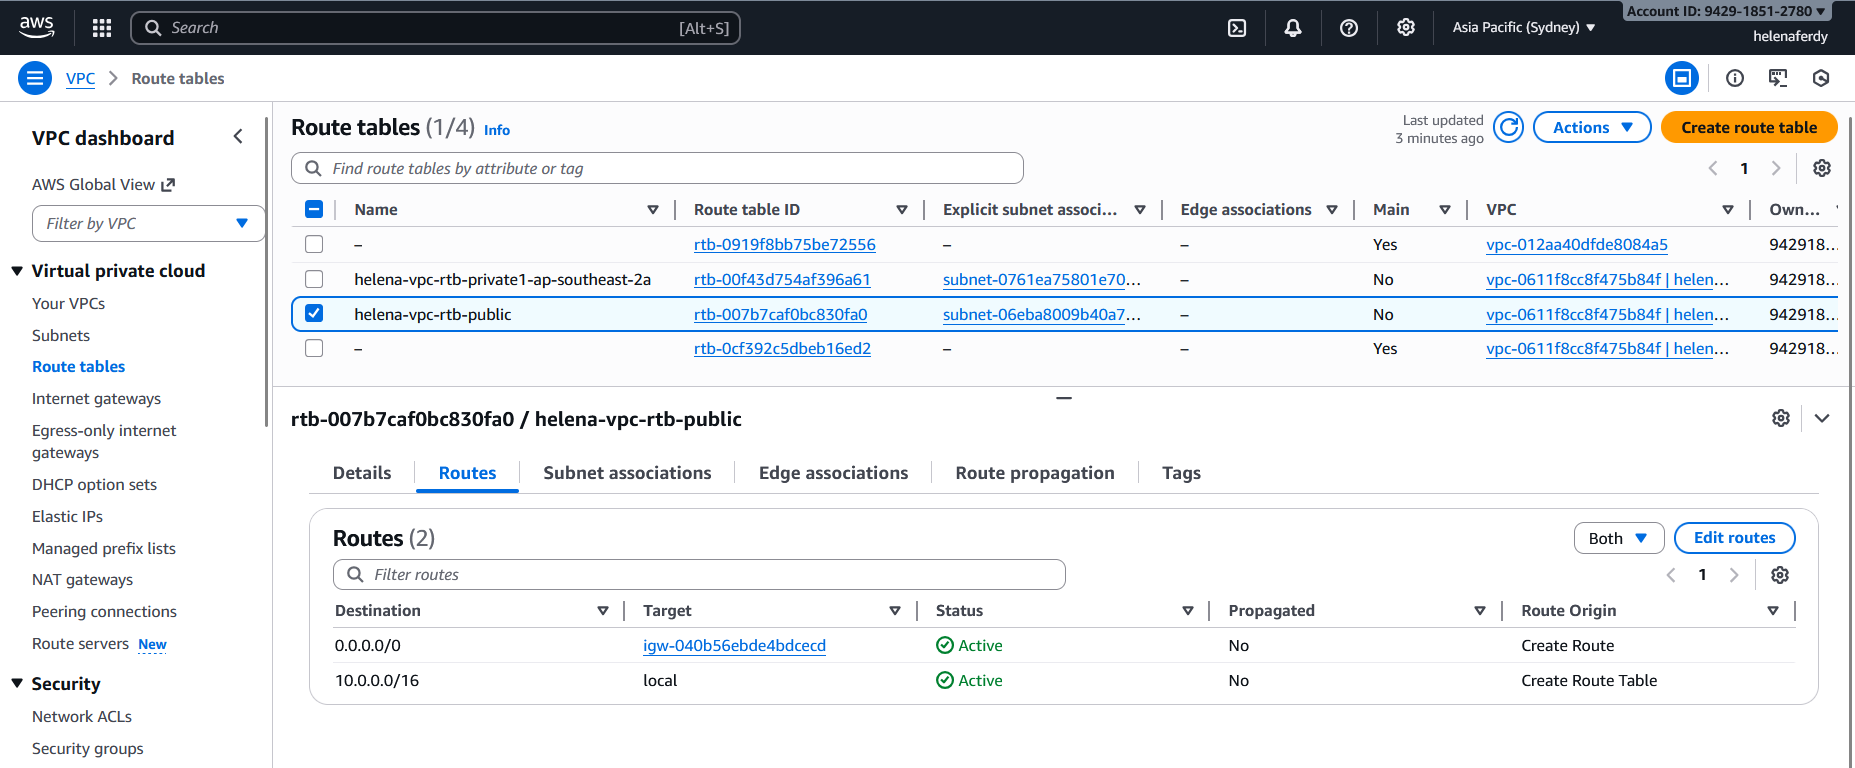
On Route Tables, we need to make sure that the private subnet doesn’t have default gateway and the public one has that points to AWS’ Internet Gateway
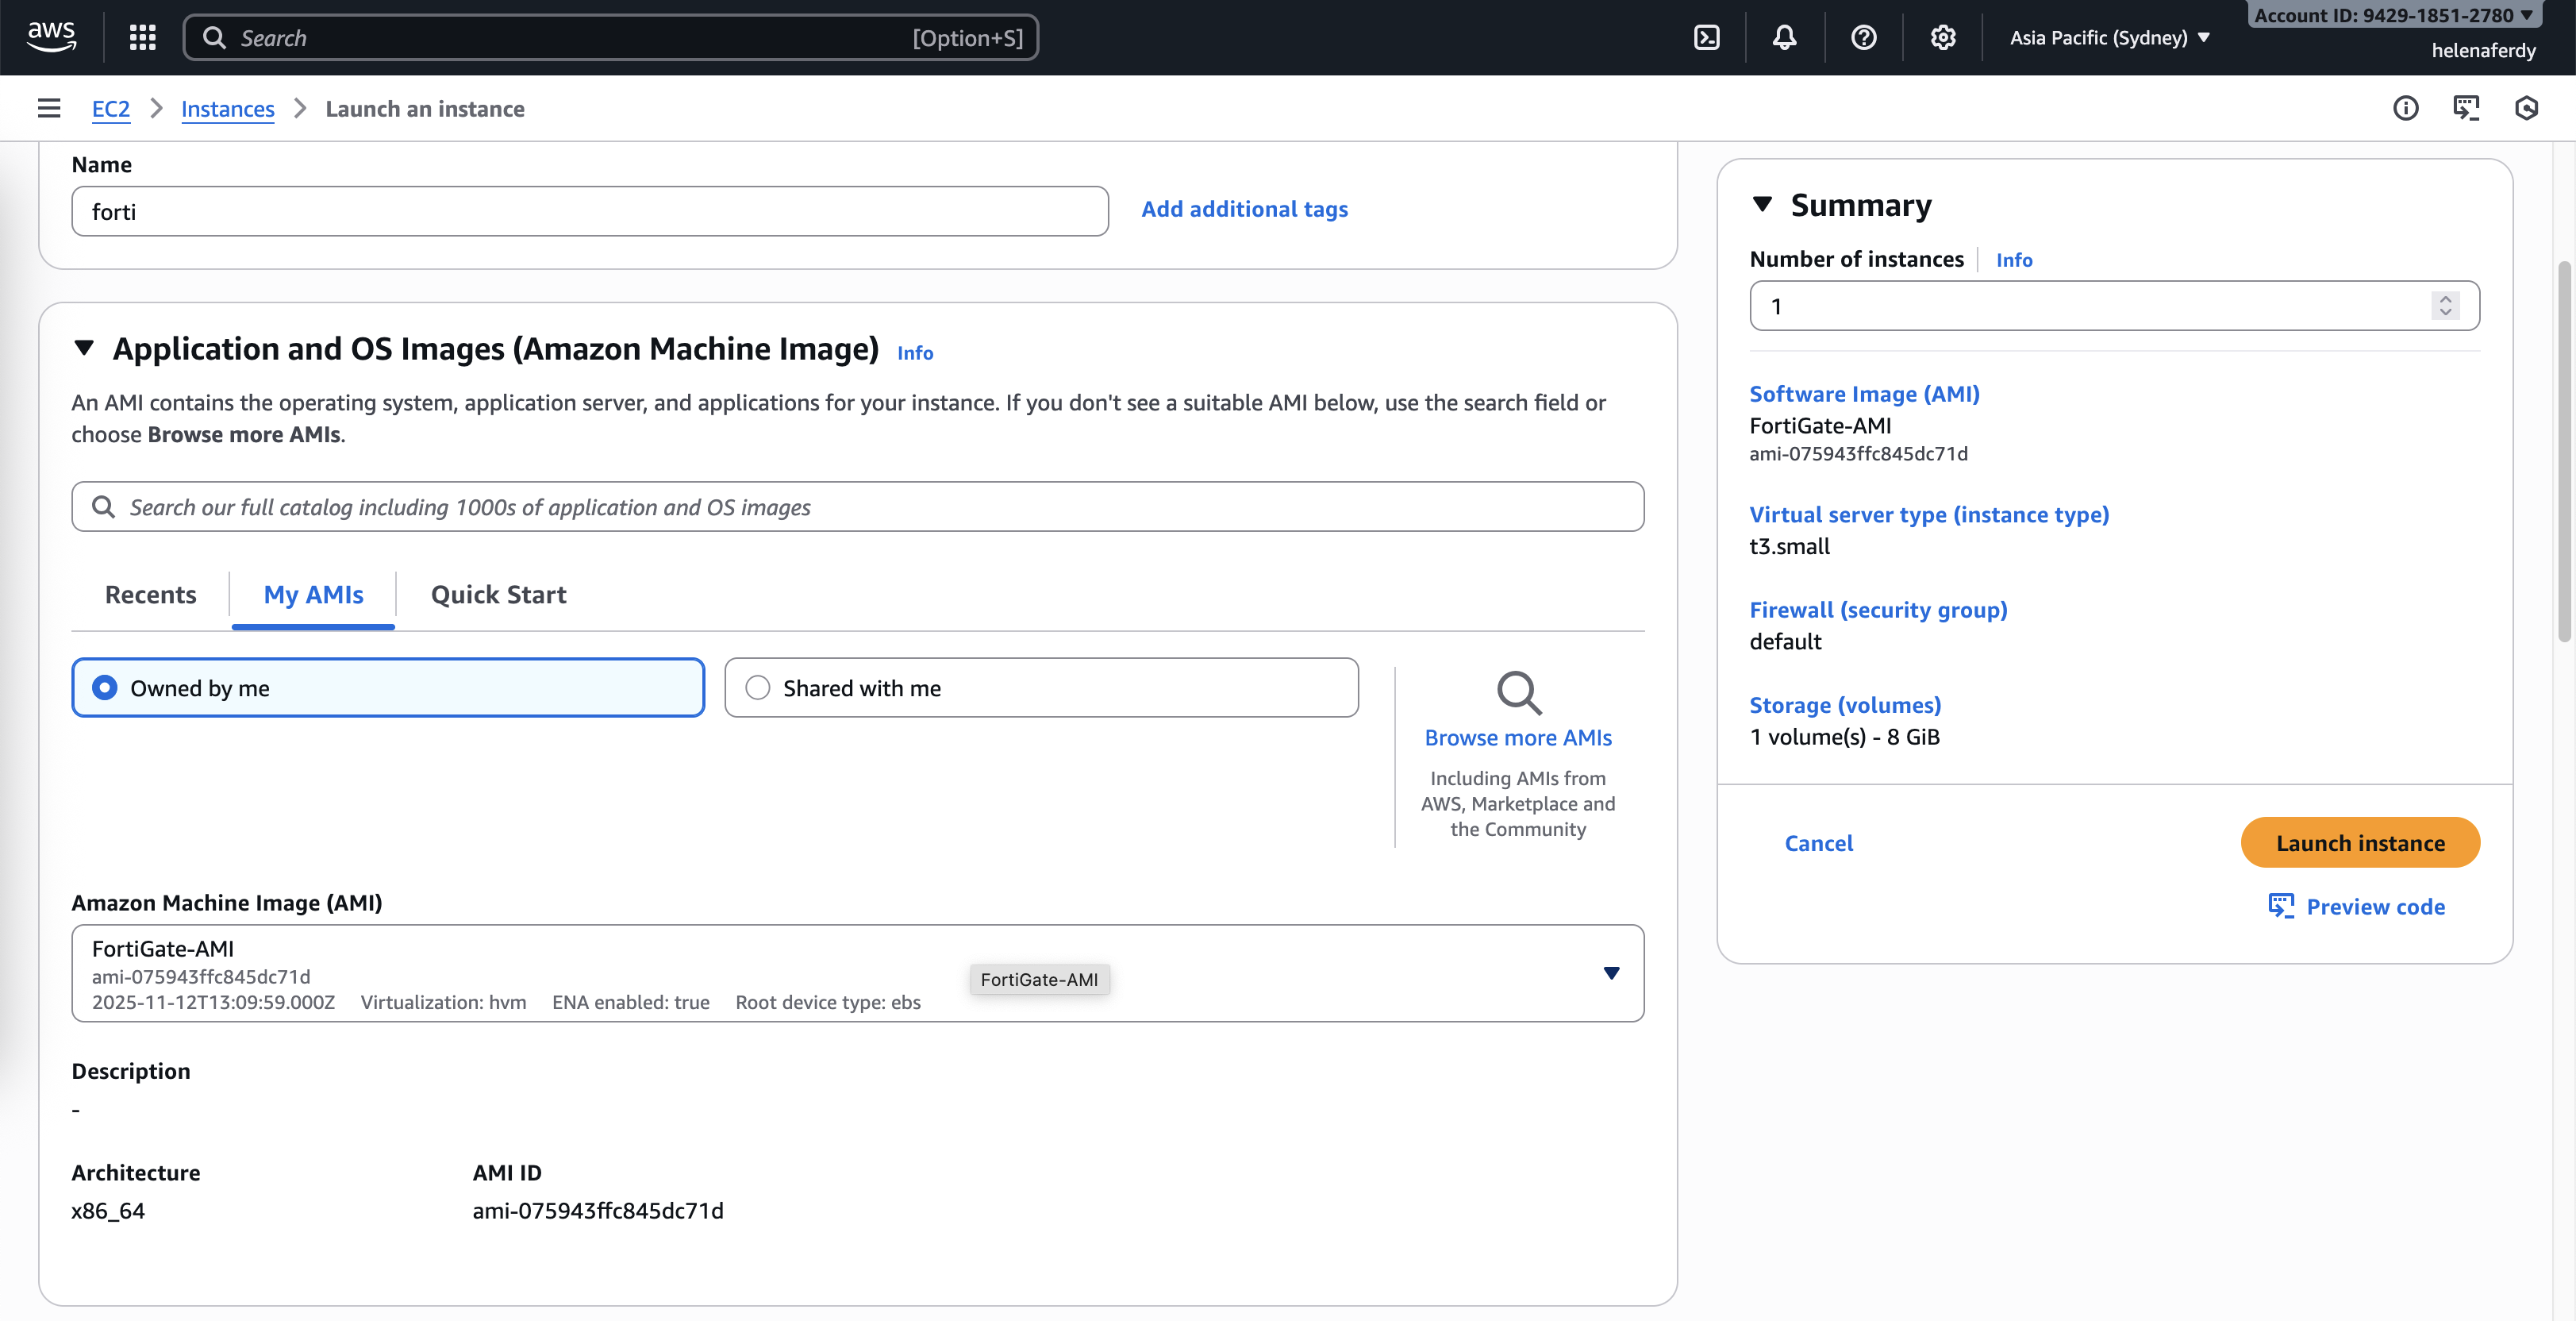
Deploying Fortigate VM
Now we can deploy our Fortigate VM using the AMI that we created earlier
We choose the t3.small because we need at least 2GB of RAM even though we will only use 1 CPU on the advanced setting

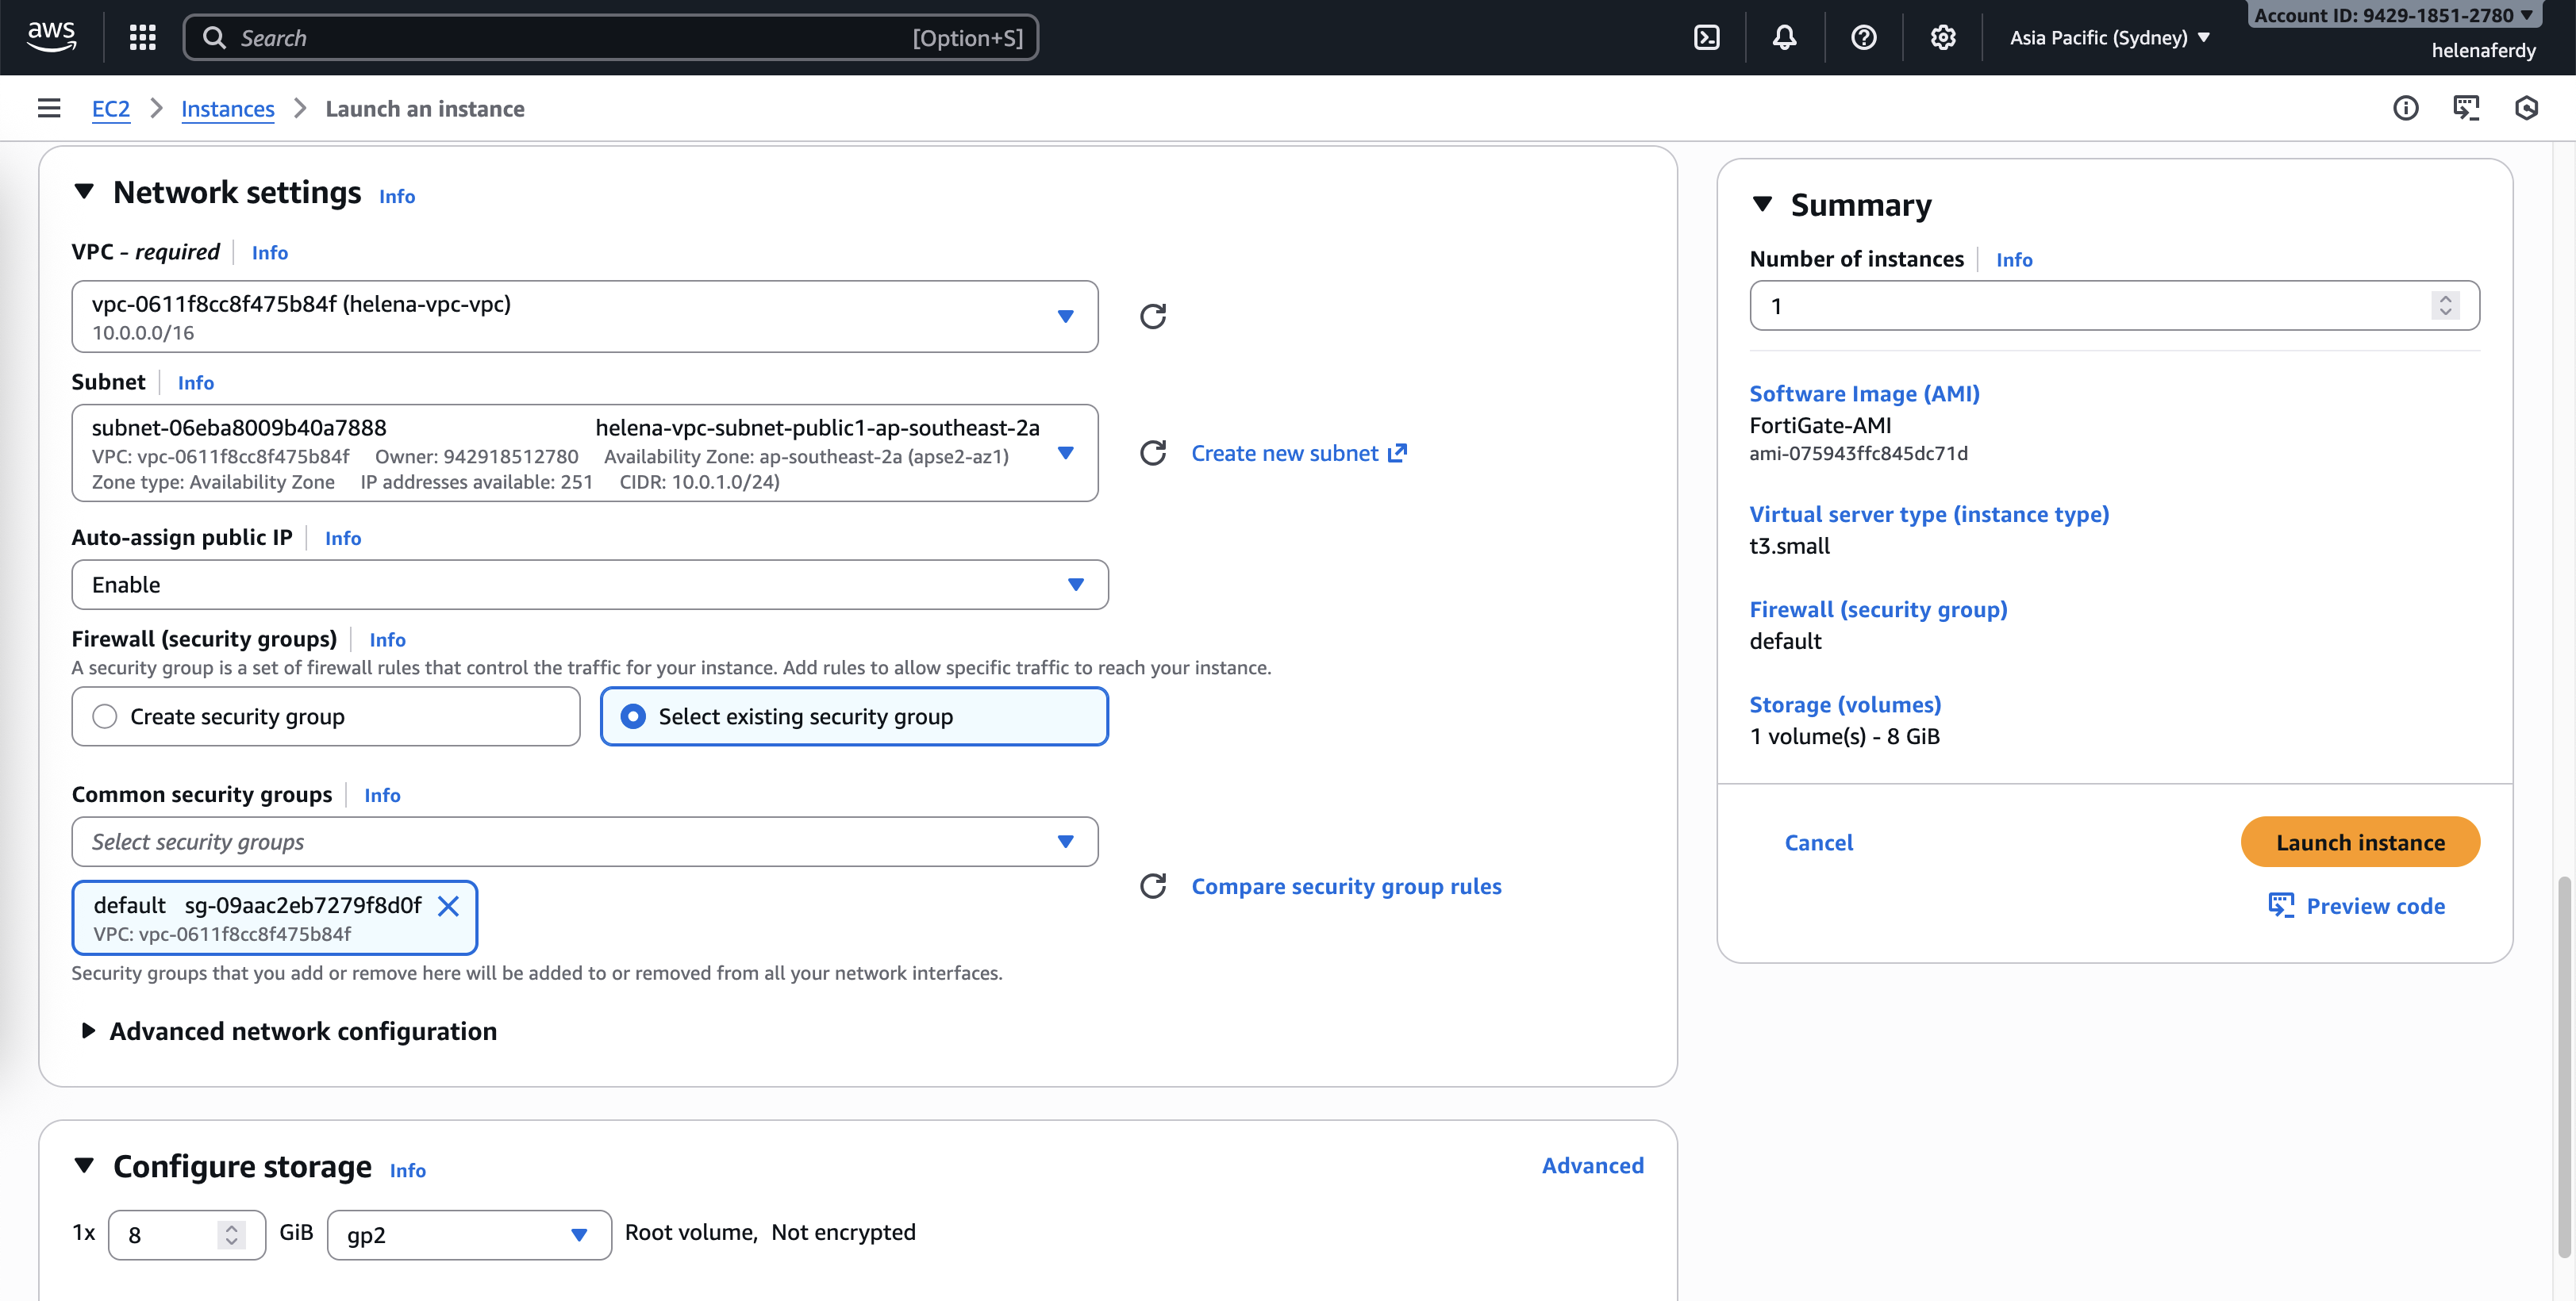
And for the network settings, we will configure the Public Subnet first with Public IP automatically assigned, here we select default Security Group that allows all traffic going to any directions, then hit start instance
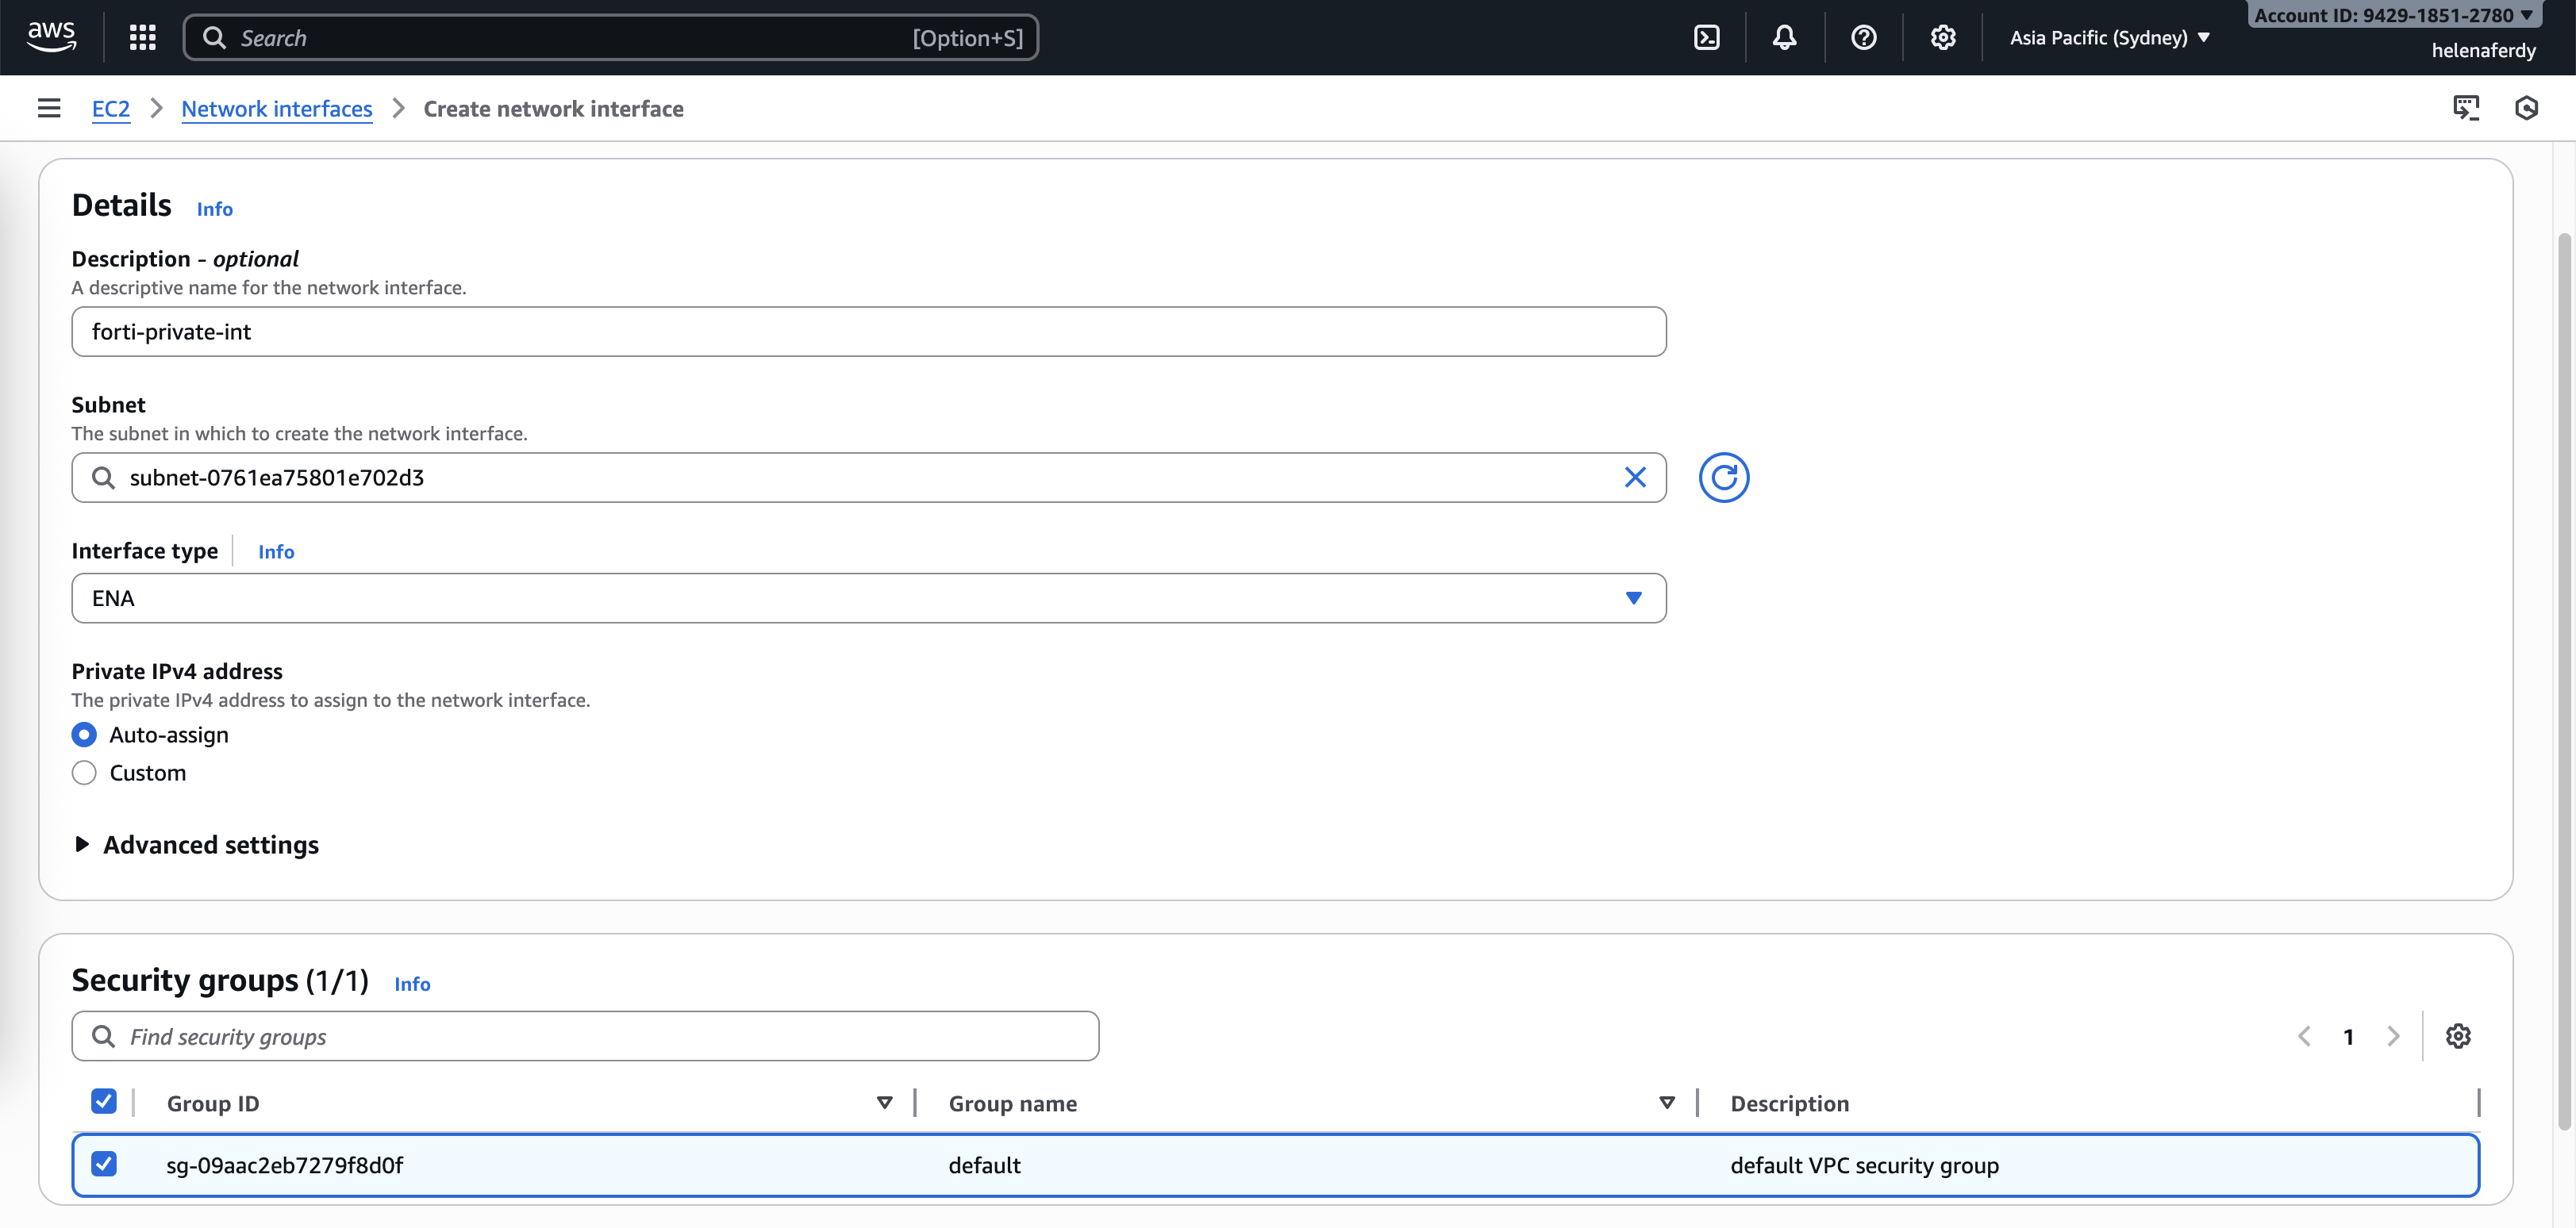
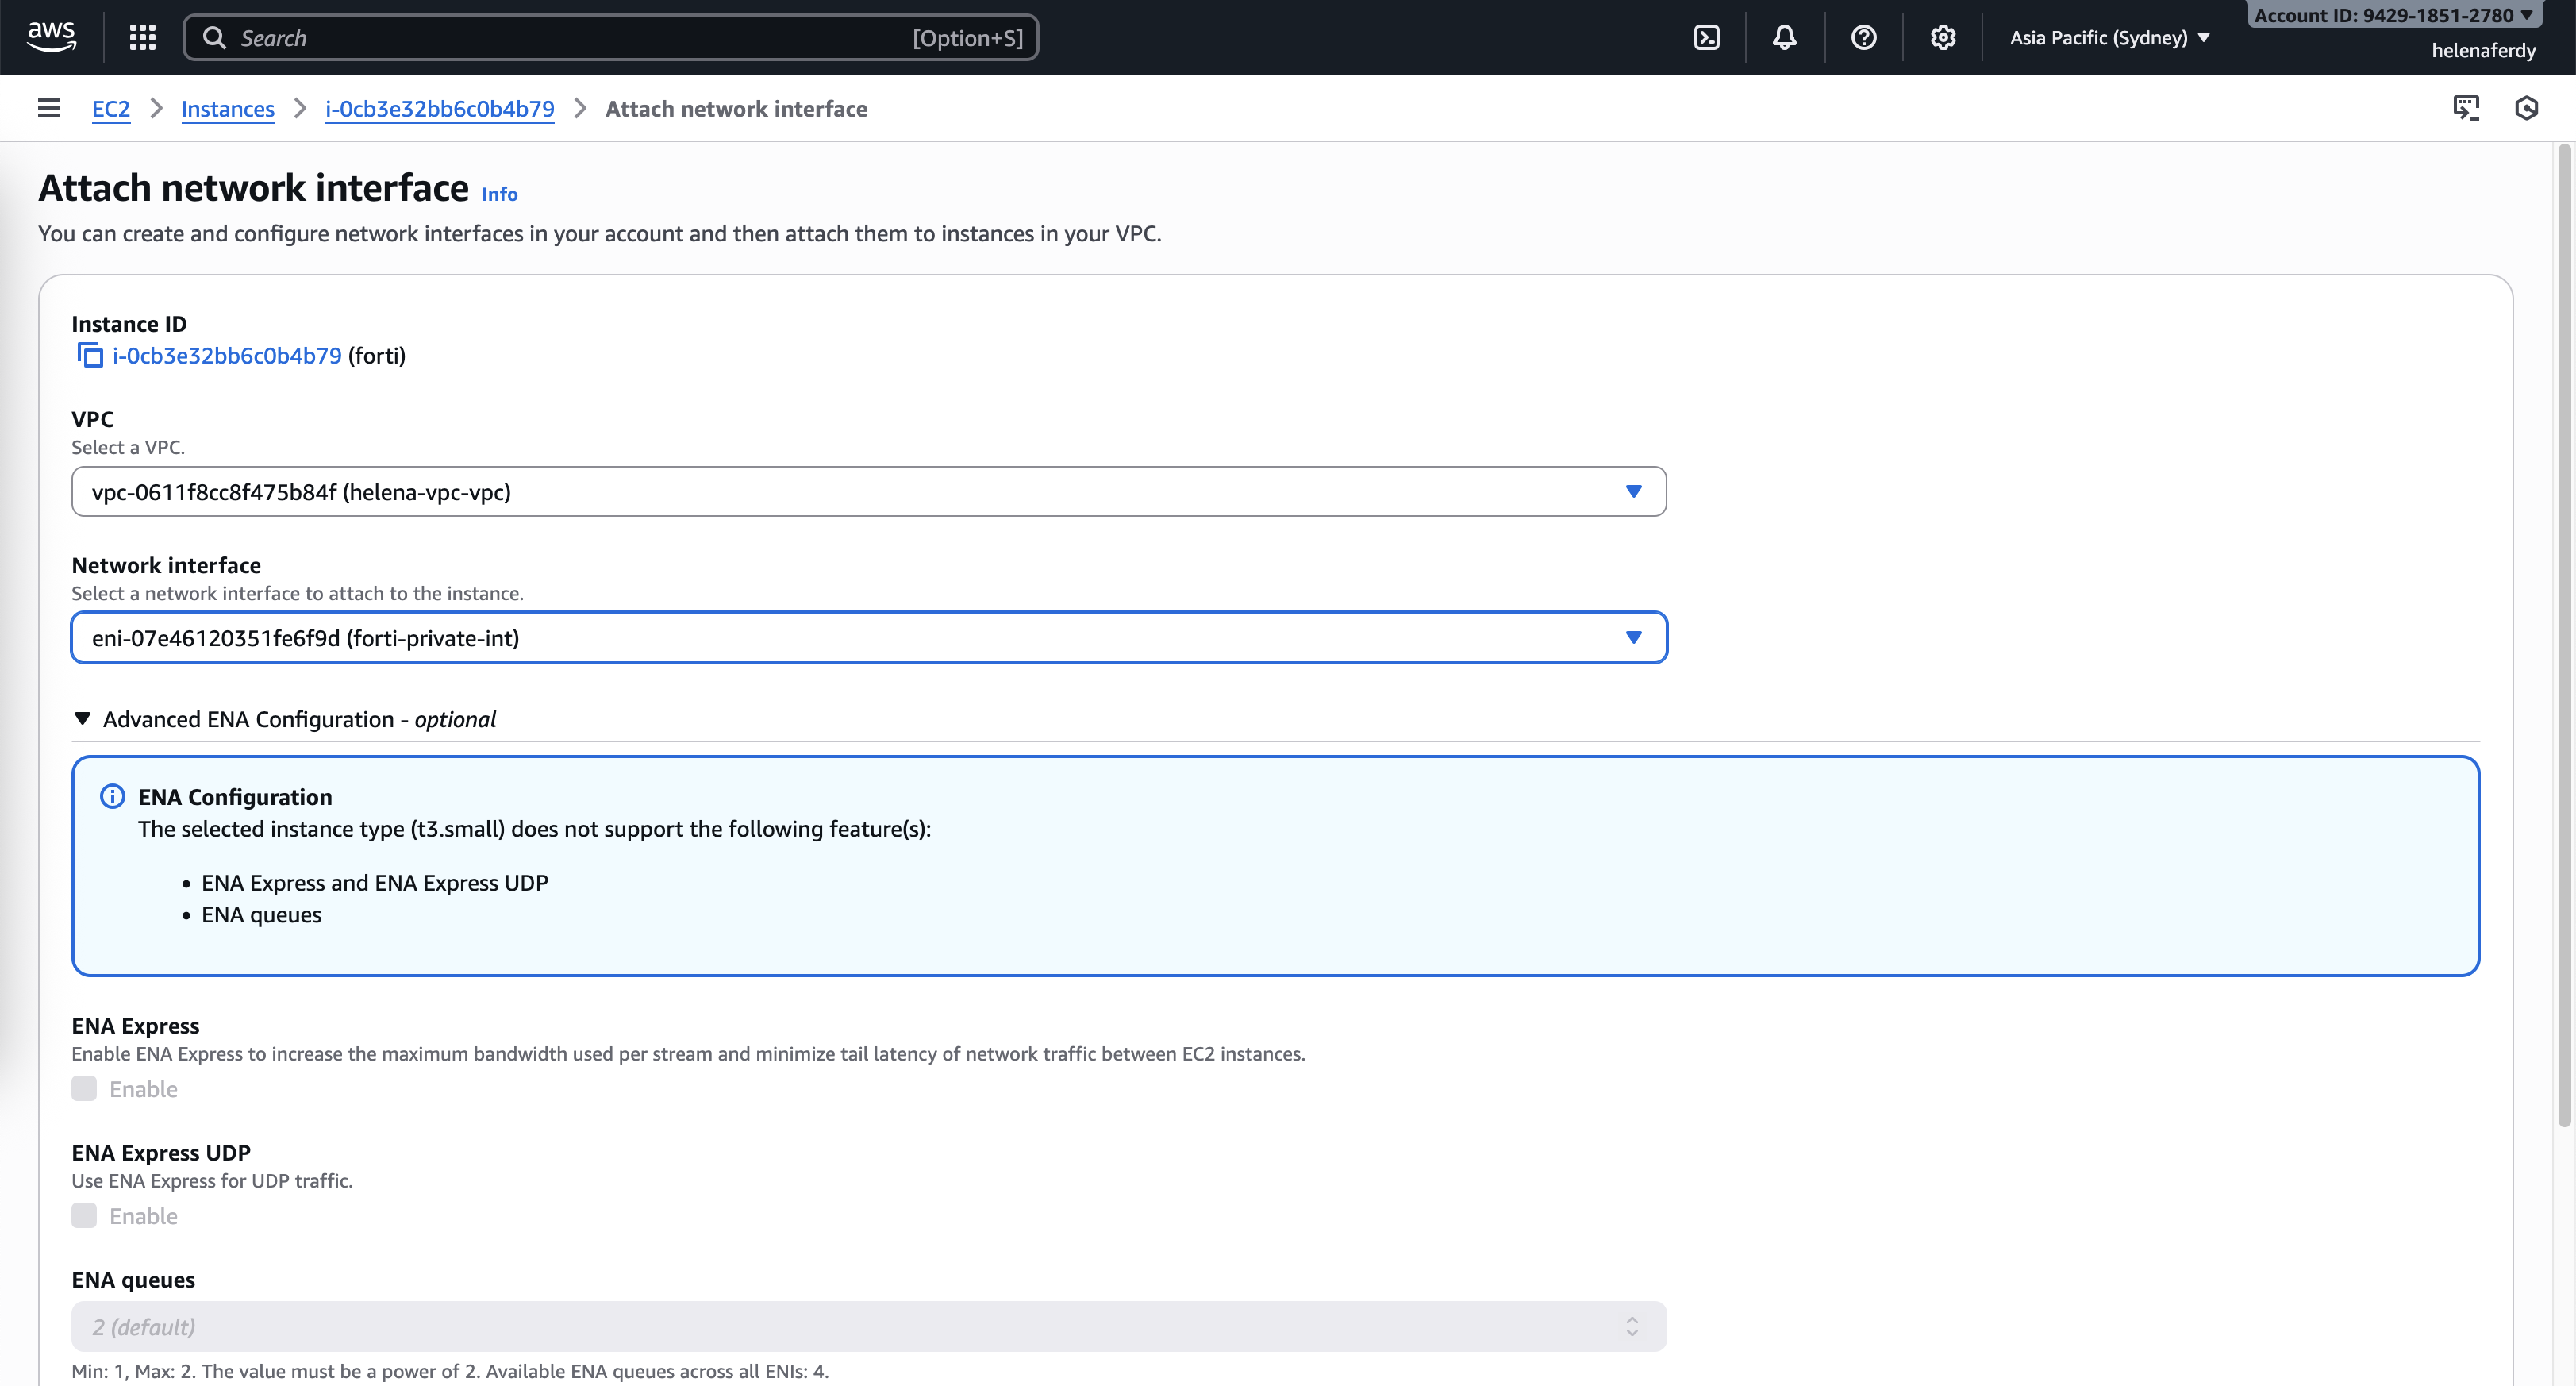
Now the instance is running, we will create a new interface for the private network, on EC2 » Network Interfaces » Create Network Interface, create interface on the Private Subnet with default SG
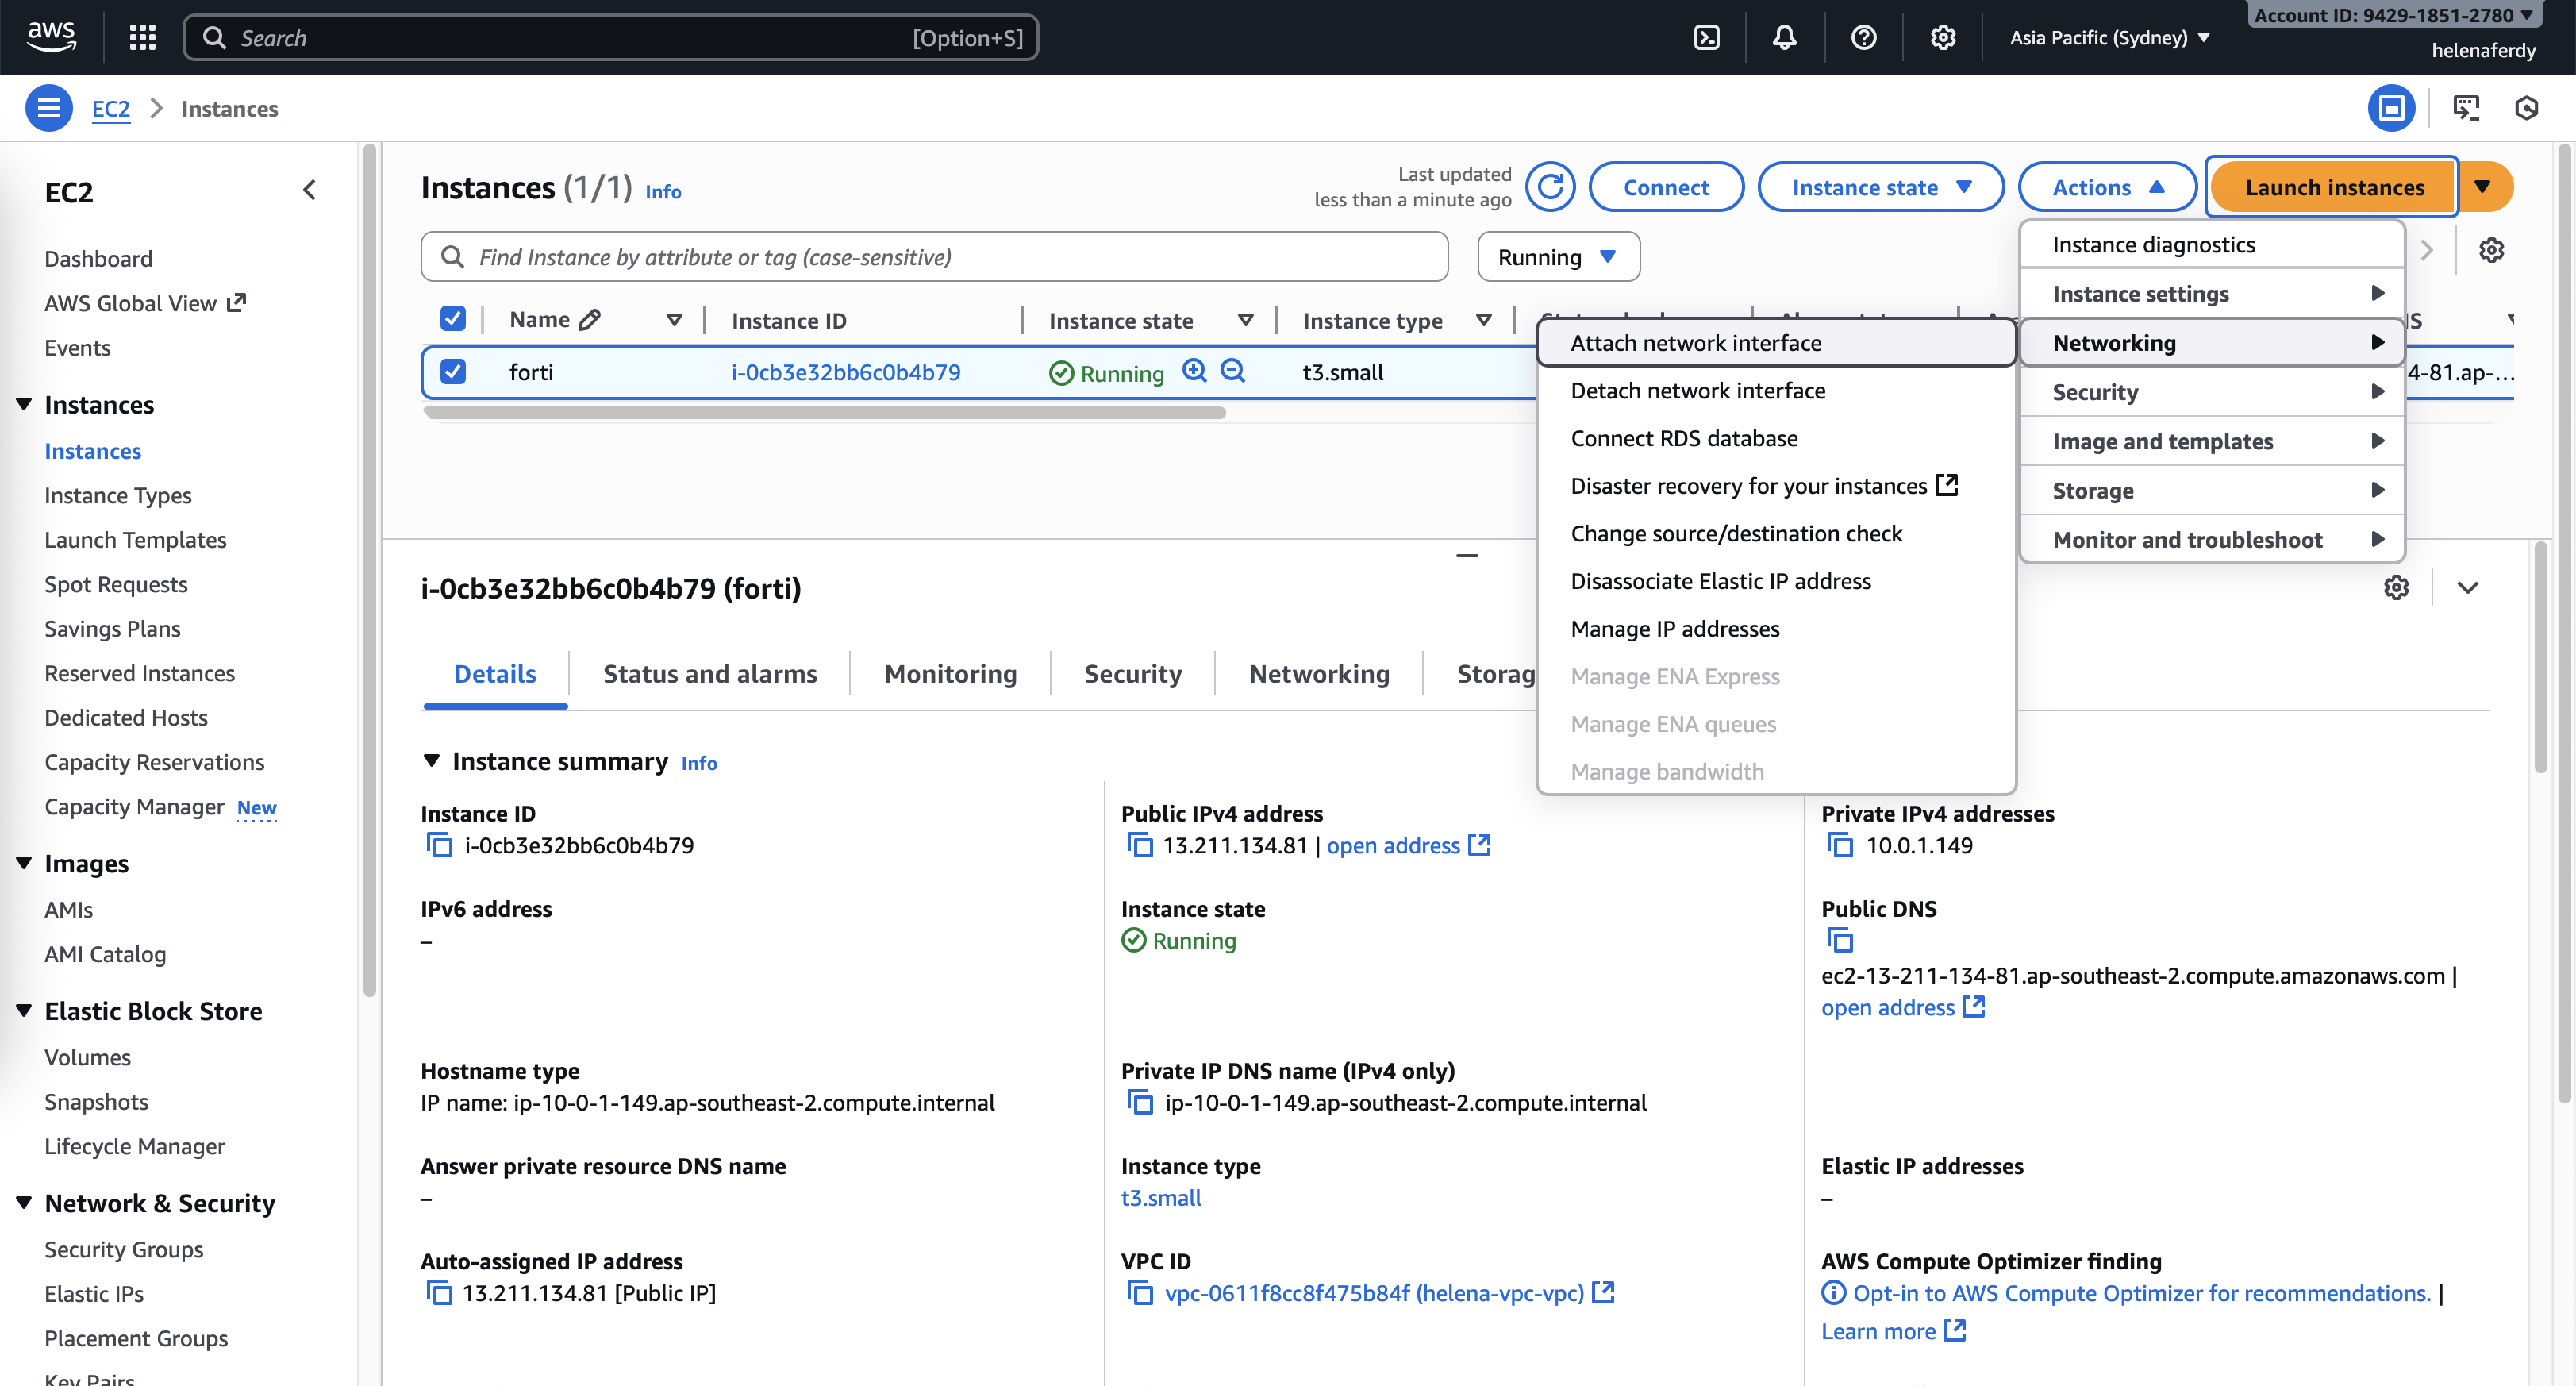
Then attach the network interface into the fortigate instance
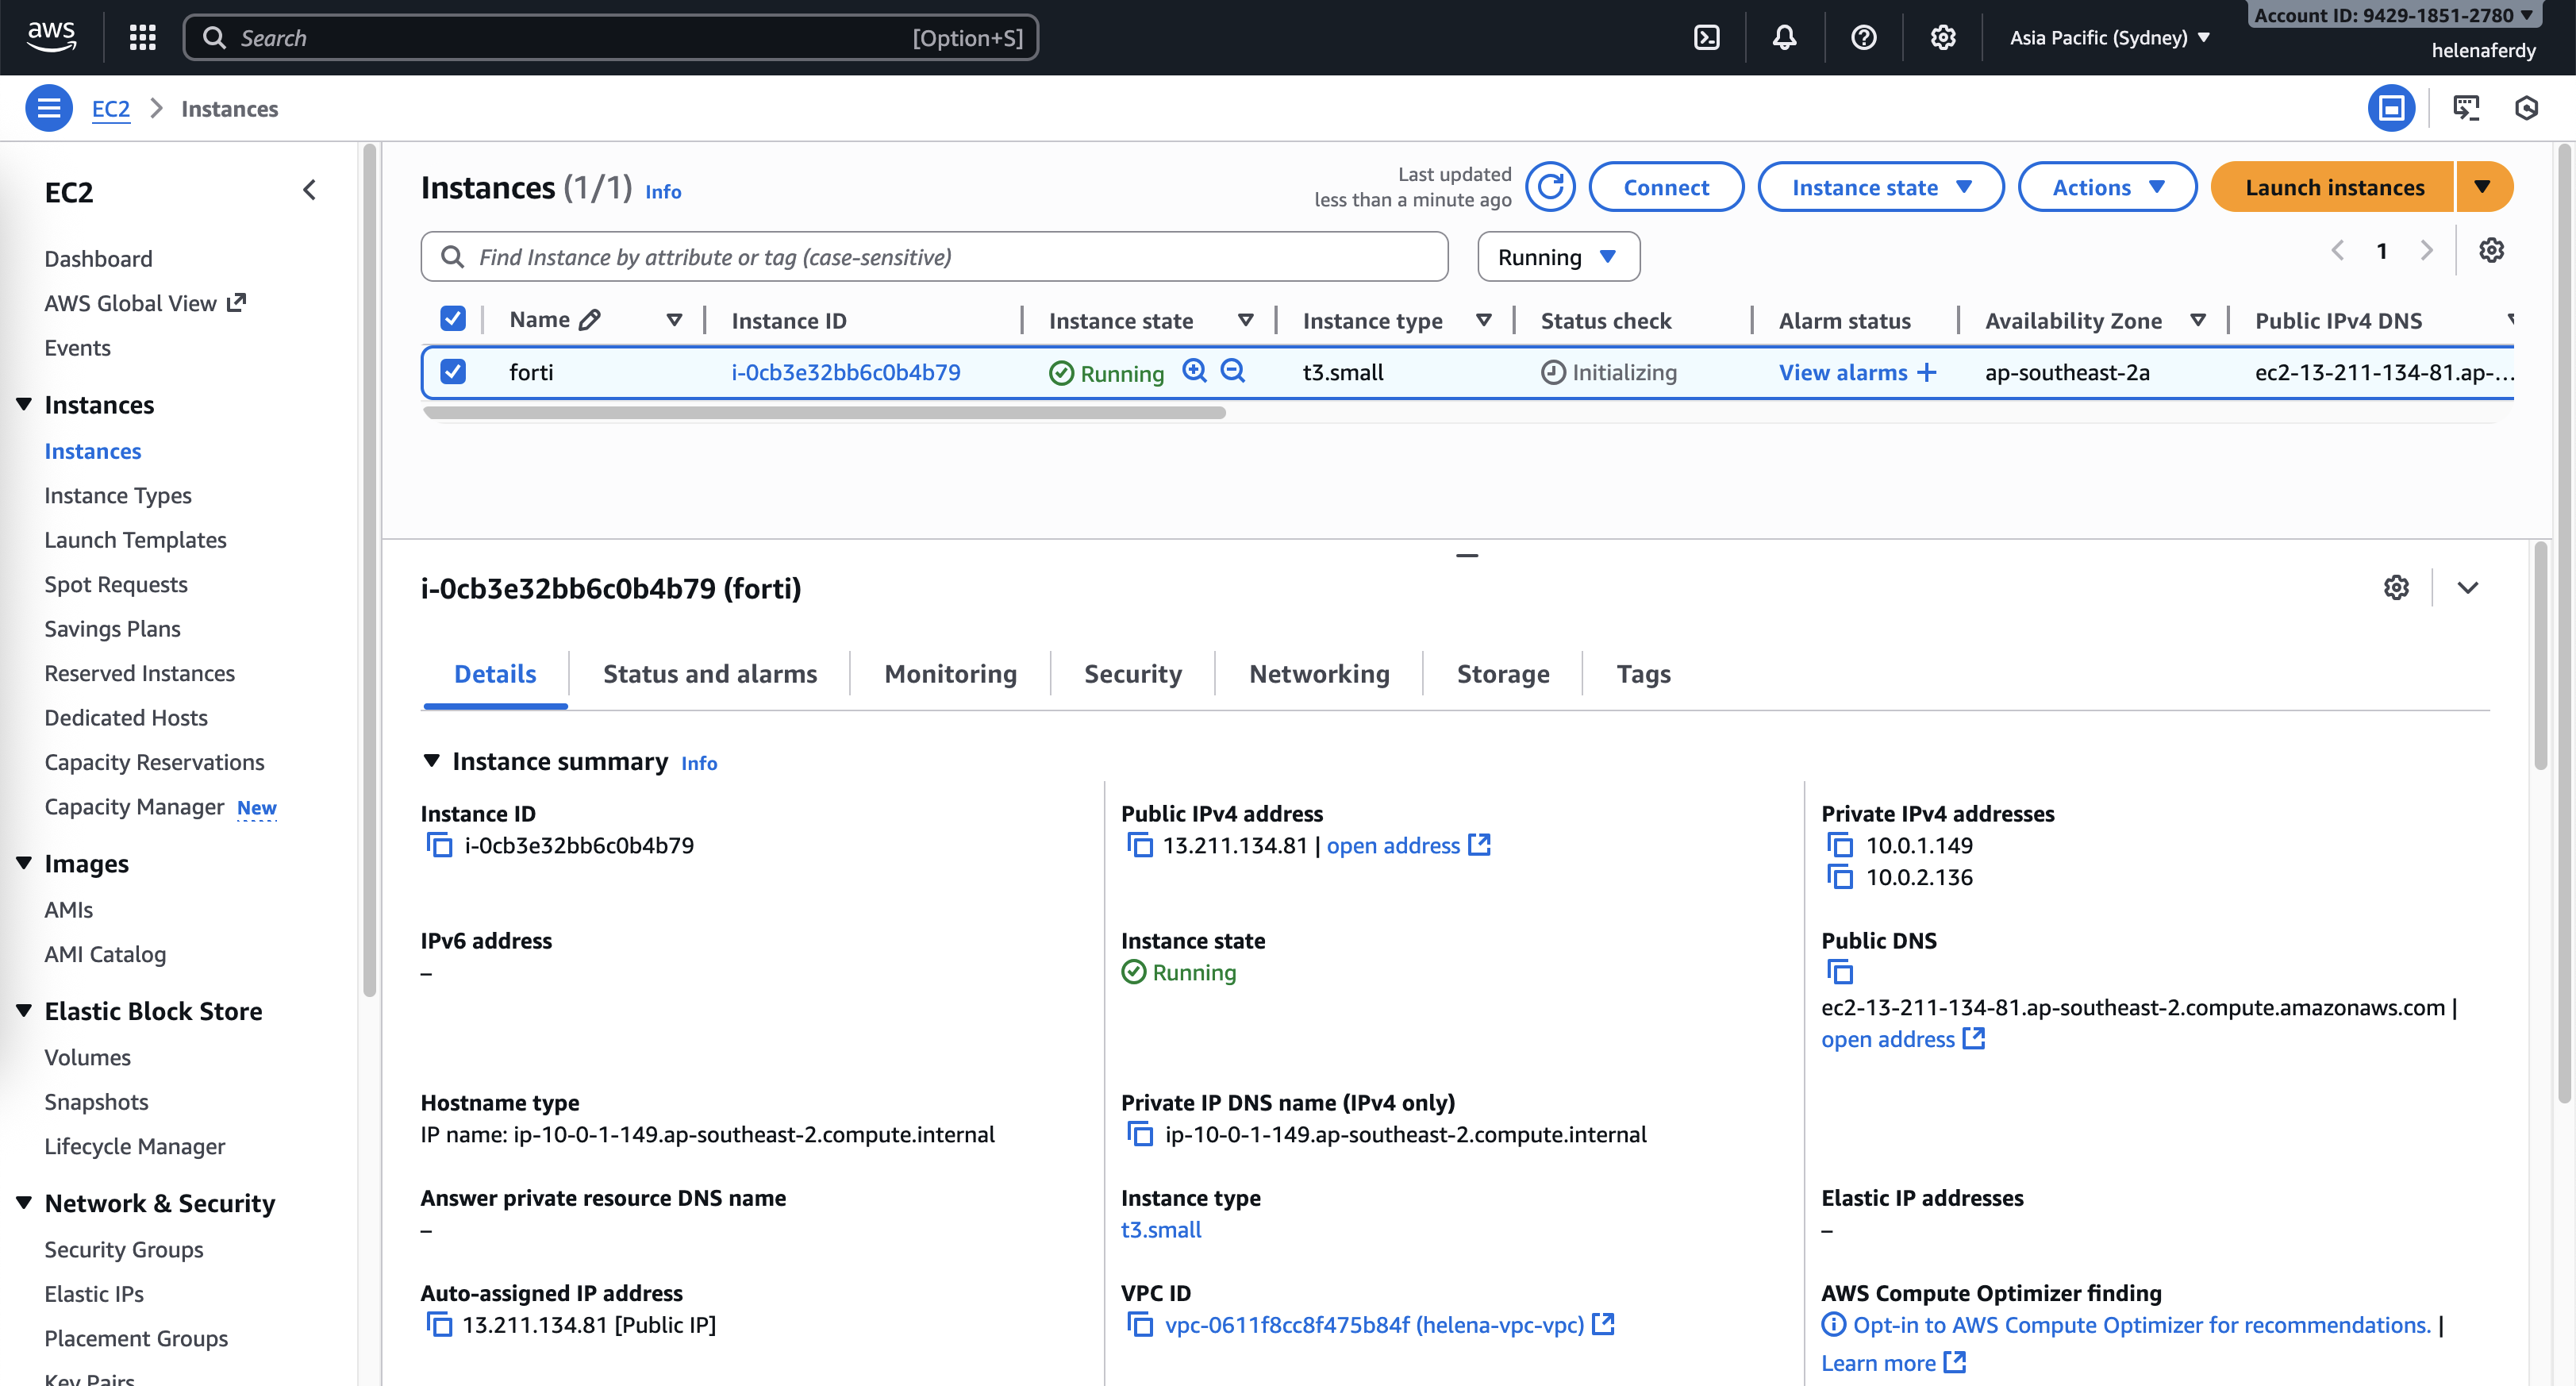
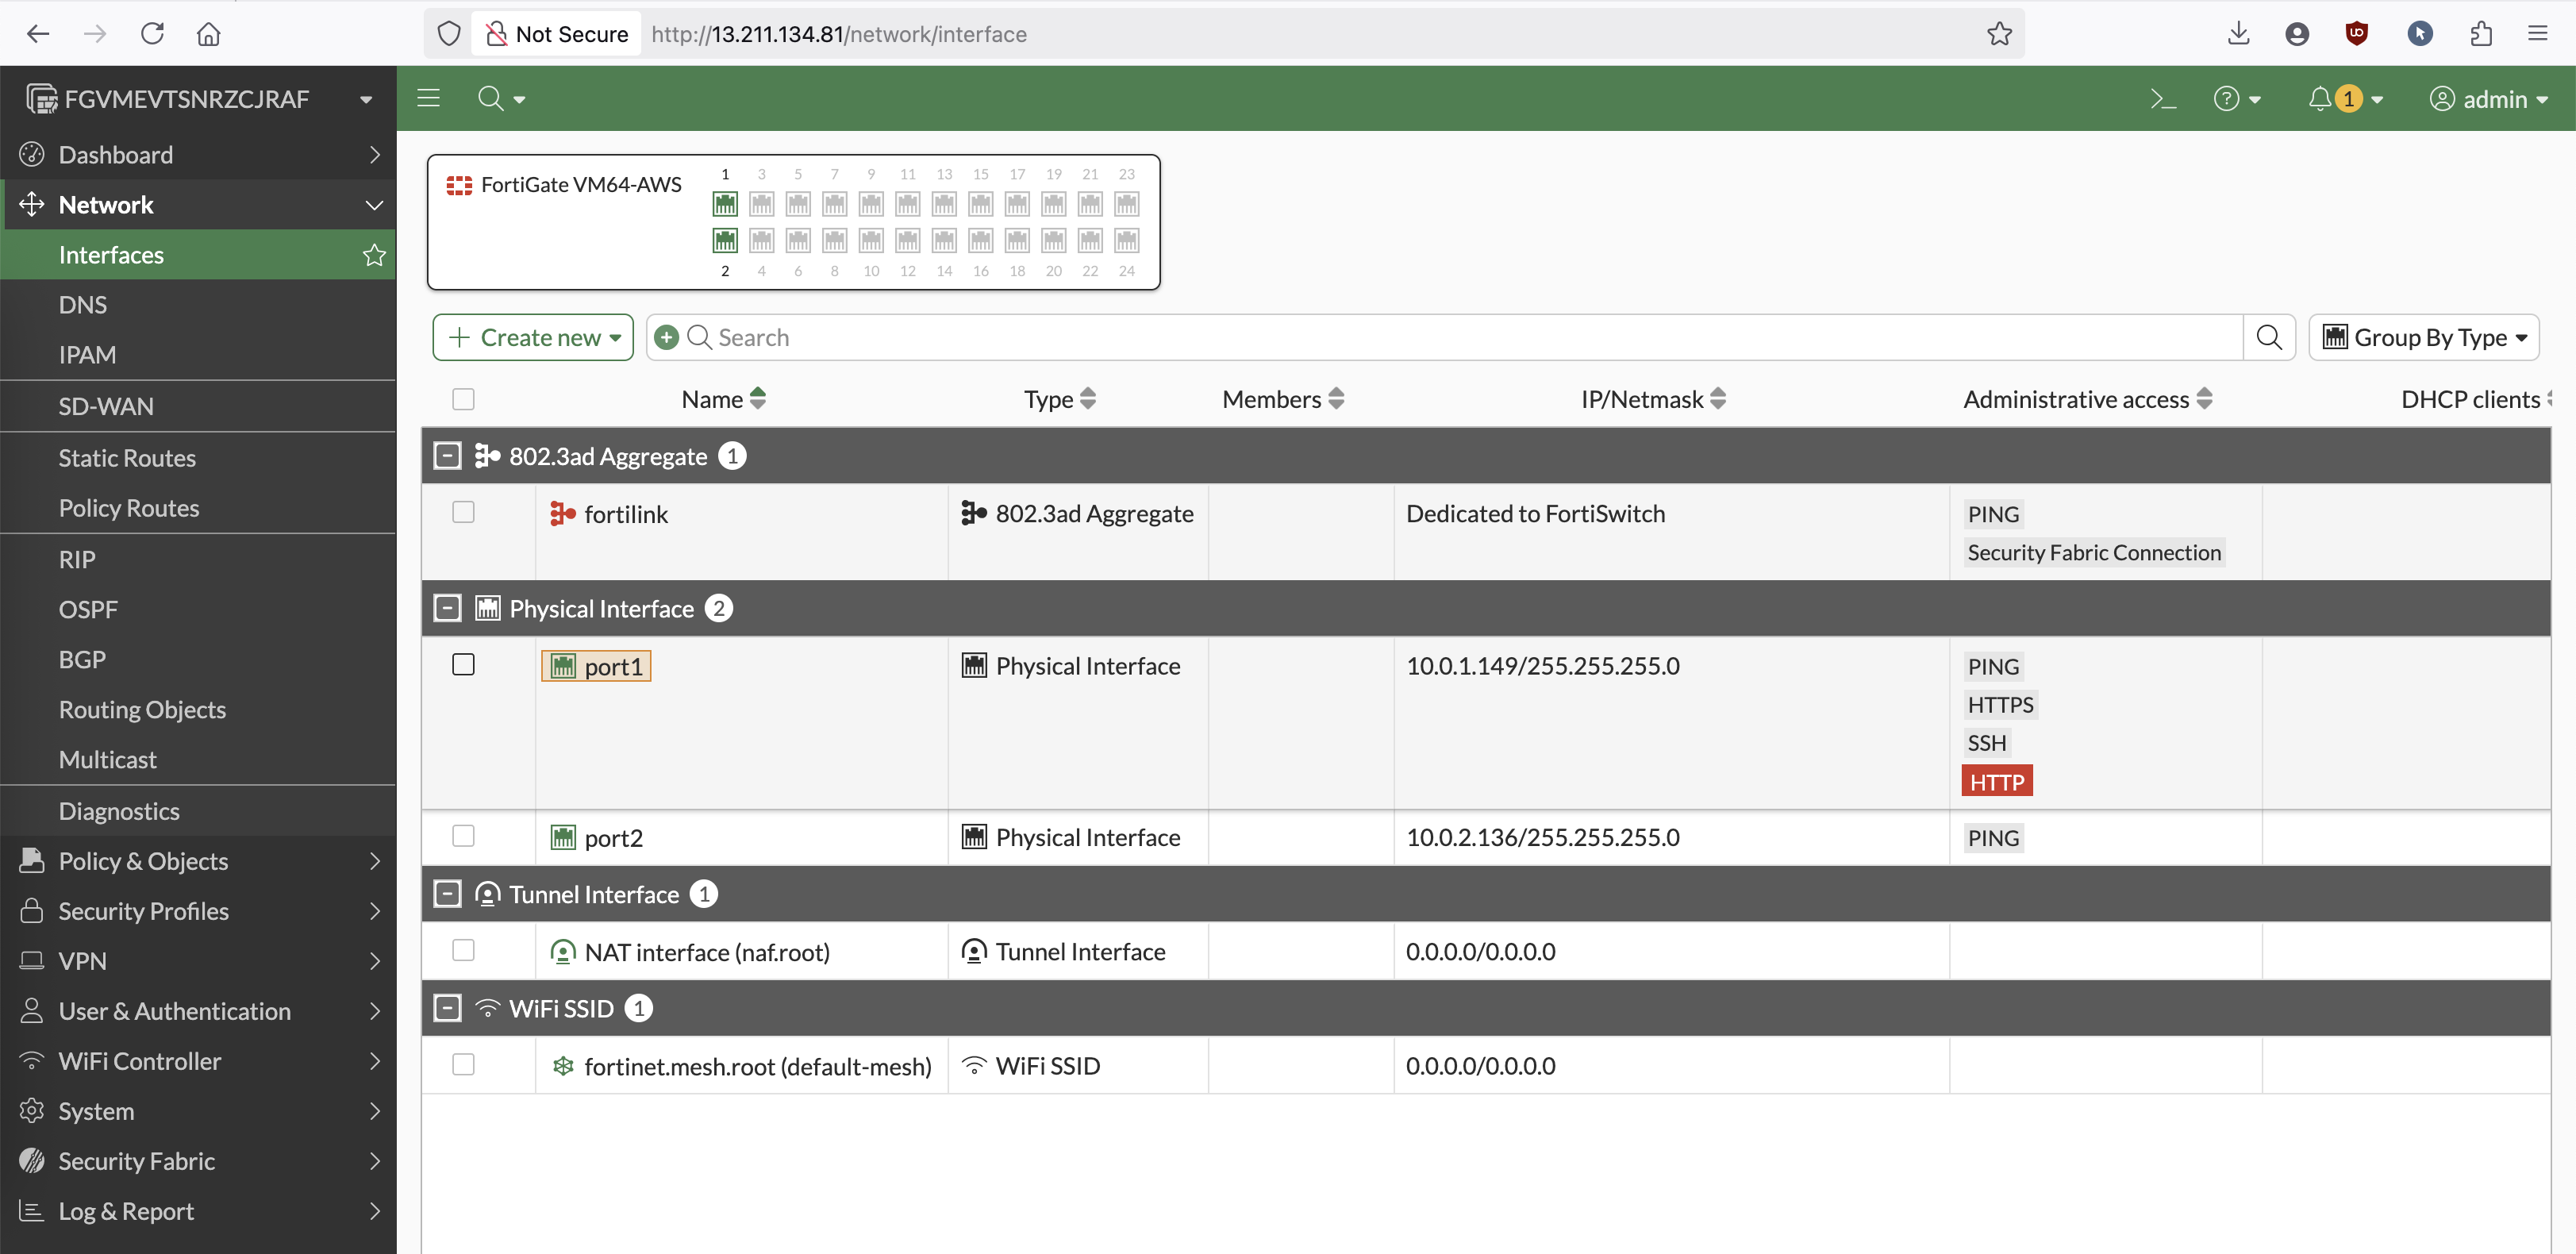
And now we have a fortigate firewall running with 2 interfaces, which the public one is mapped to a public IP address
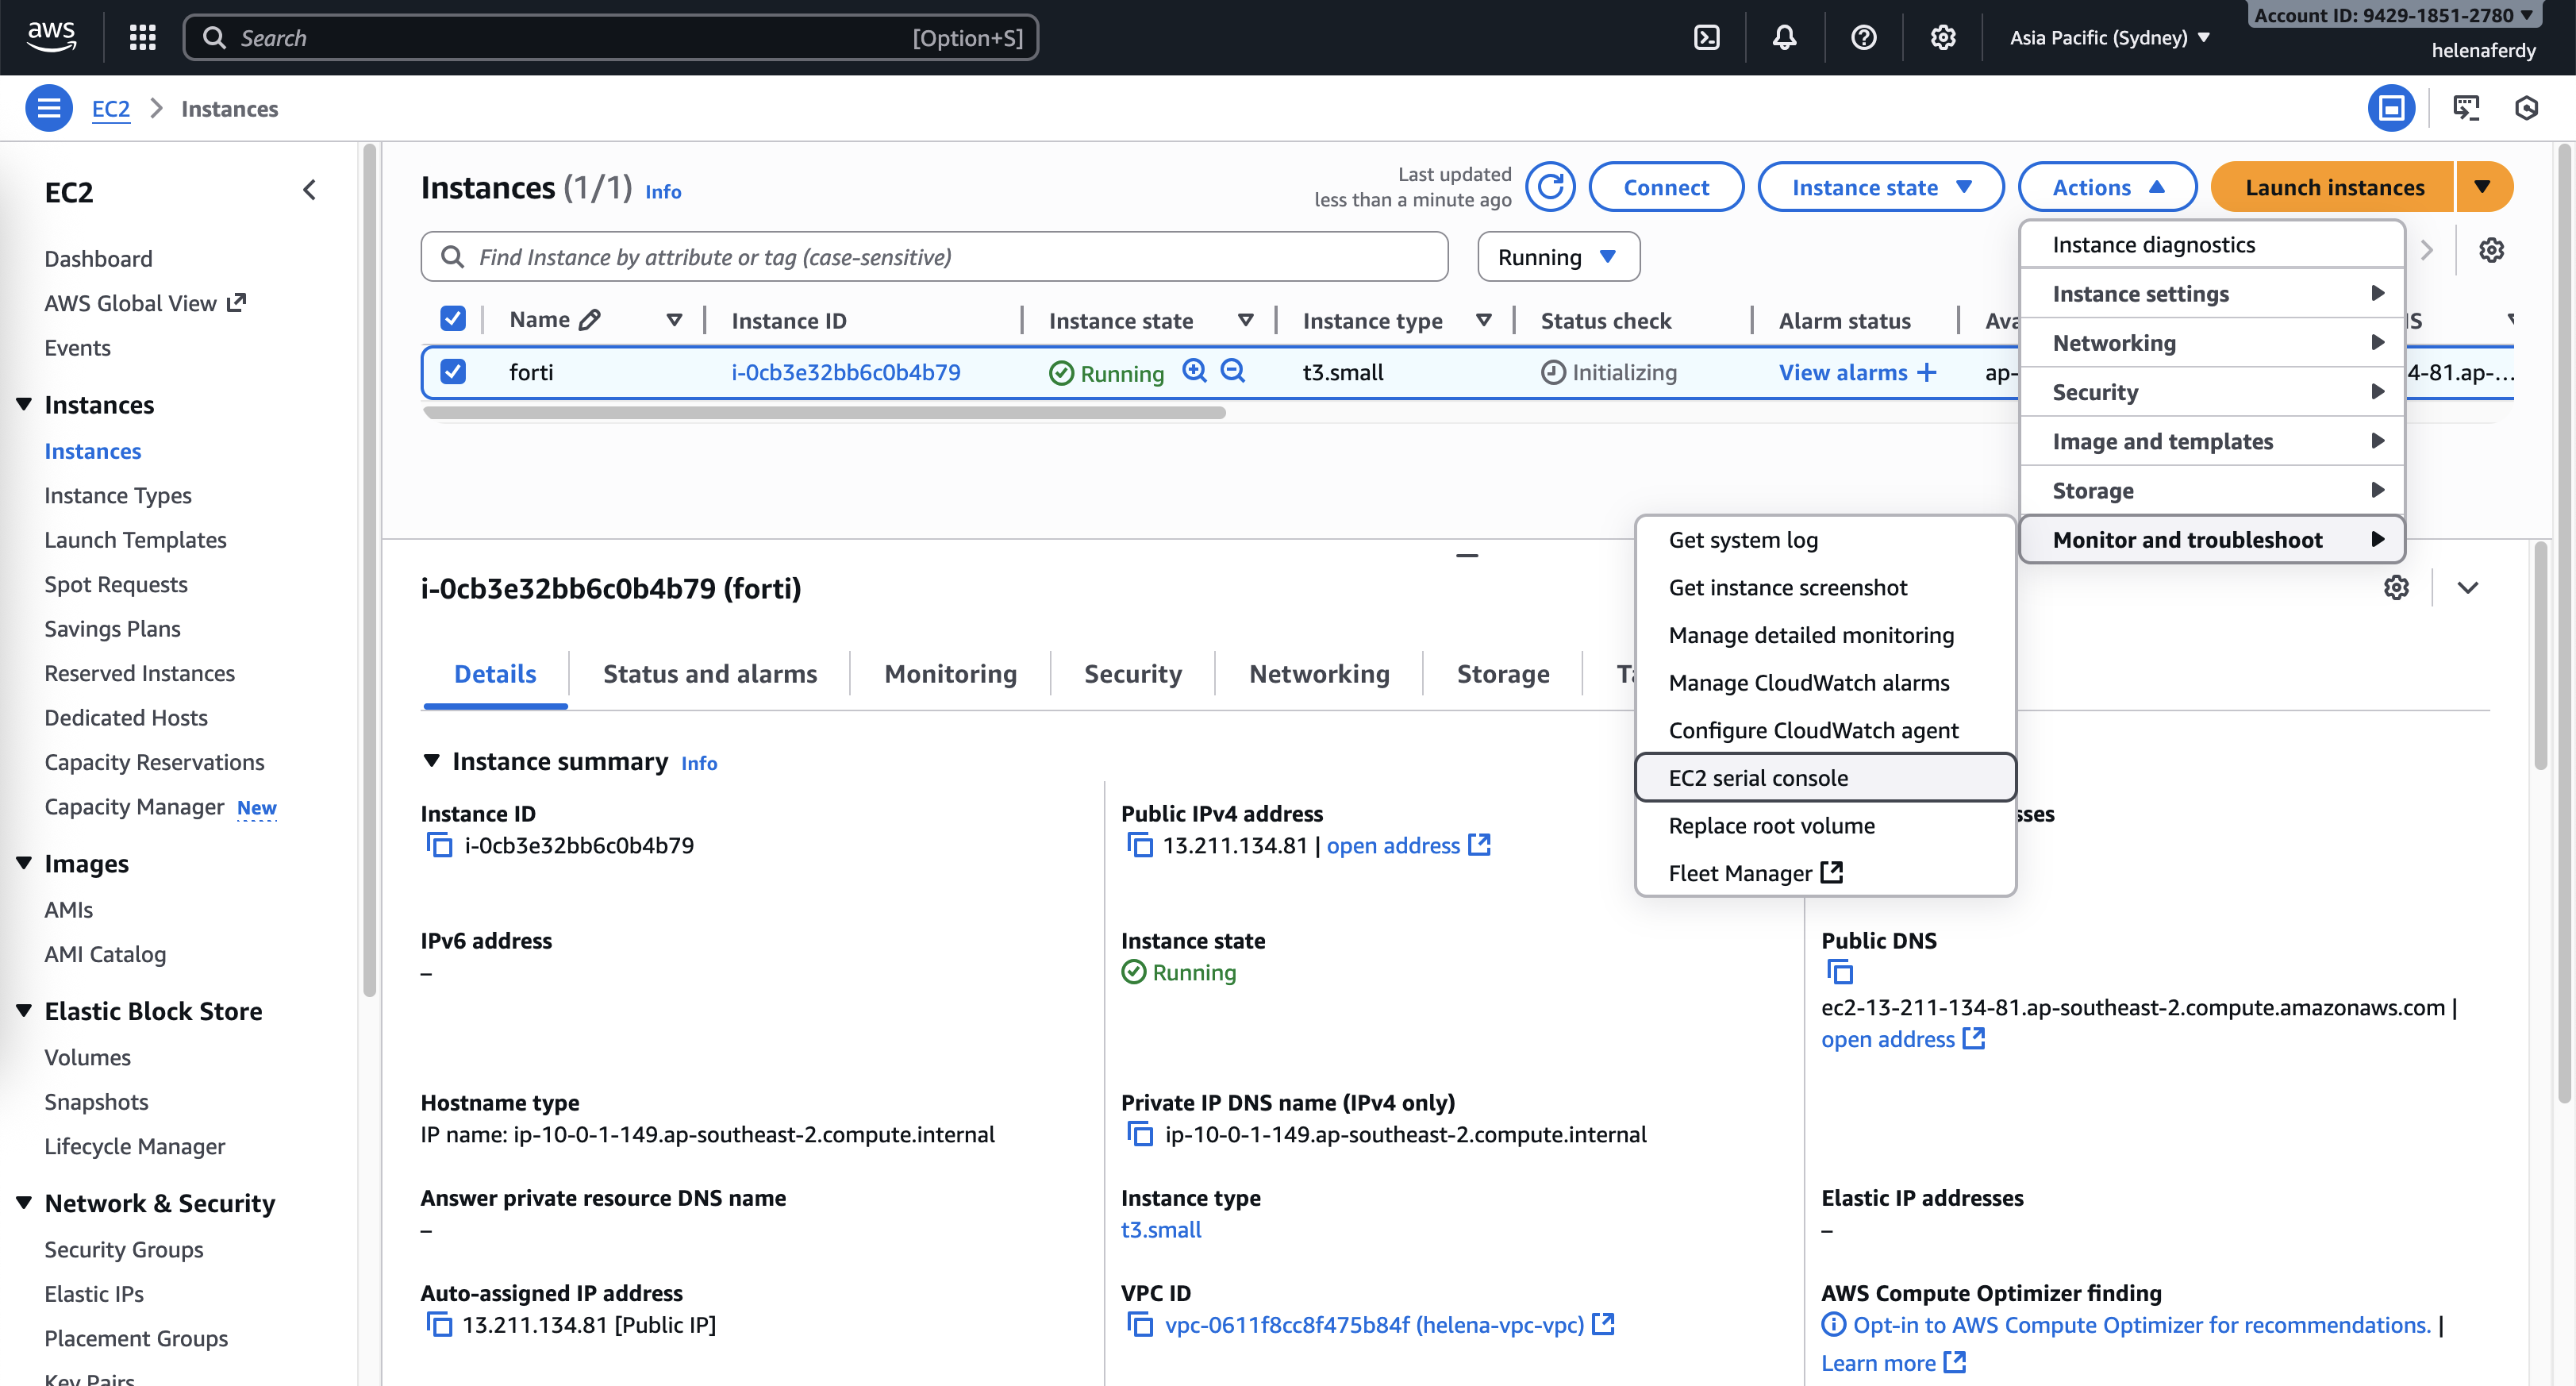
We can now configure the fortigate through serial console
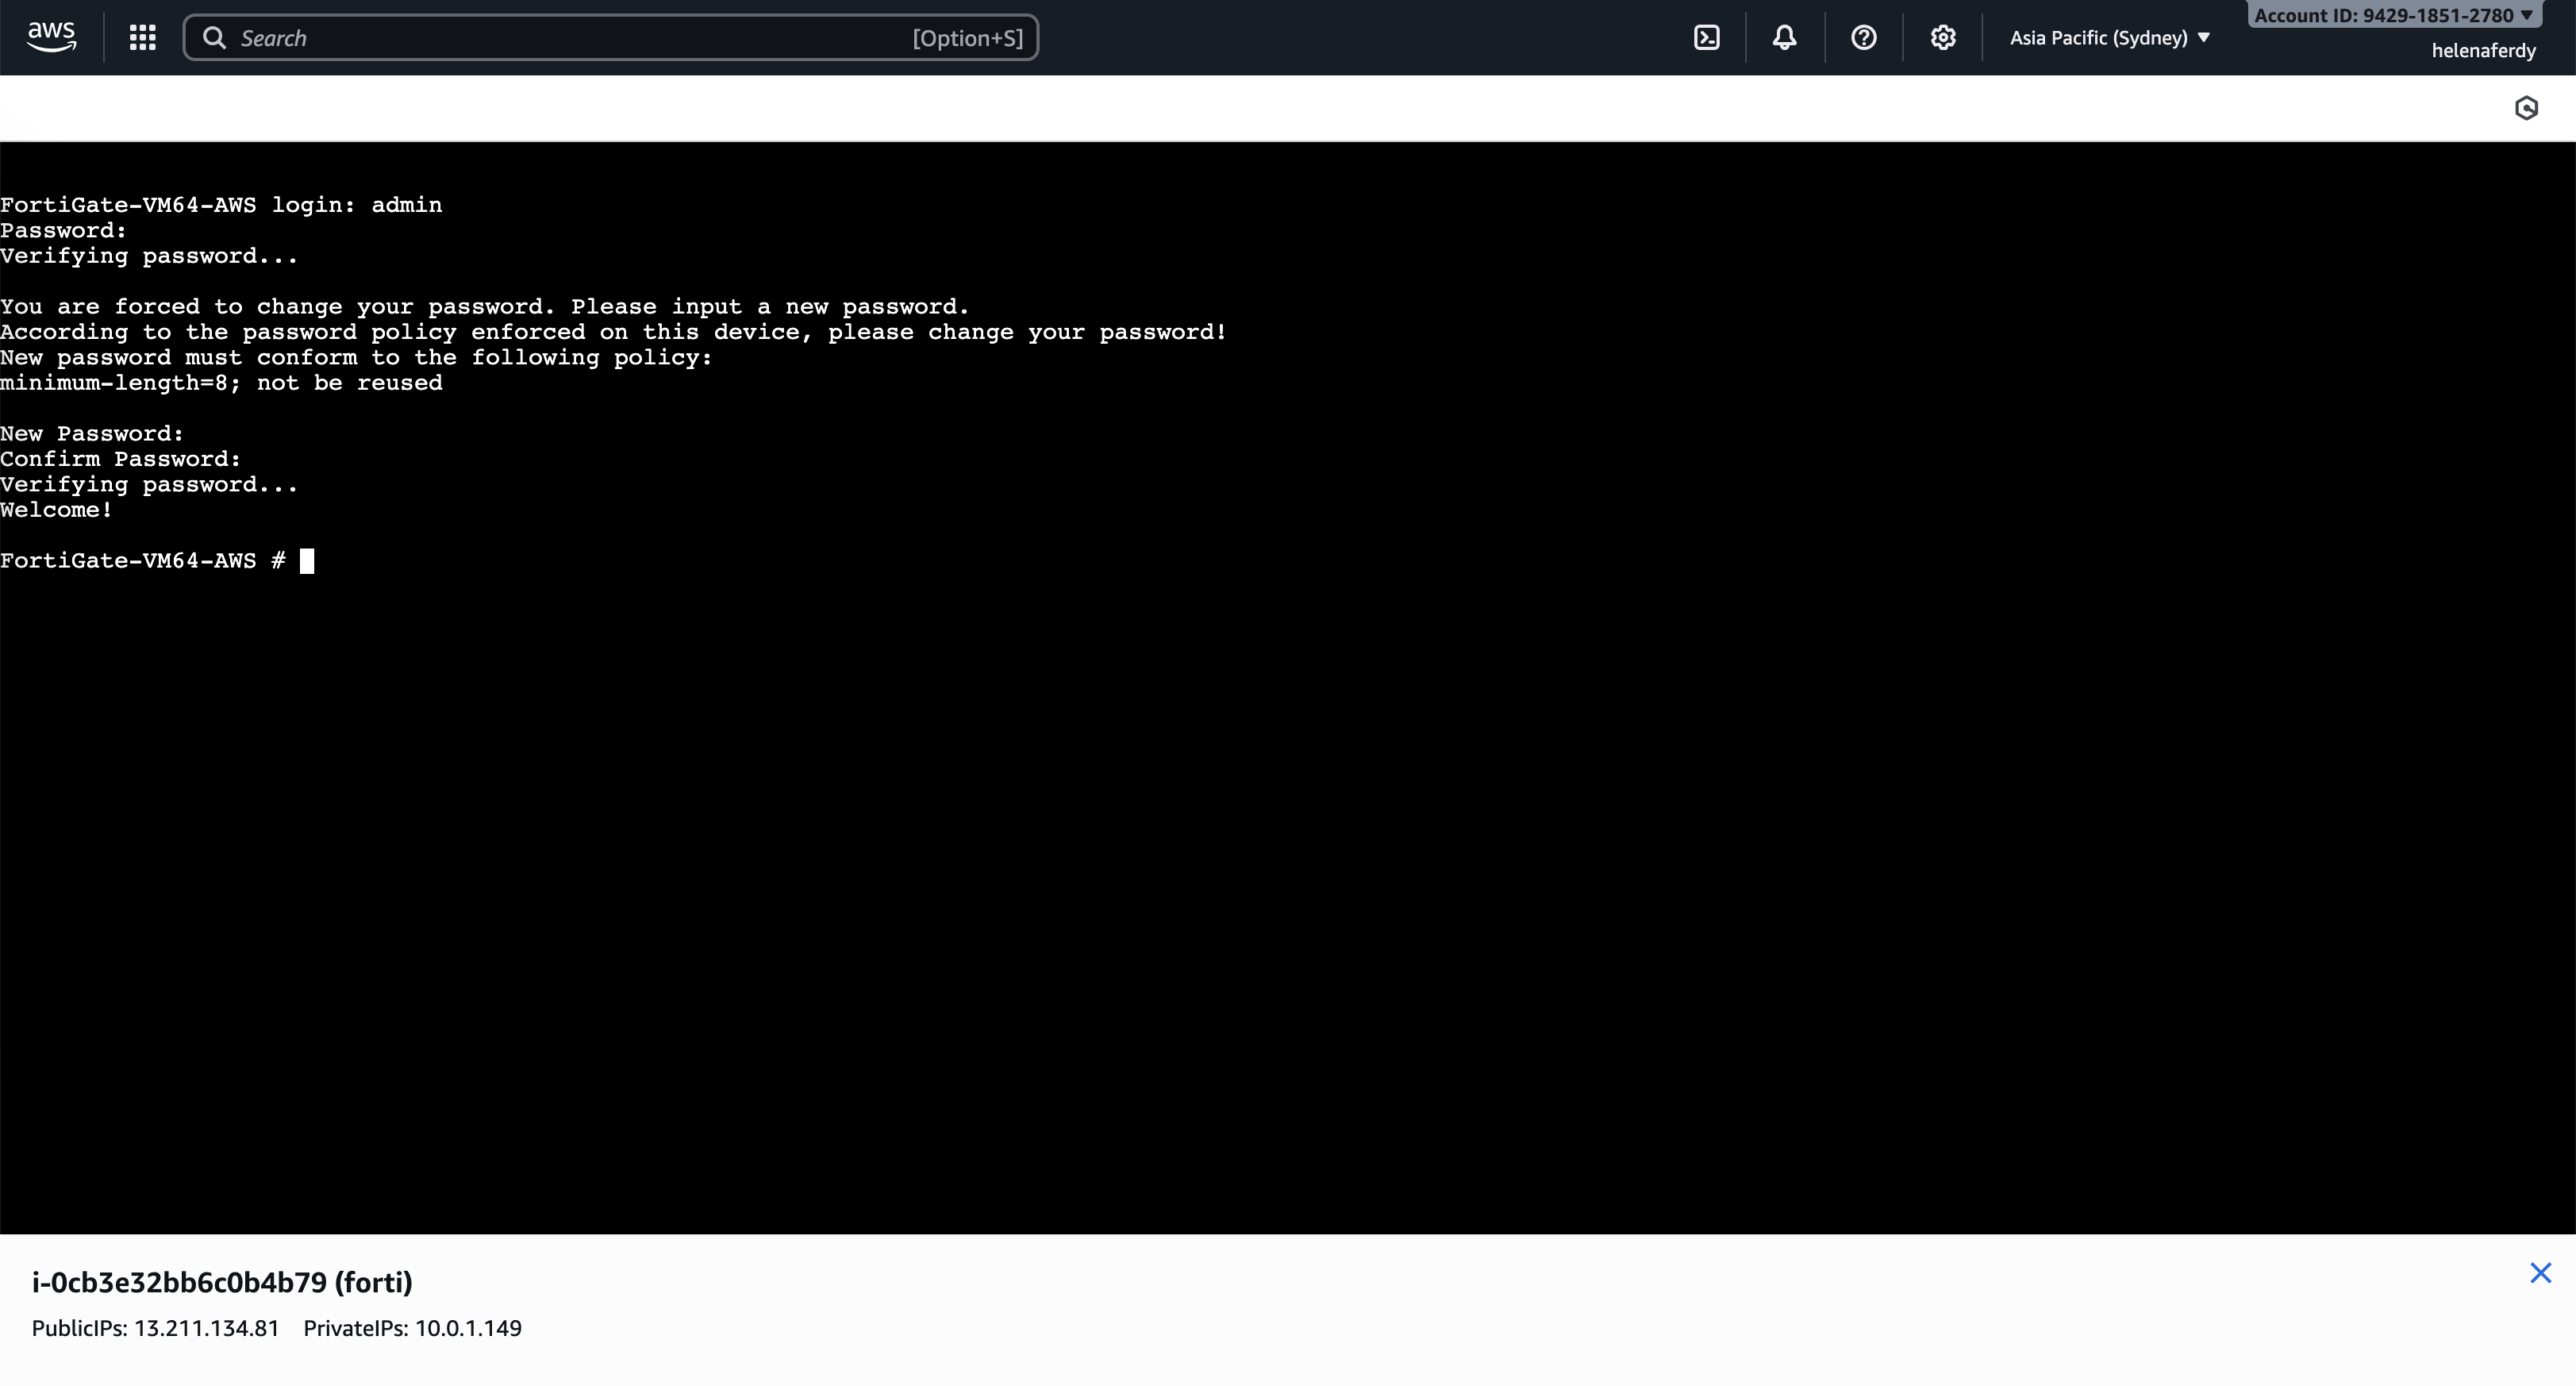
And after initial config, we can now access the fortigate through its public ip
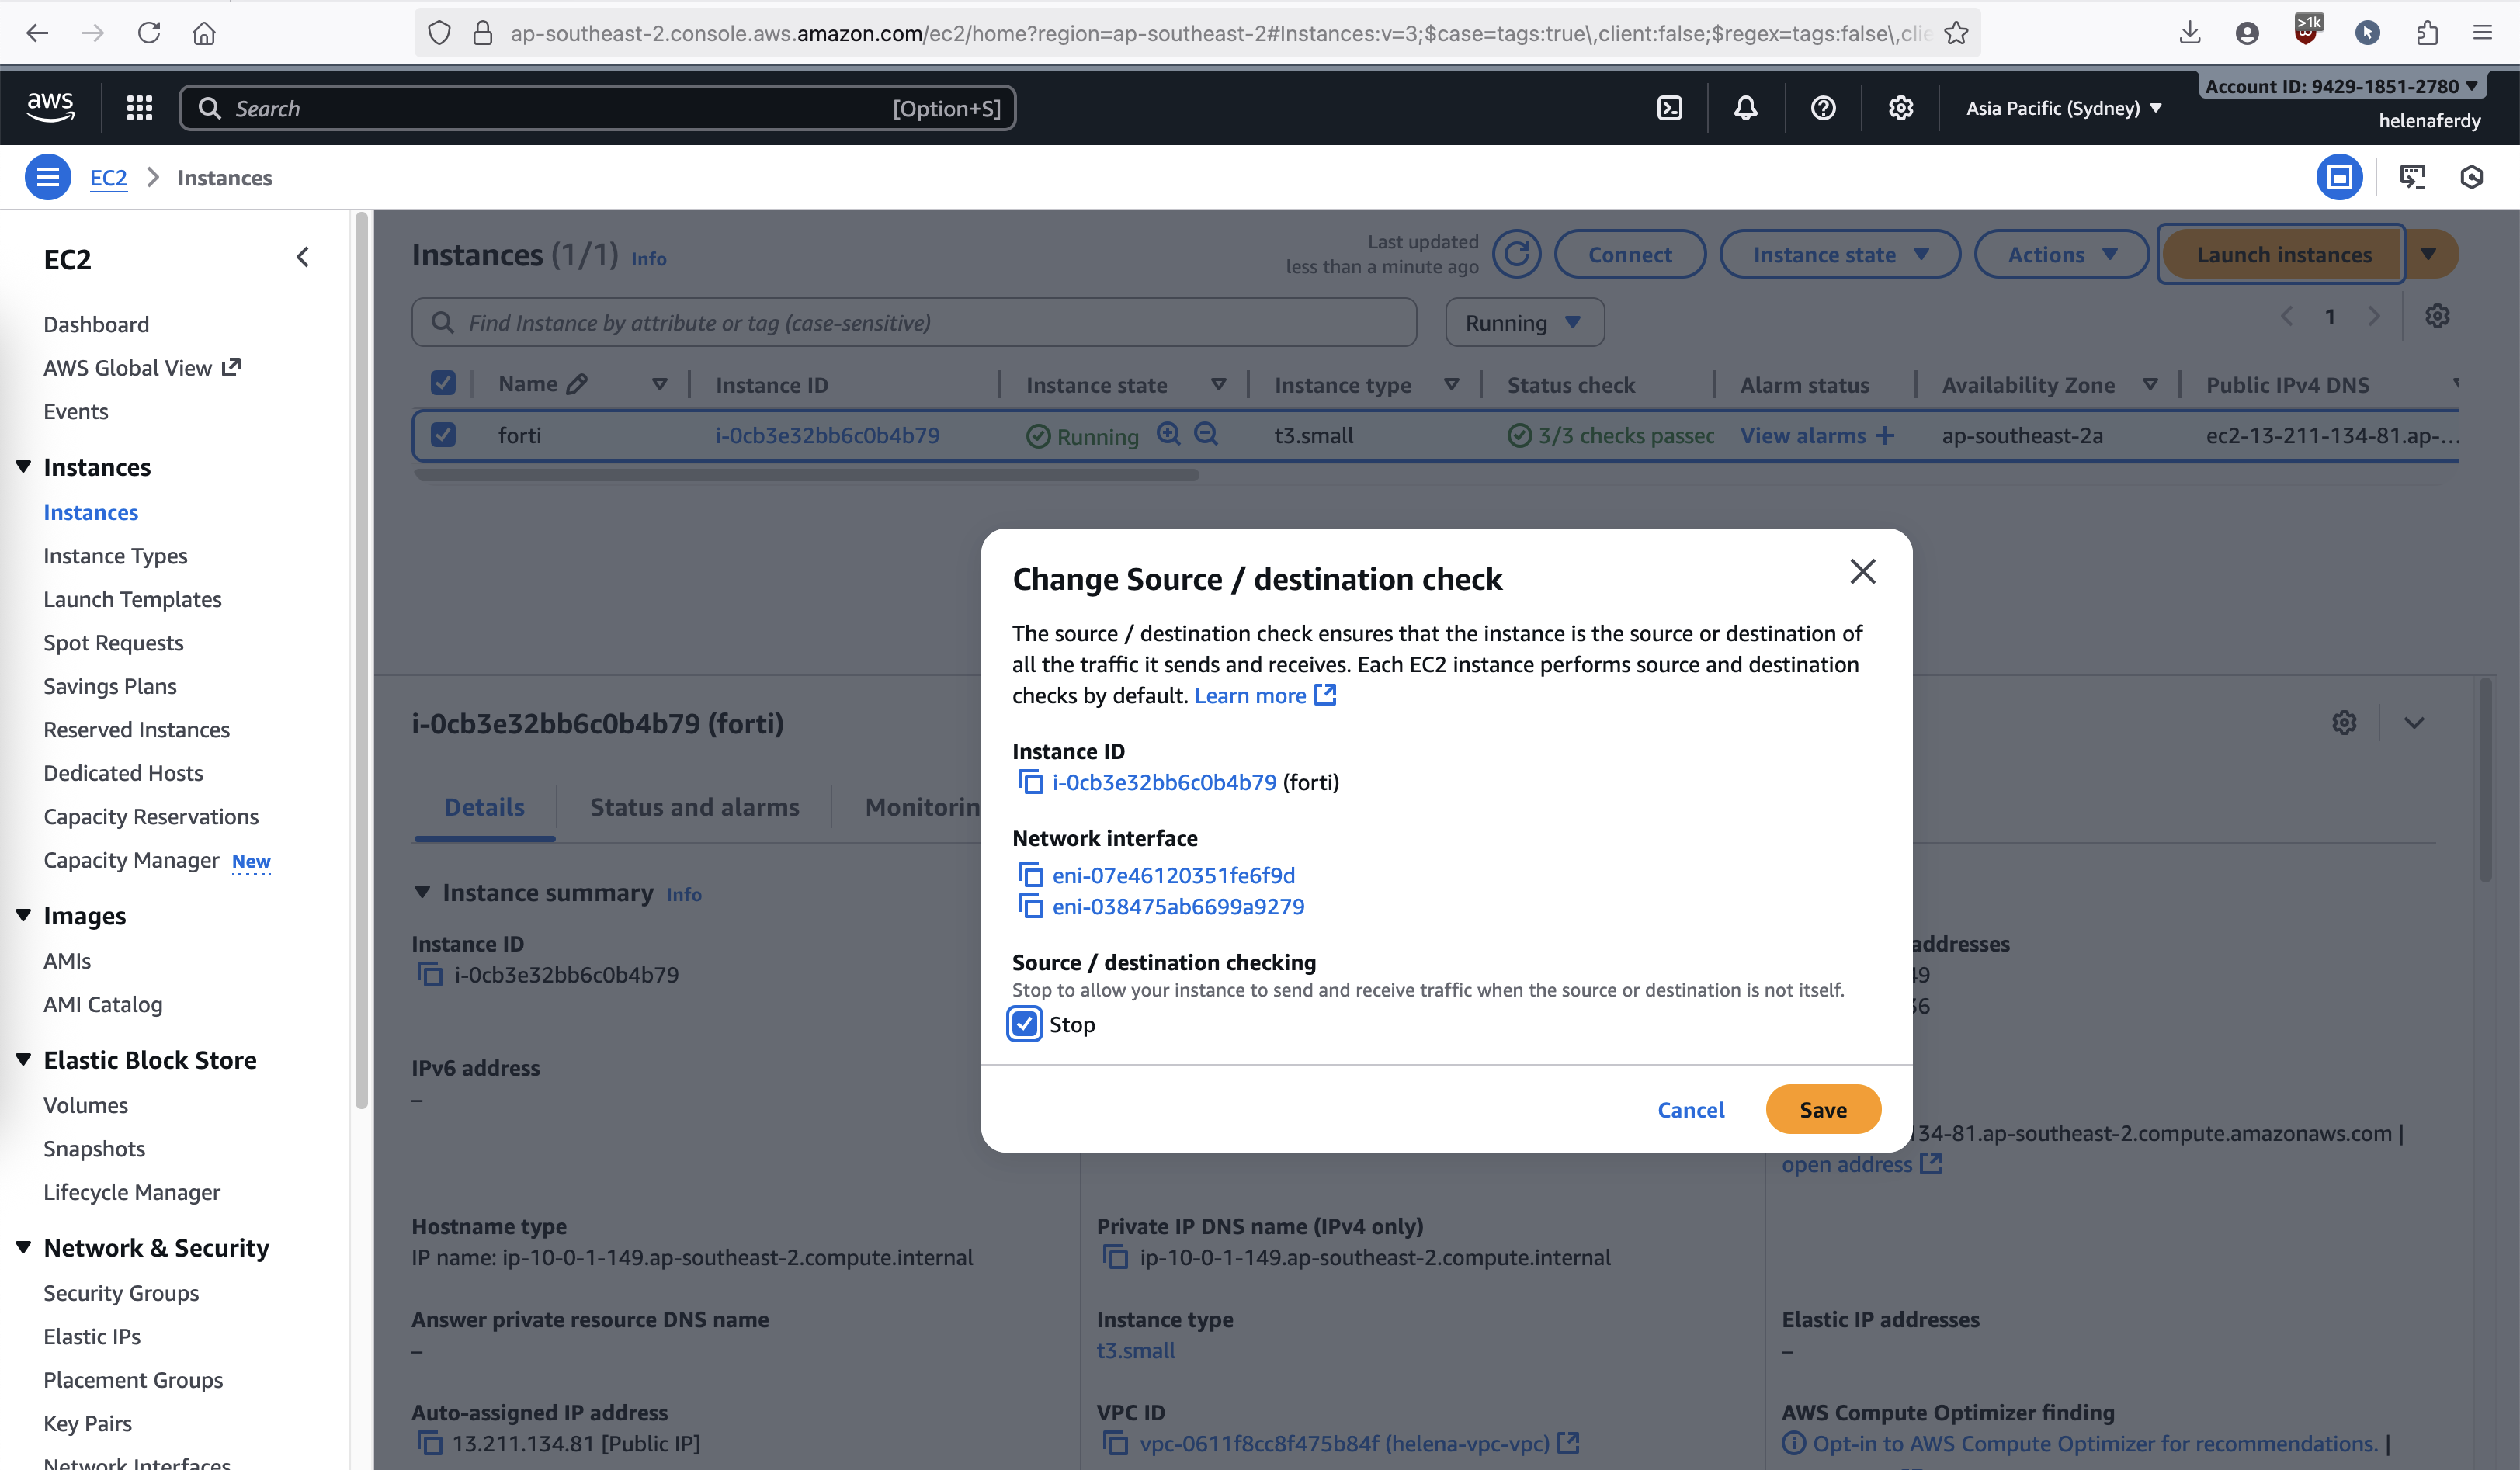
Enable IP Forwarding
For this instance to act as a router/firewall, we need to allow it to forward traffic where the source/dst is not itself, on Action » Networking » Change Source/Destination Check and disabel it
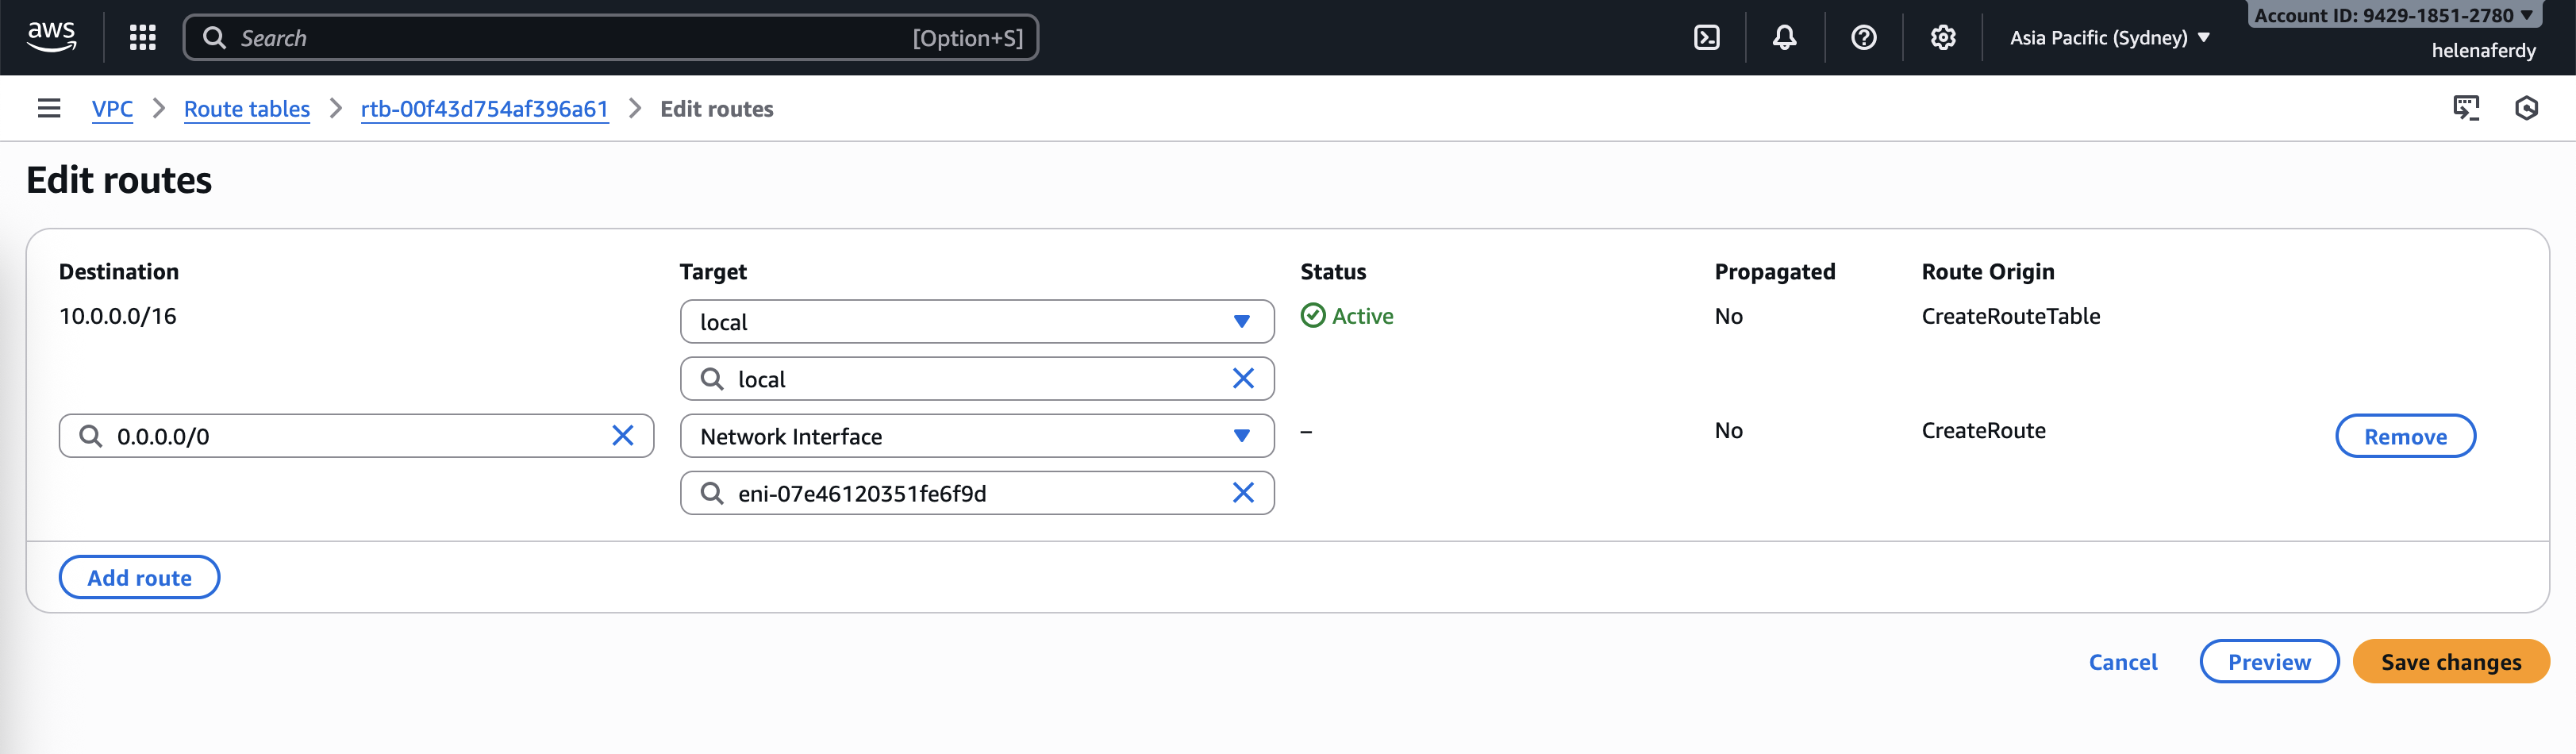
Using Fortigate as Default Gateway of Private Subnet
Now we want all traffic from private subnet to go through fortigate’s private interface, to do that we go to VPC’s Route Tables configuration and select the Private Subnet, then add a default gateway that points to fortigate’s Network Interface

Next we add a linux instance on the private network that will send traffic to the fortigate to reach internet

Here we can see that this linux host is indeed in the correct subnet and can access internet

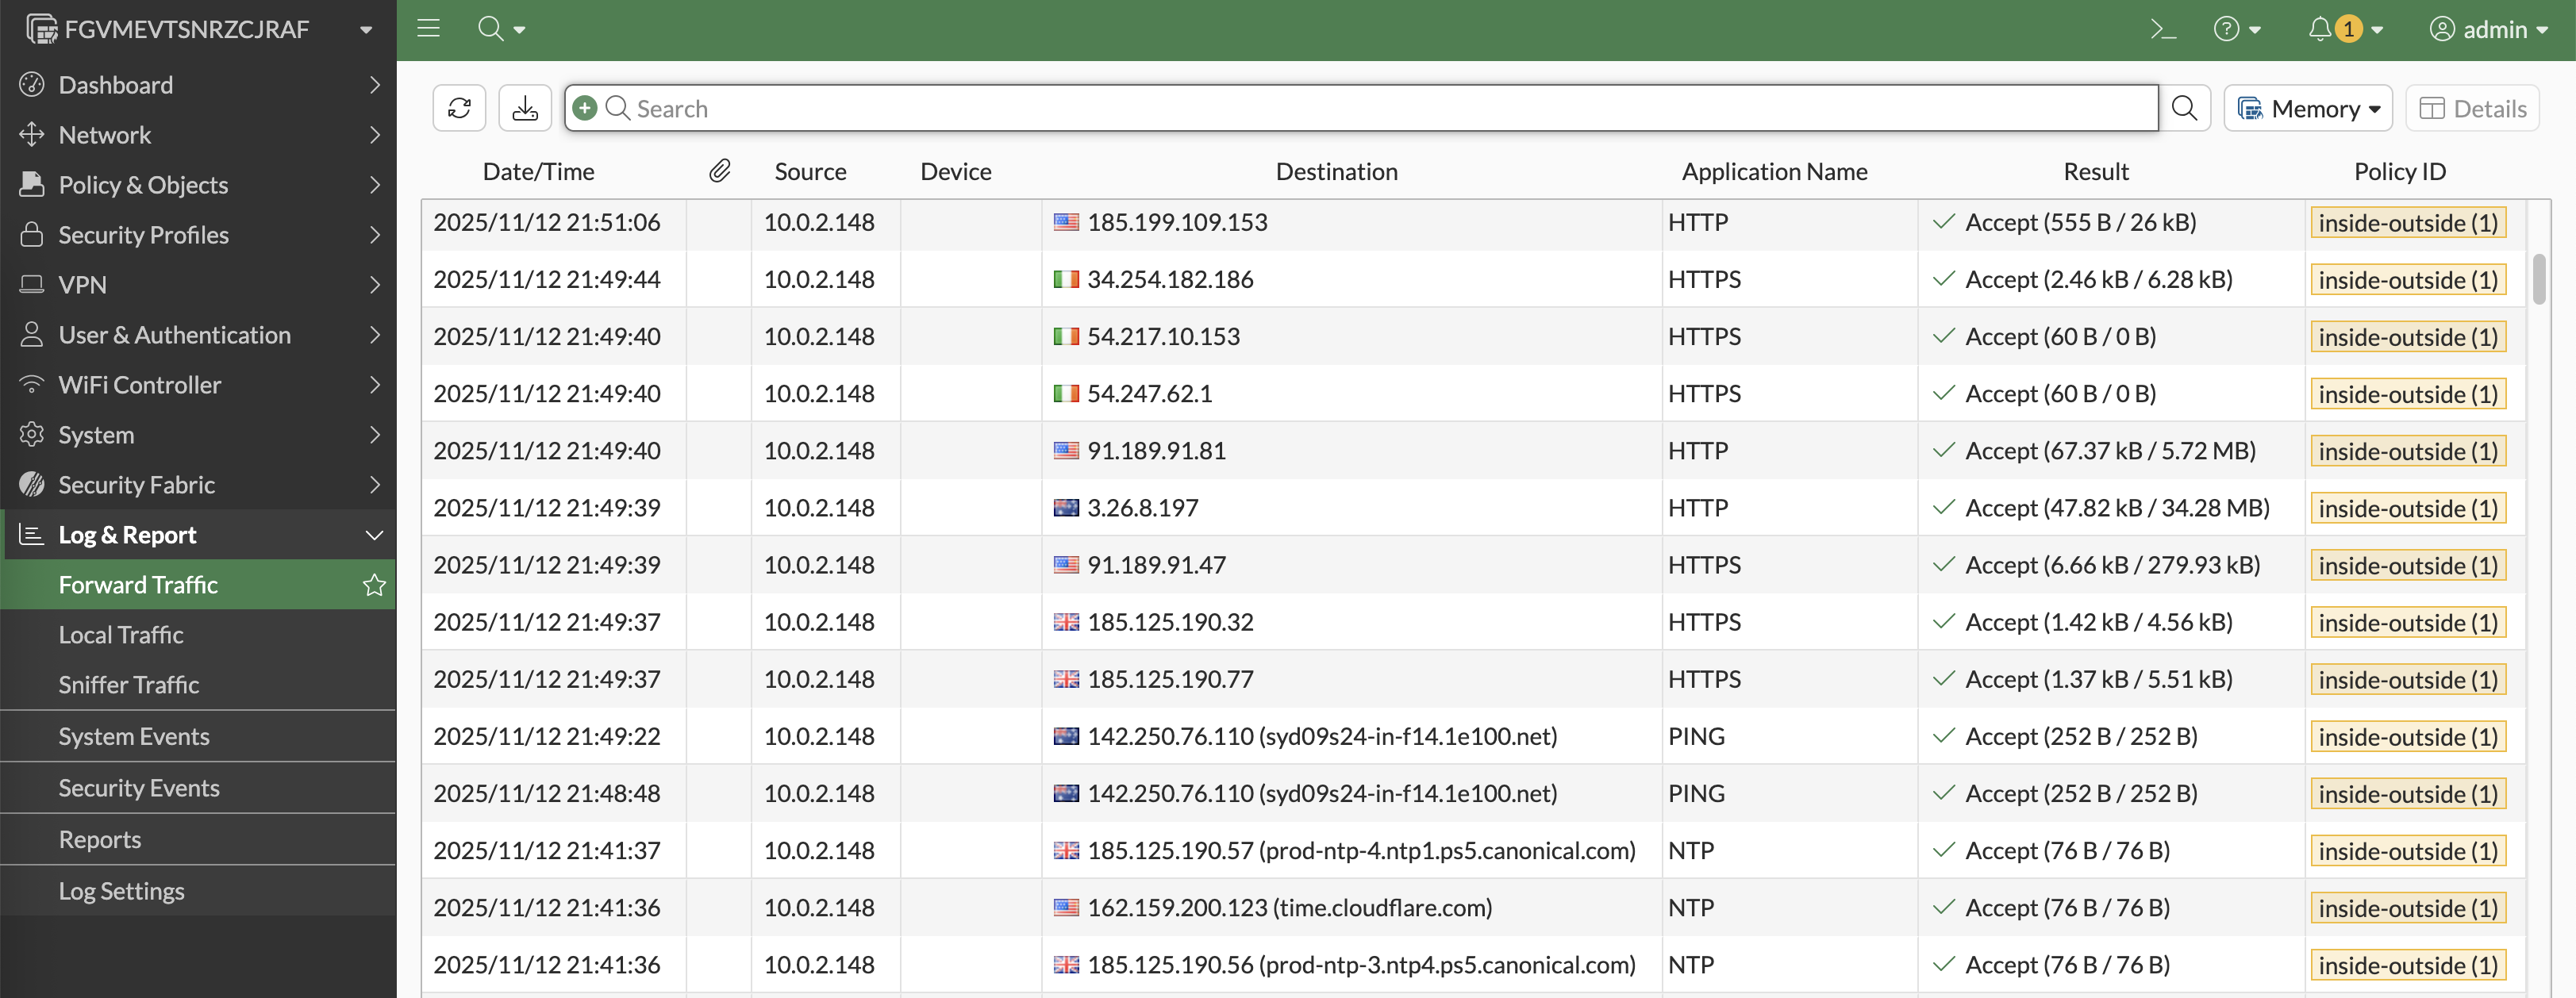
On Fortigate, we can see the traffic logs coming from linux host that goes to the internet