AWS Gateway Load Balancer
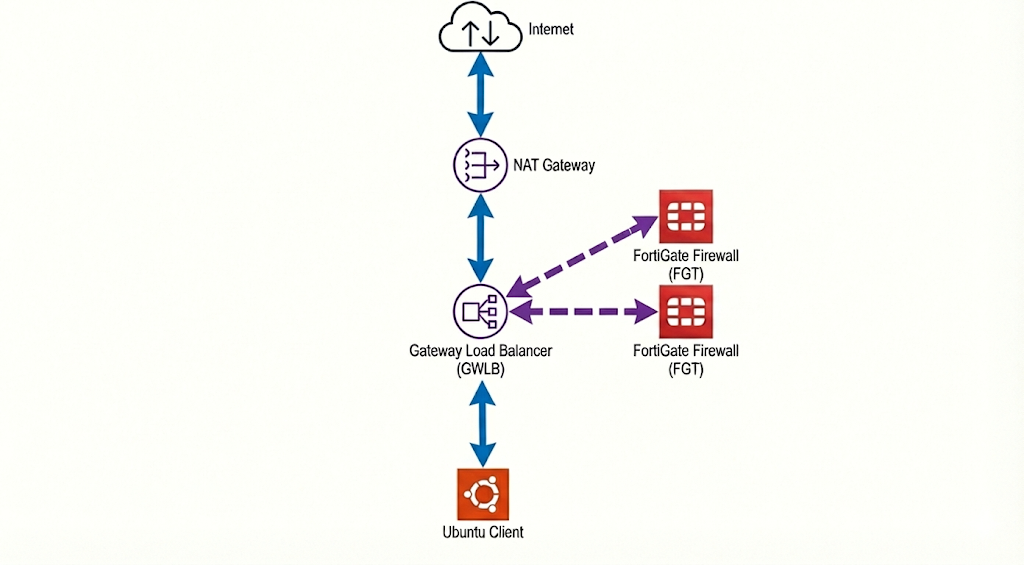
This lab implements a scalable, transparent inspection architecture by integrating AWS Gateway Load Balancer (GWLB) with FortiGate firewalls. We replace legacy Active/Passive NAT designs with a active-active fleet using GENEVE encapsulation with two standalone fortigate firewalls with identical configuration.
Instances
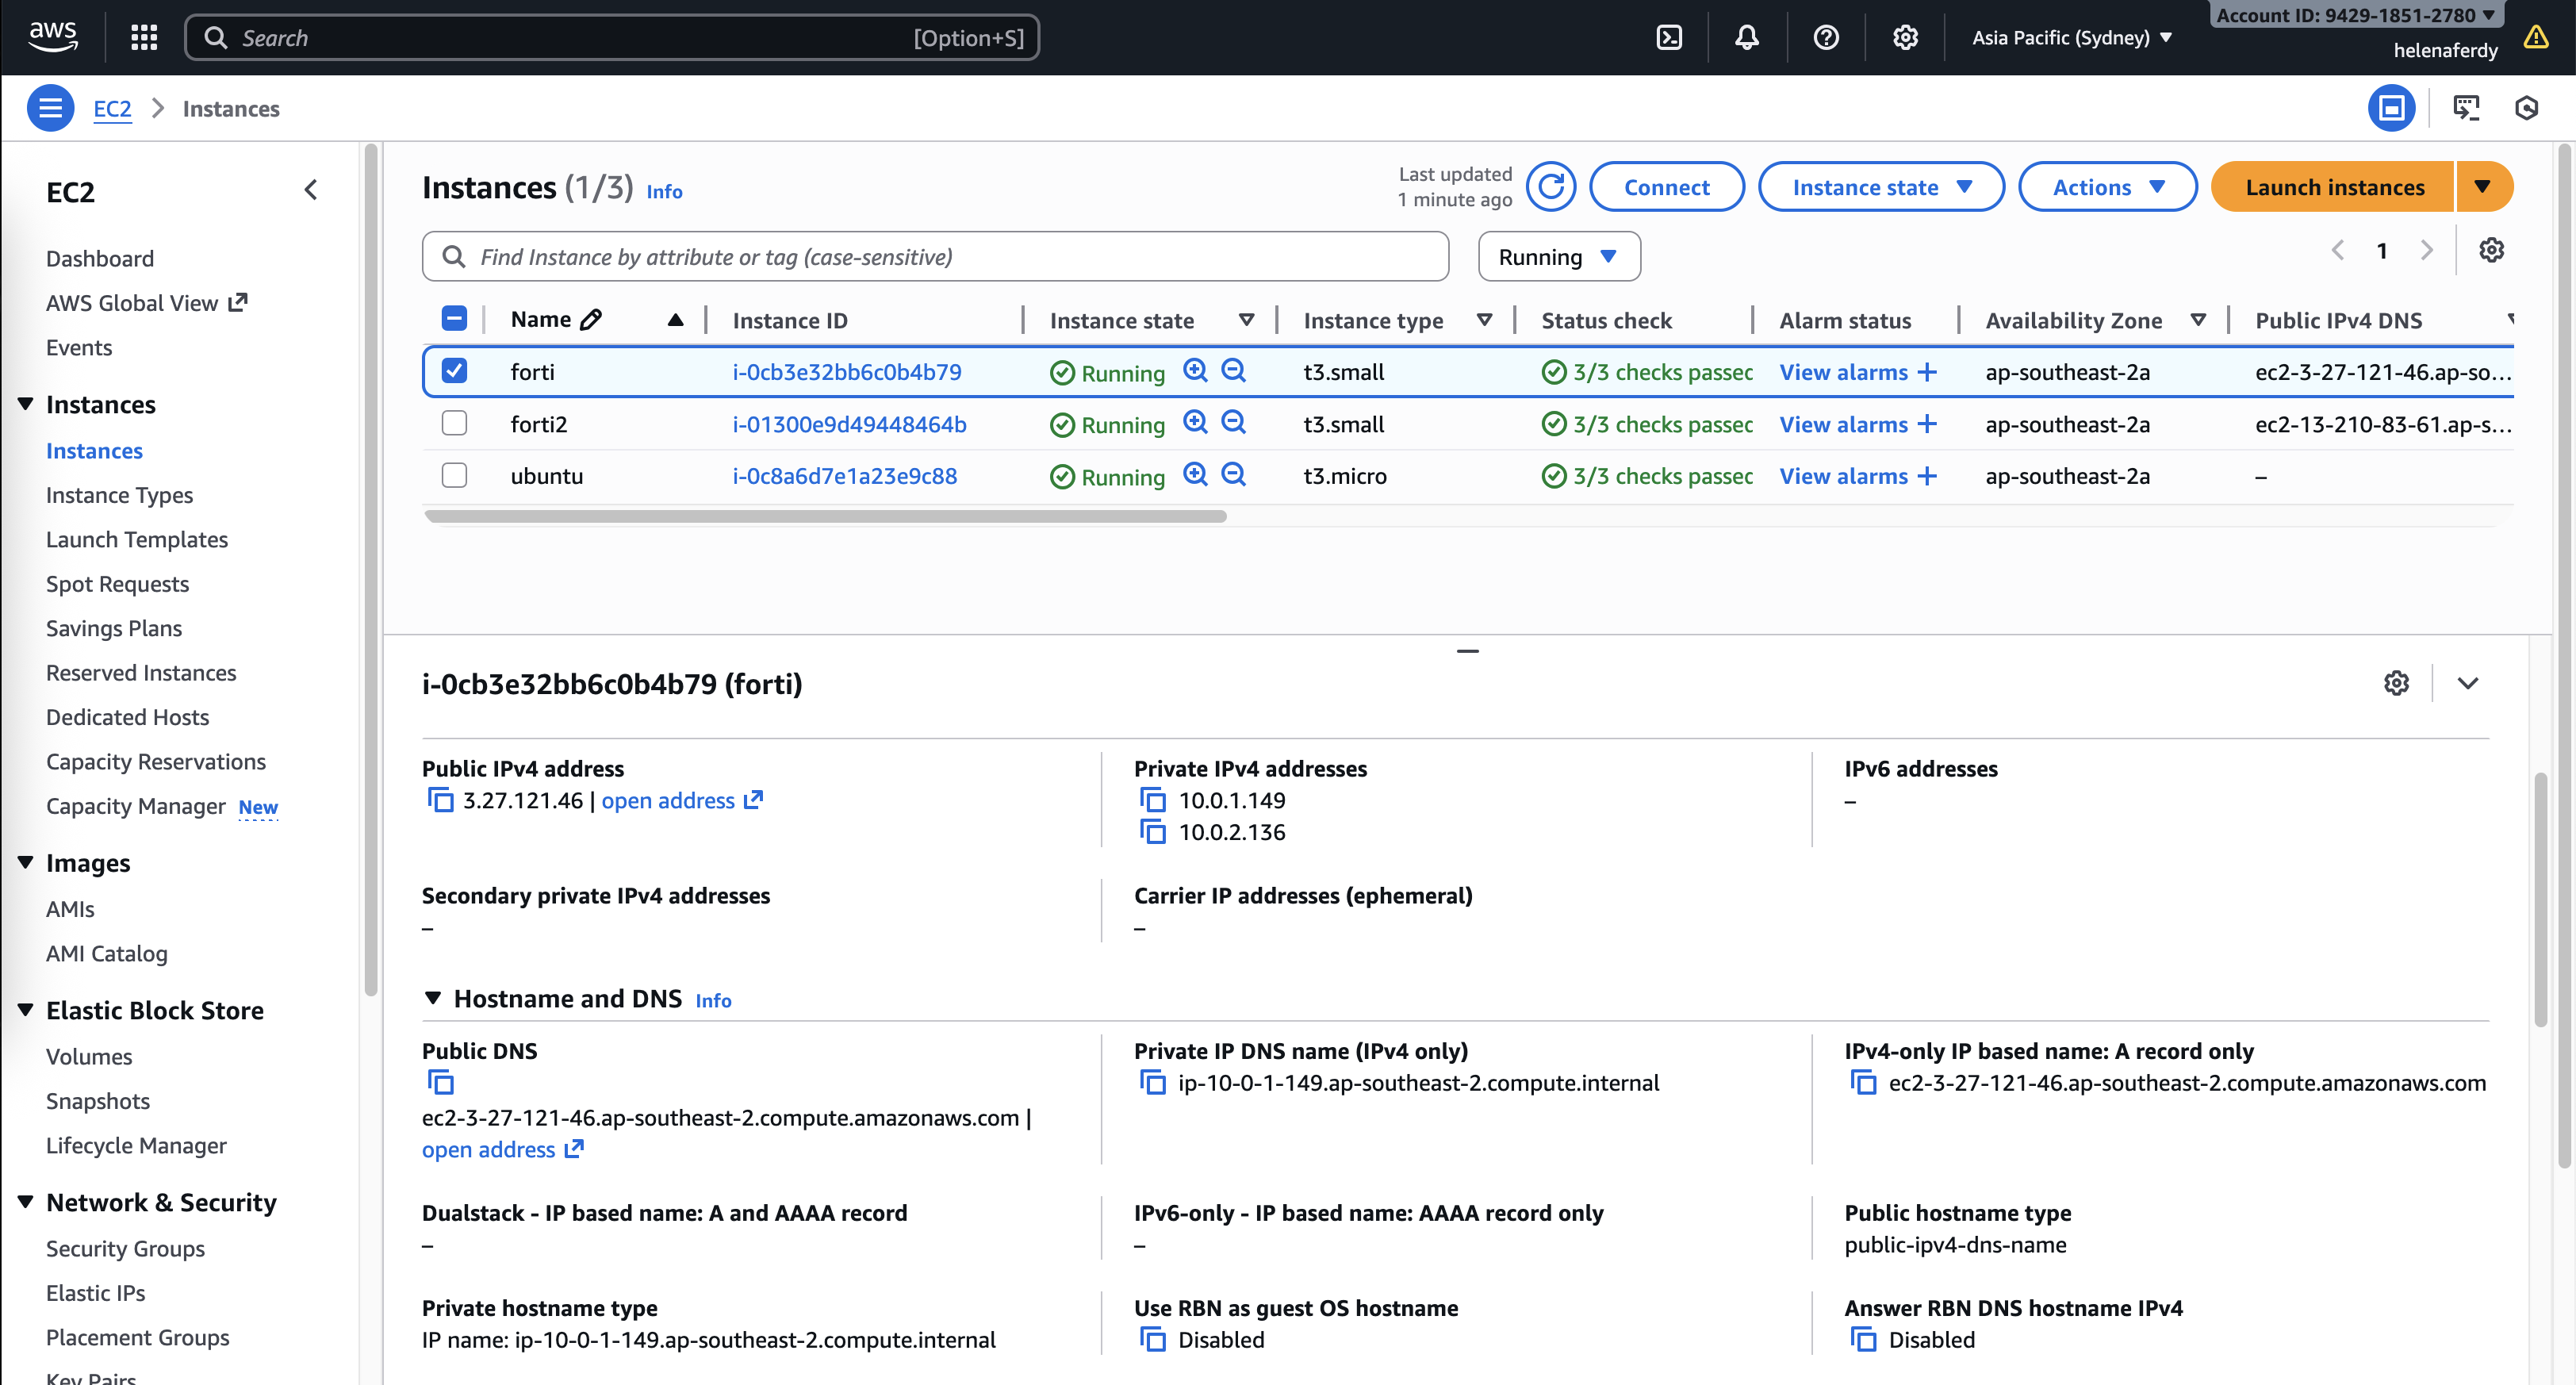
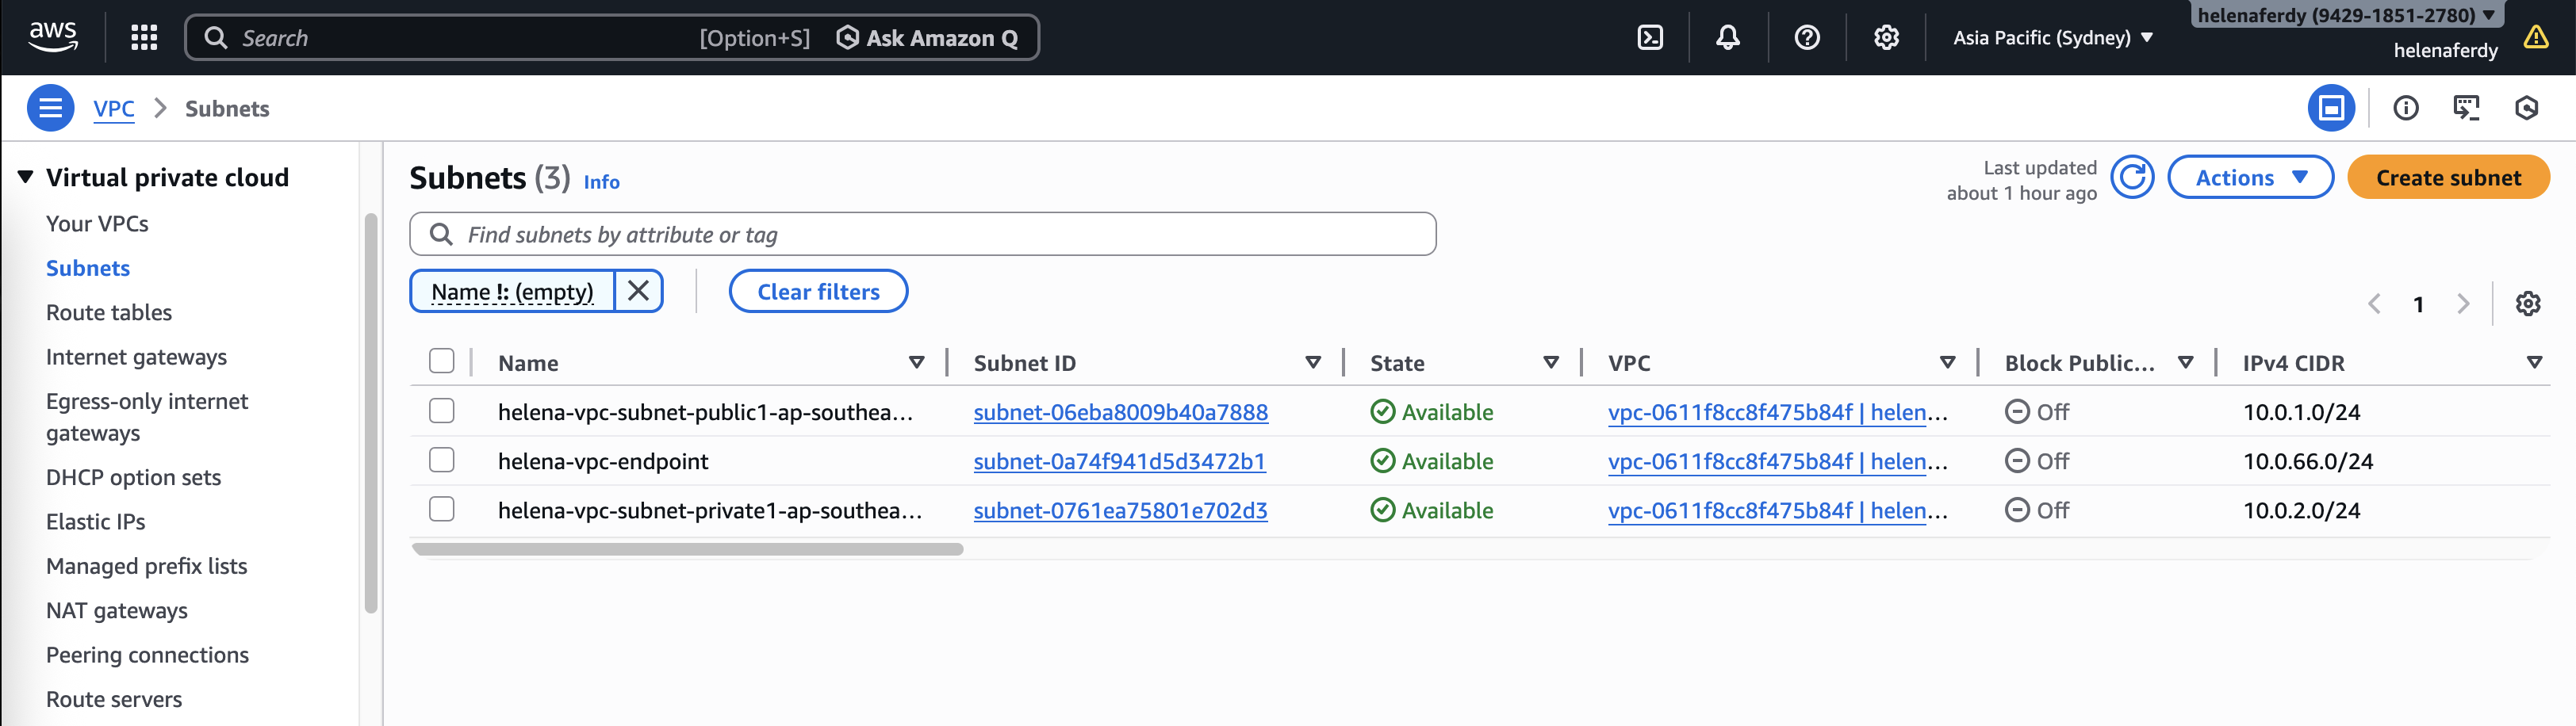
Here we have 2 standalone Fortigates with identical configurations and a single linux vm as the client host. The fortigate has Public and Private subnets but we will only use the private one to act as a single-arm firewall to the GWLB.
Private is the subnet we use to communicate between all nodes here while Public is only used for FGT management, and we also added an Endpoint Subnet for Geneve Tunnel communication between GWLB and FGT
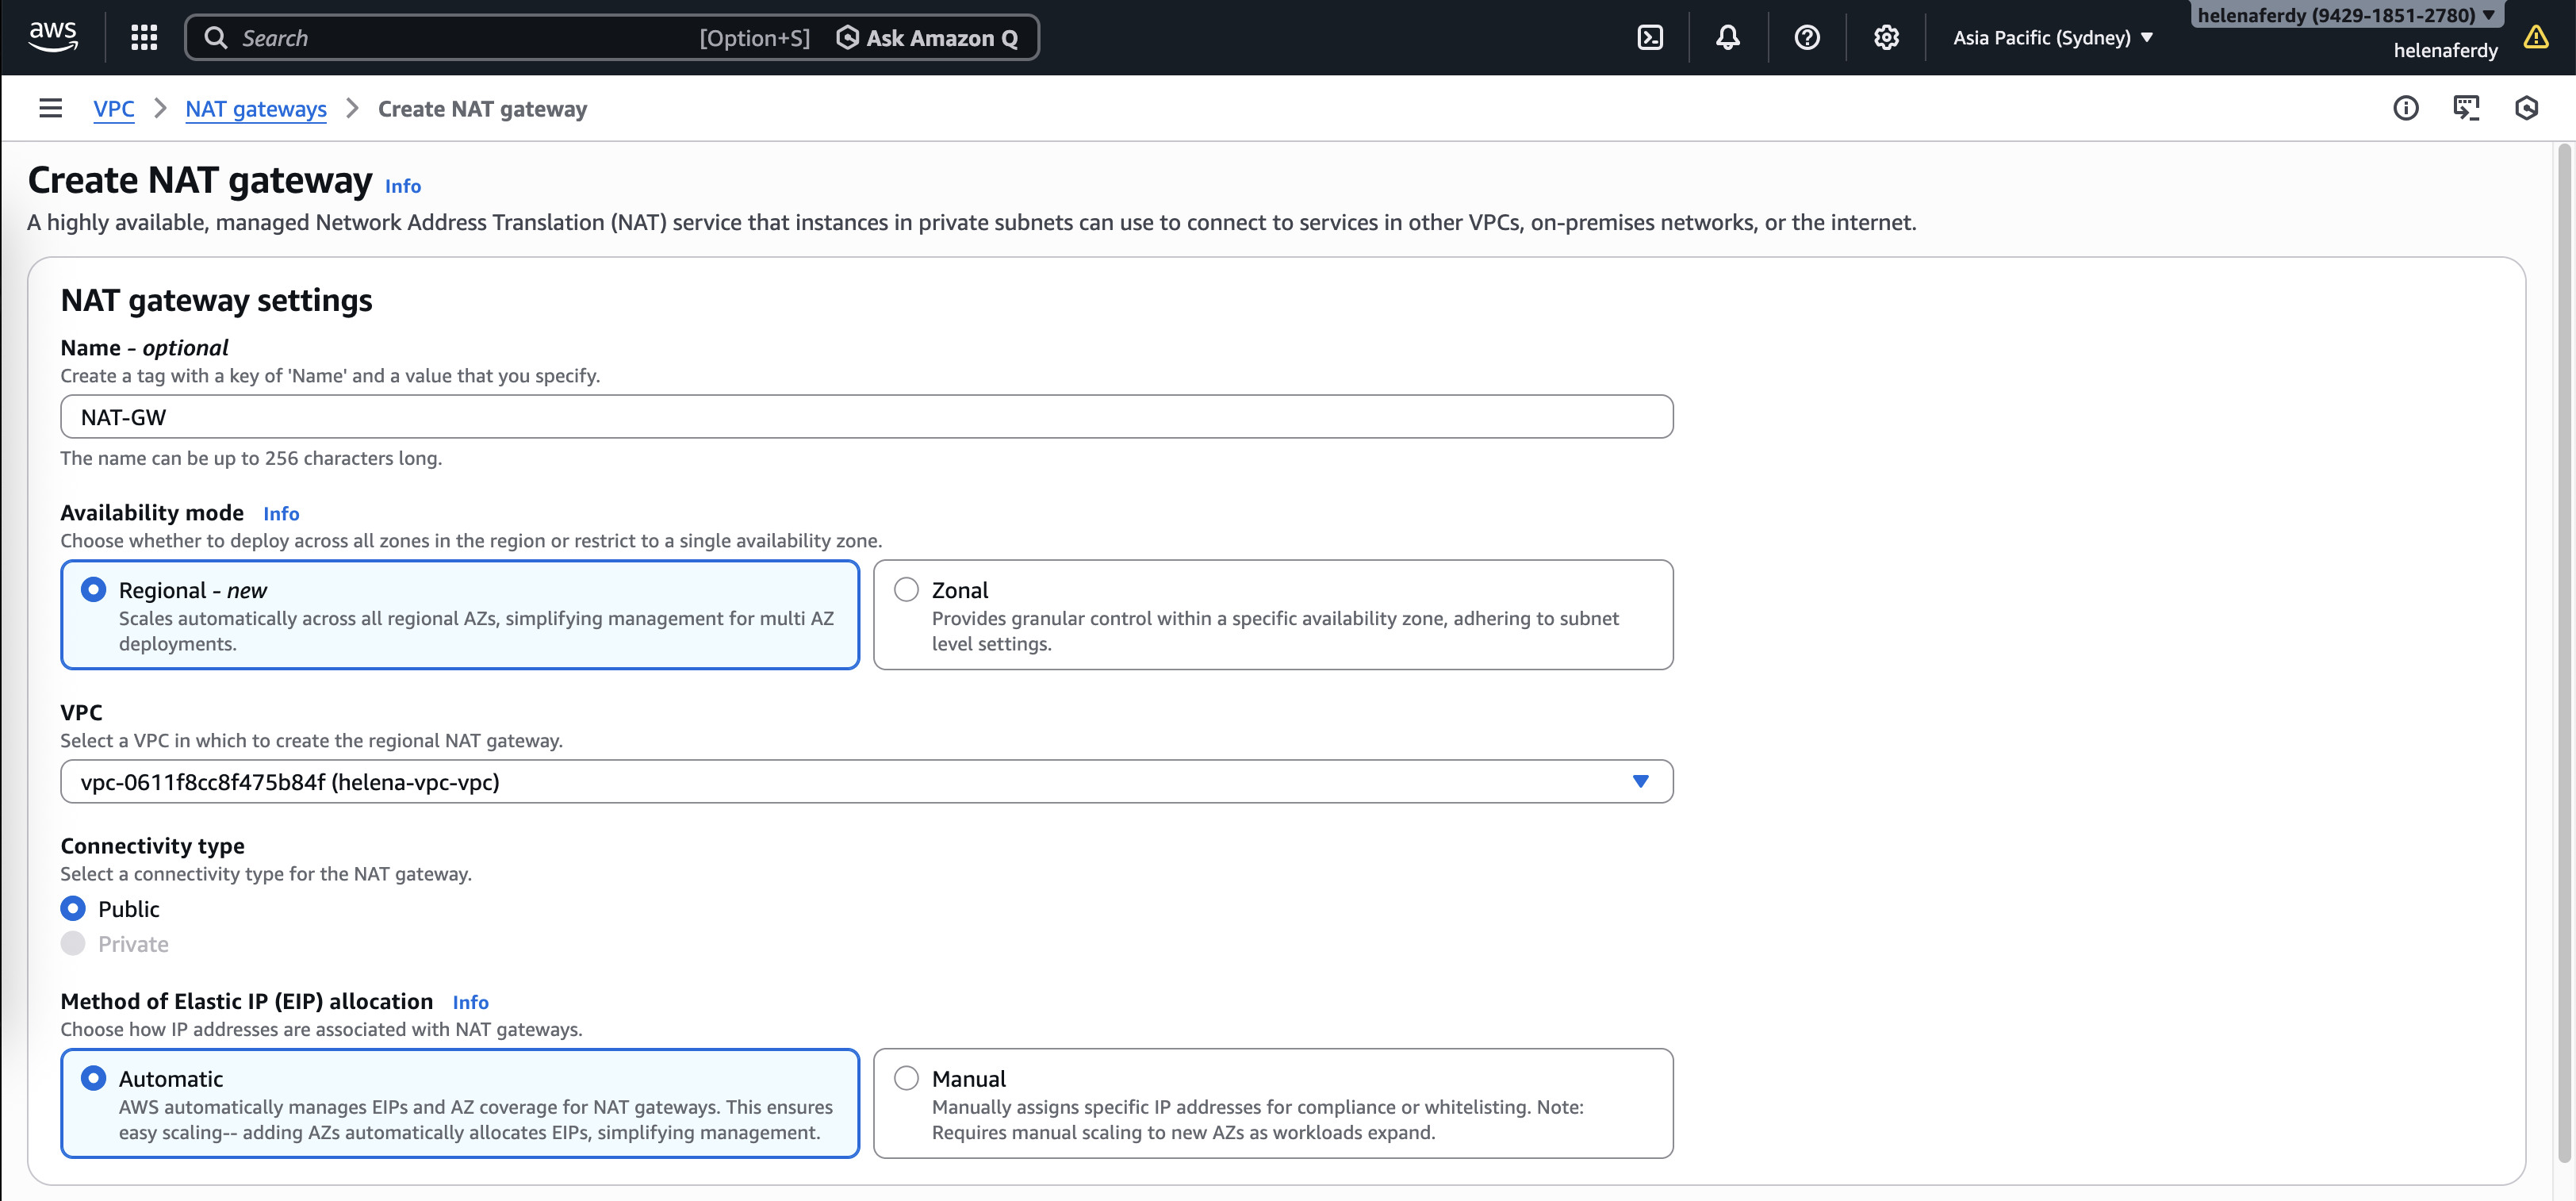
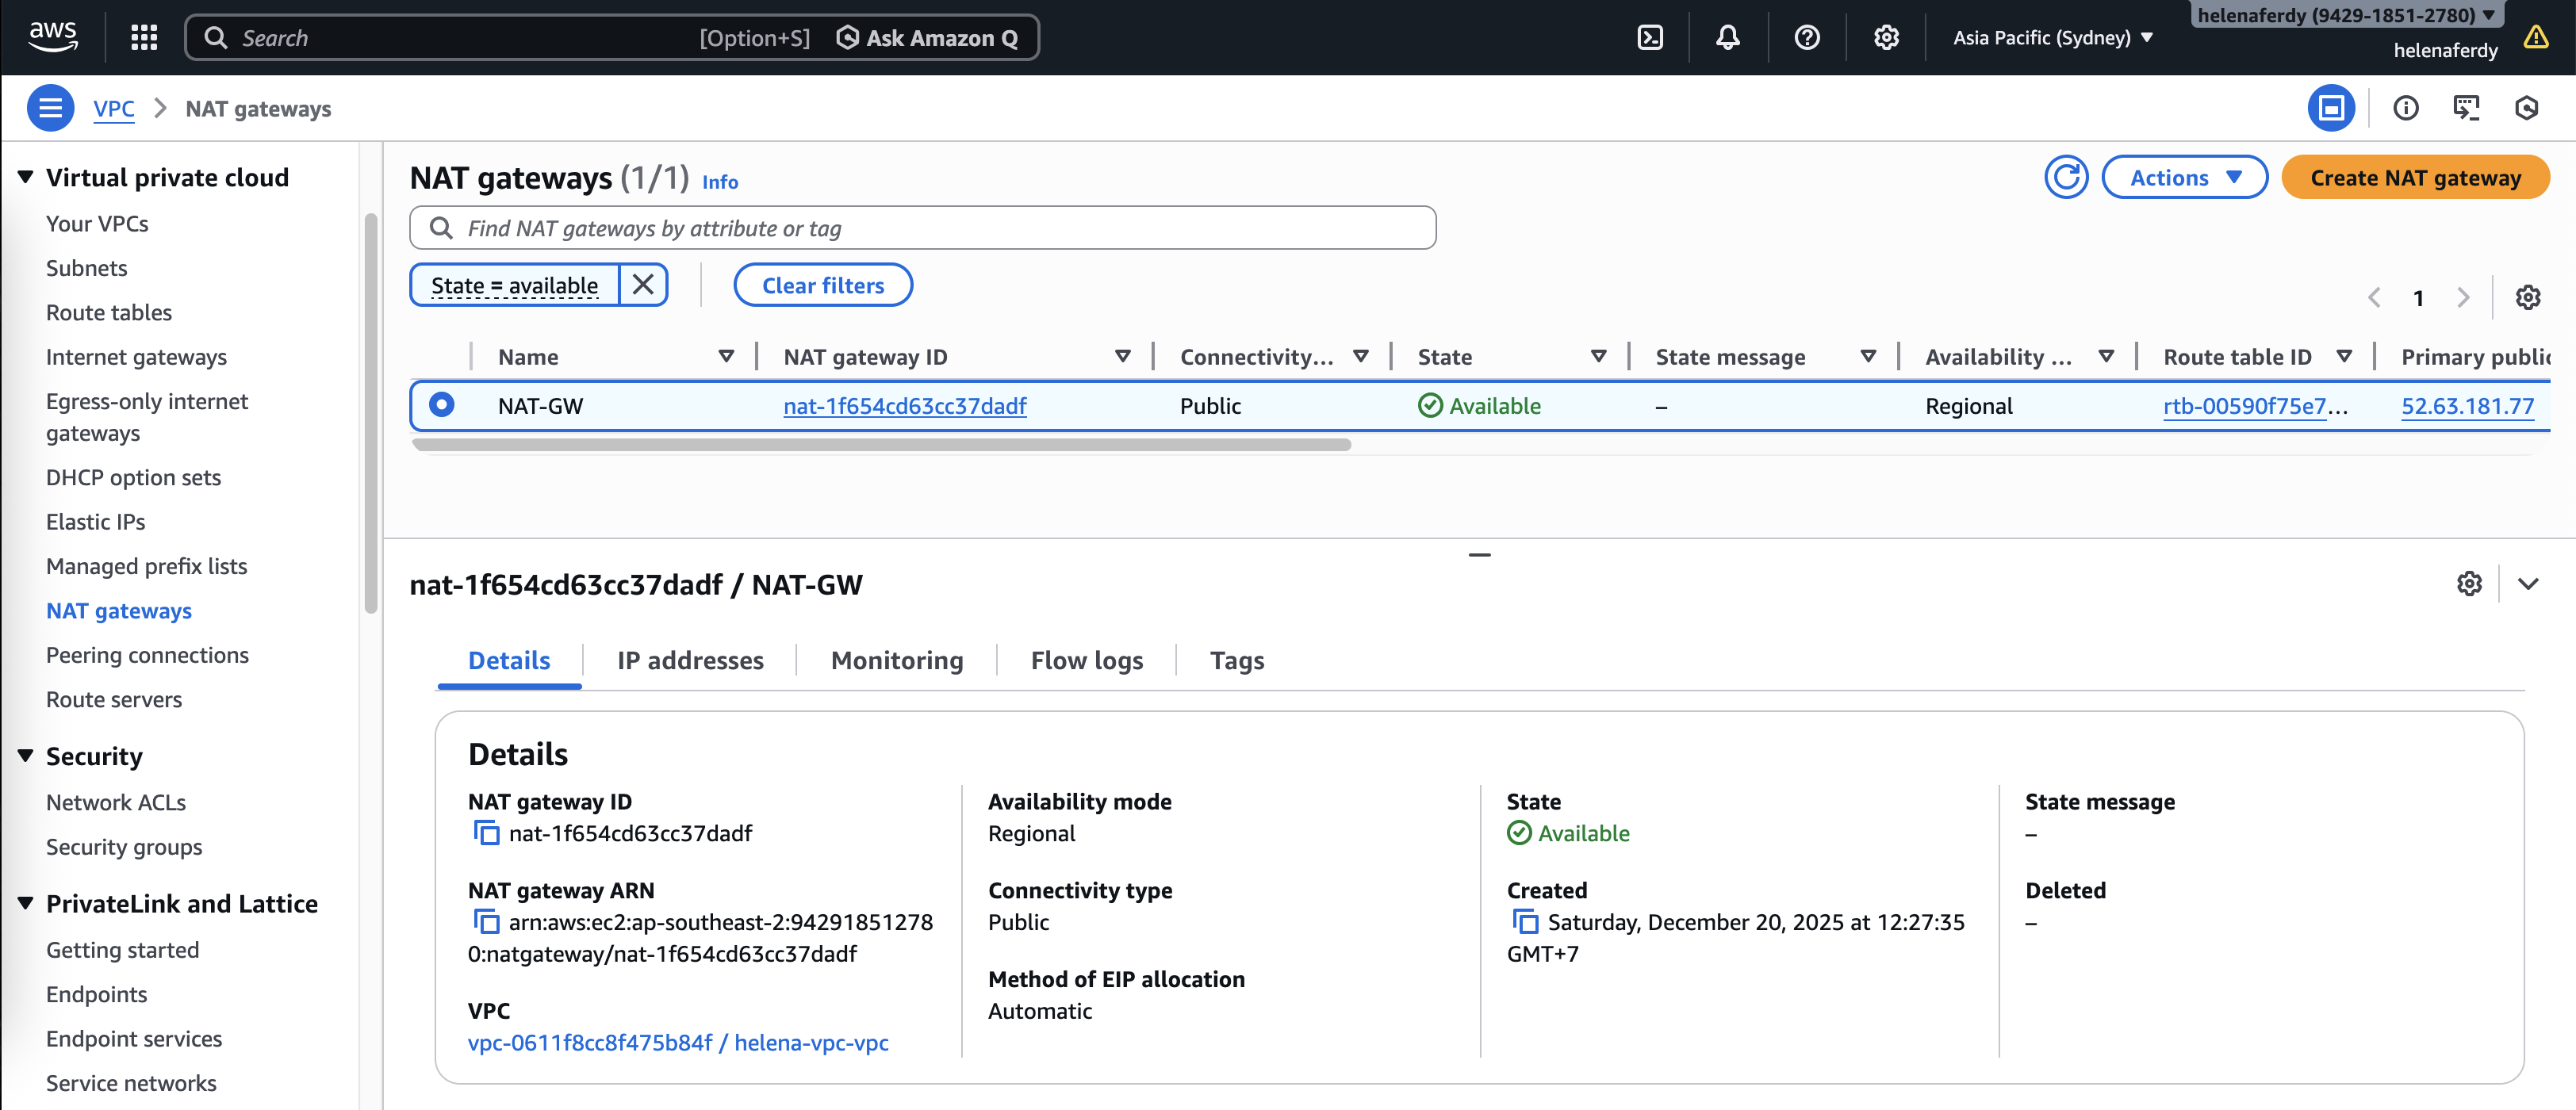
NAT Gateway
Because the FGT no longer handles NAT operation, we need to add NAT Gateway that’ll be used by GWLB for internet access.
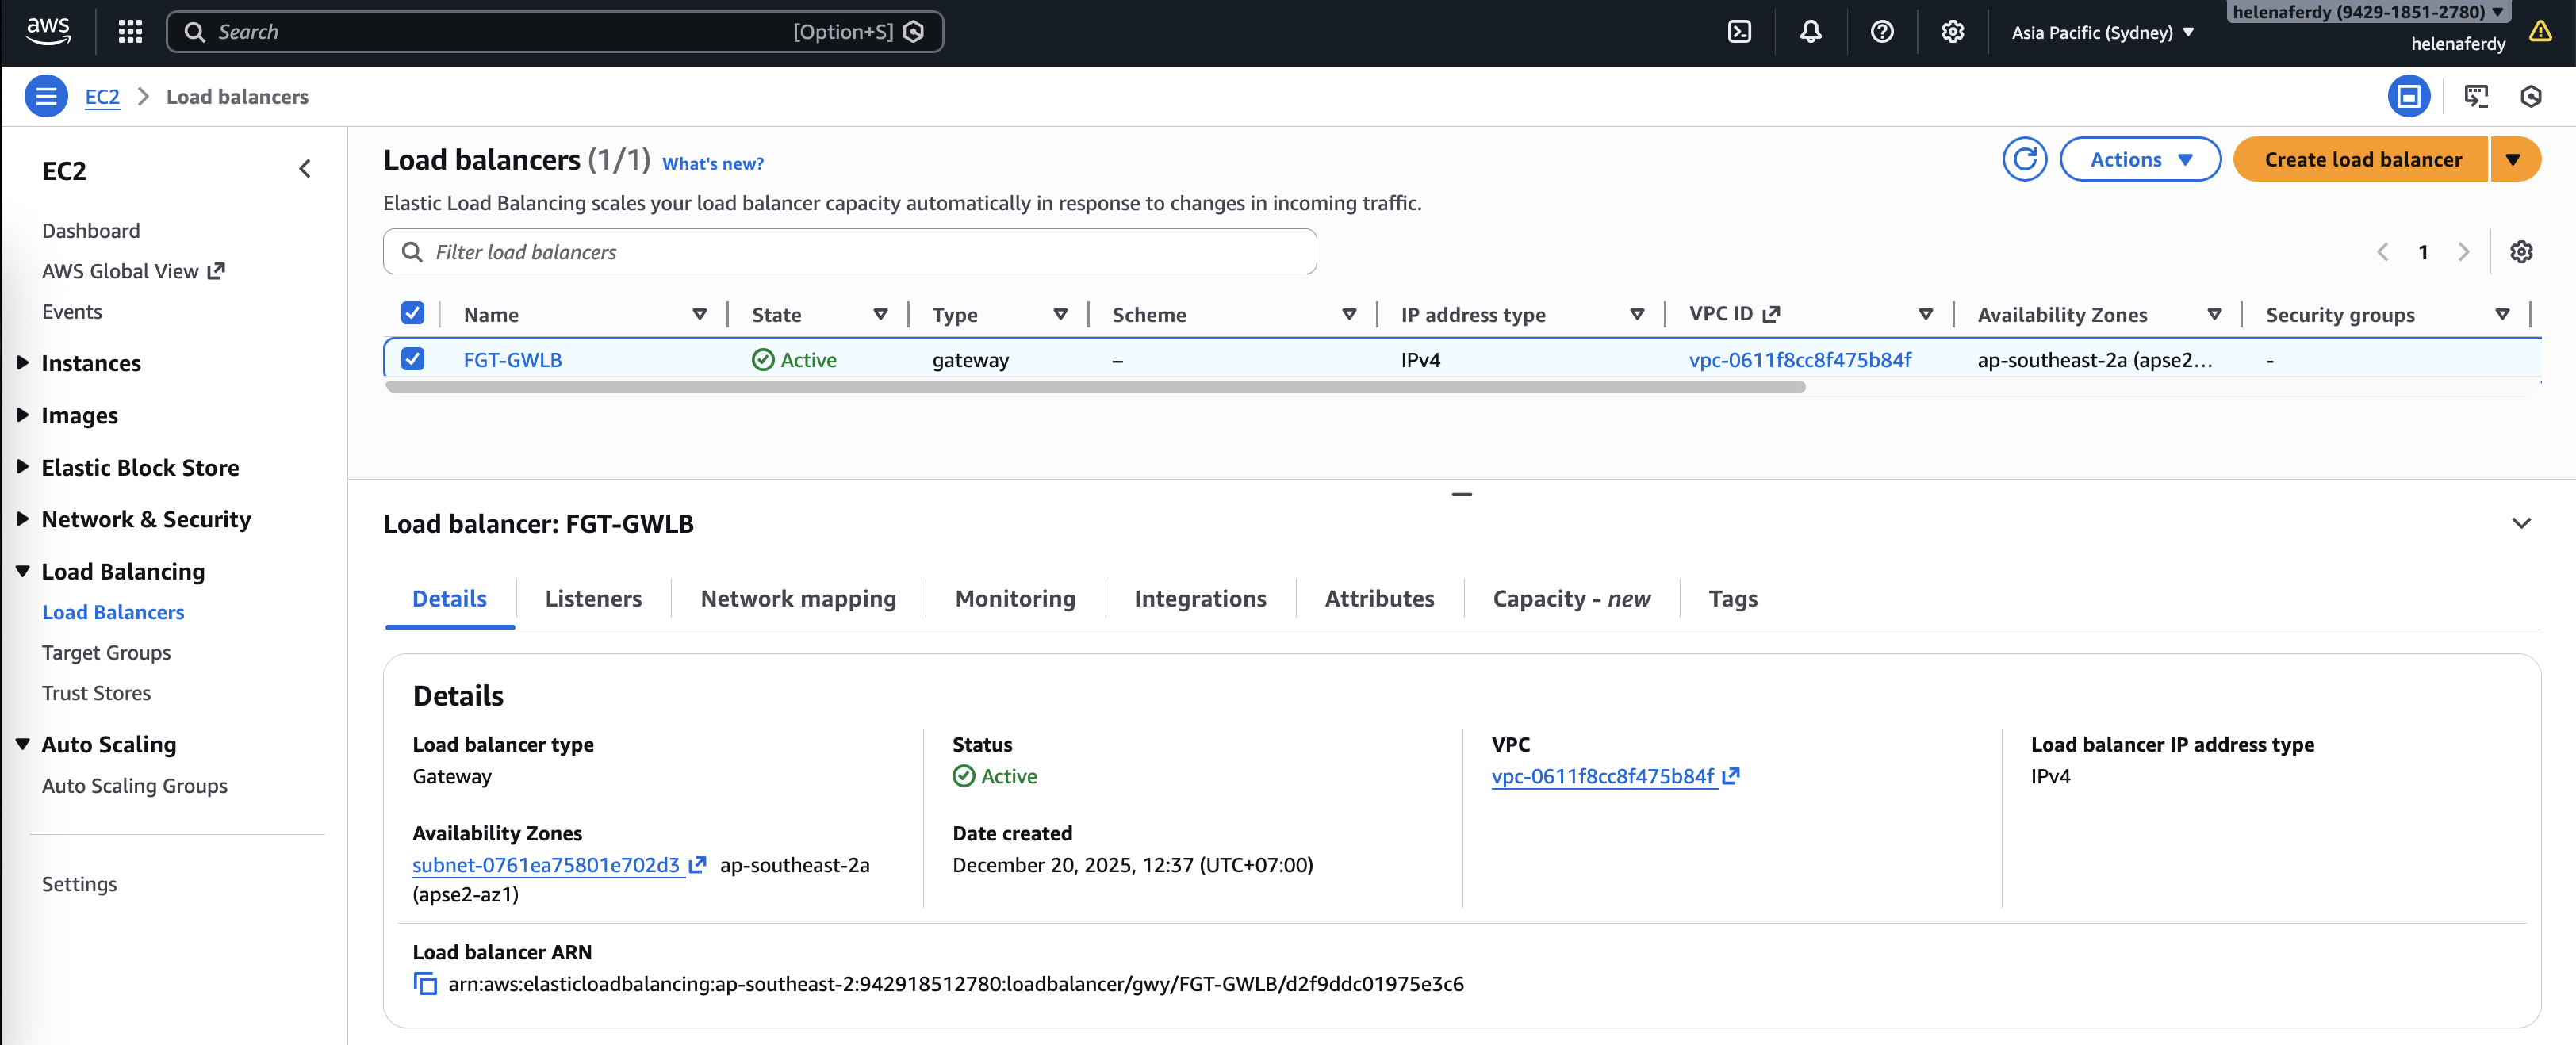
GWLB
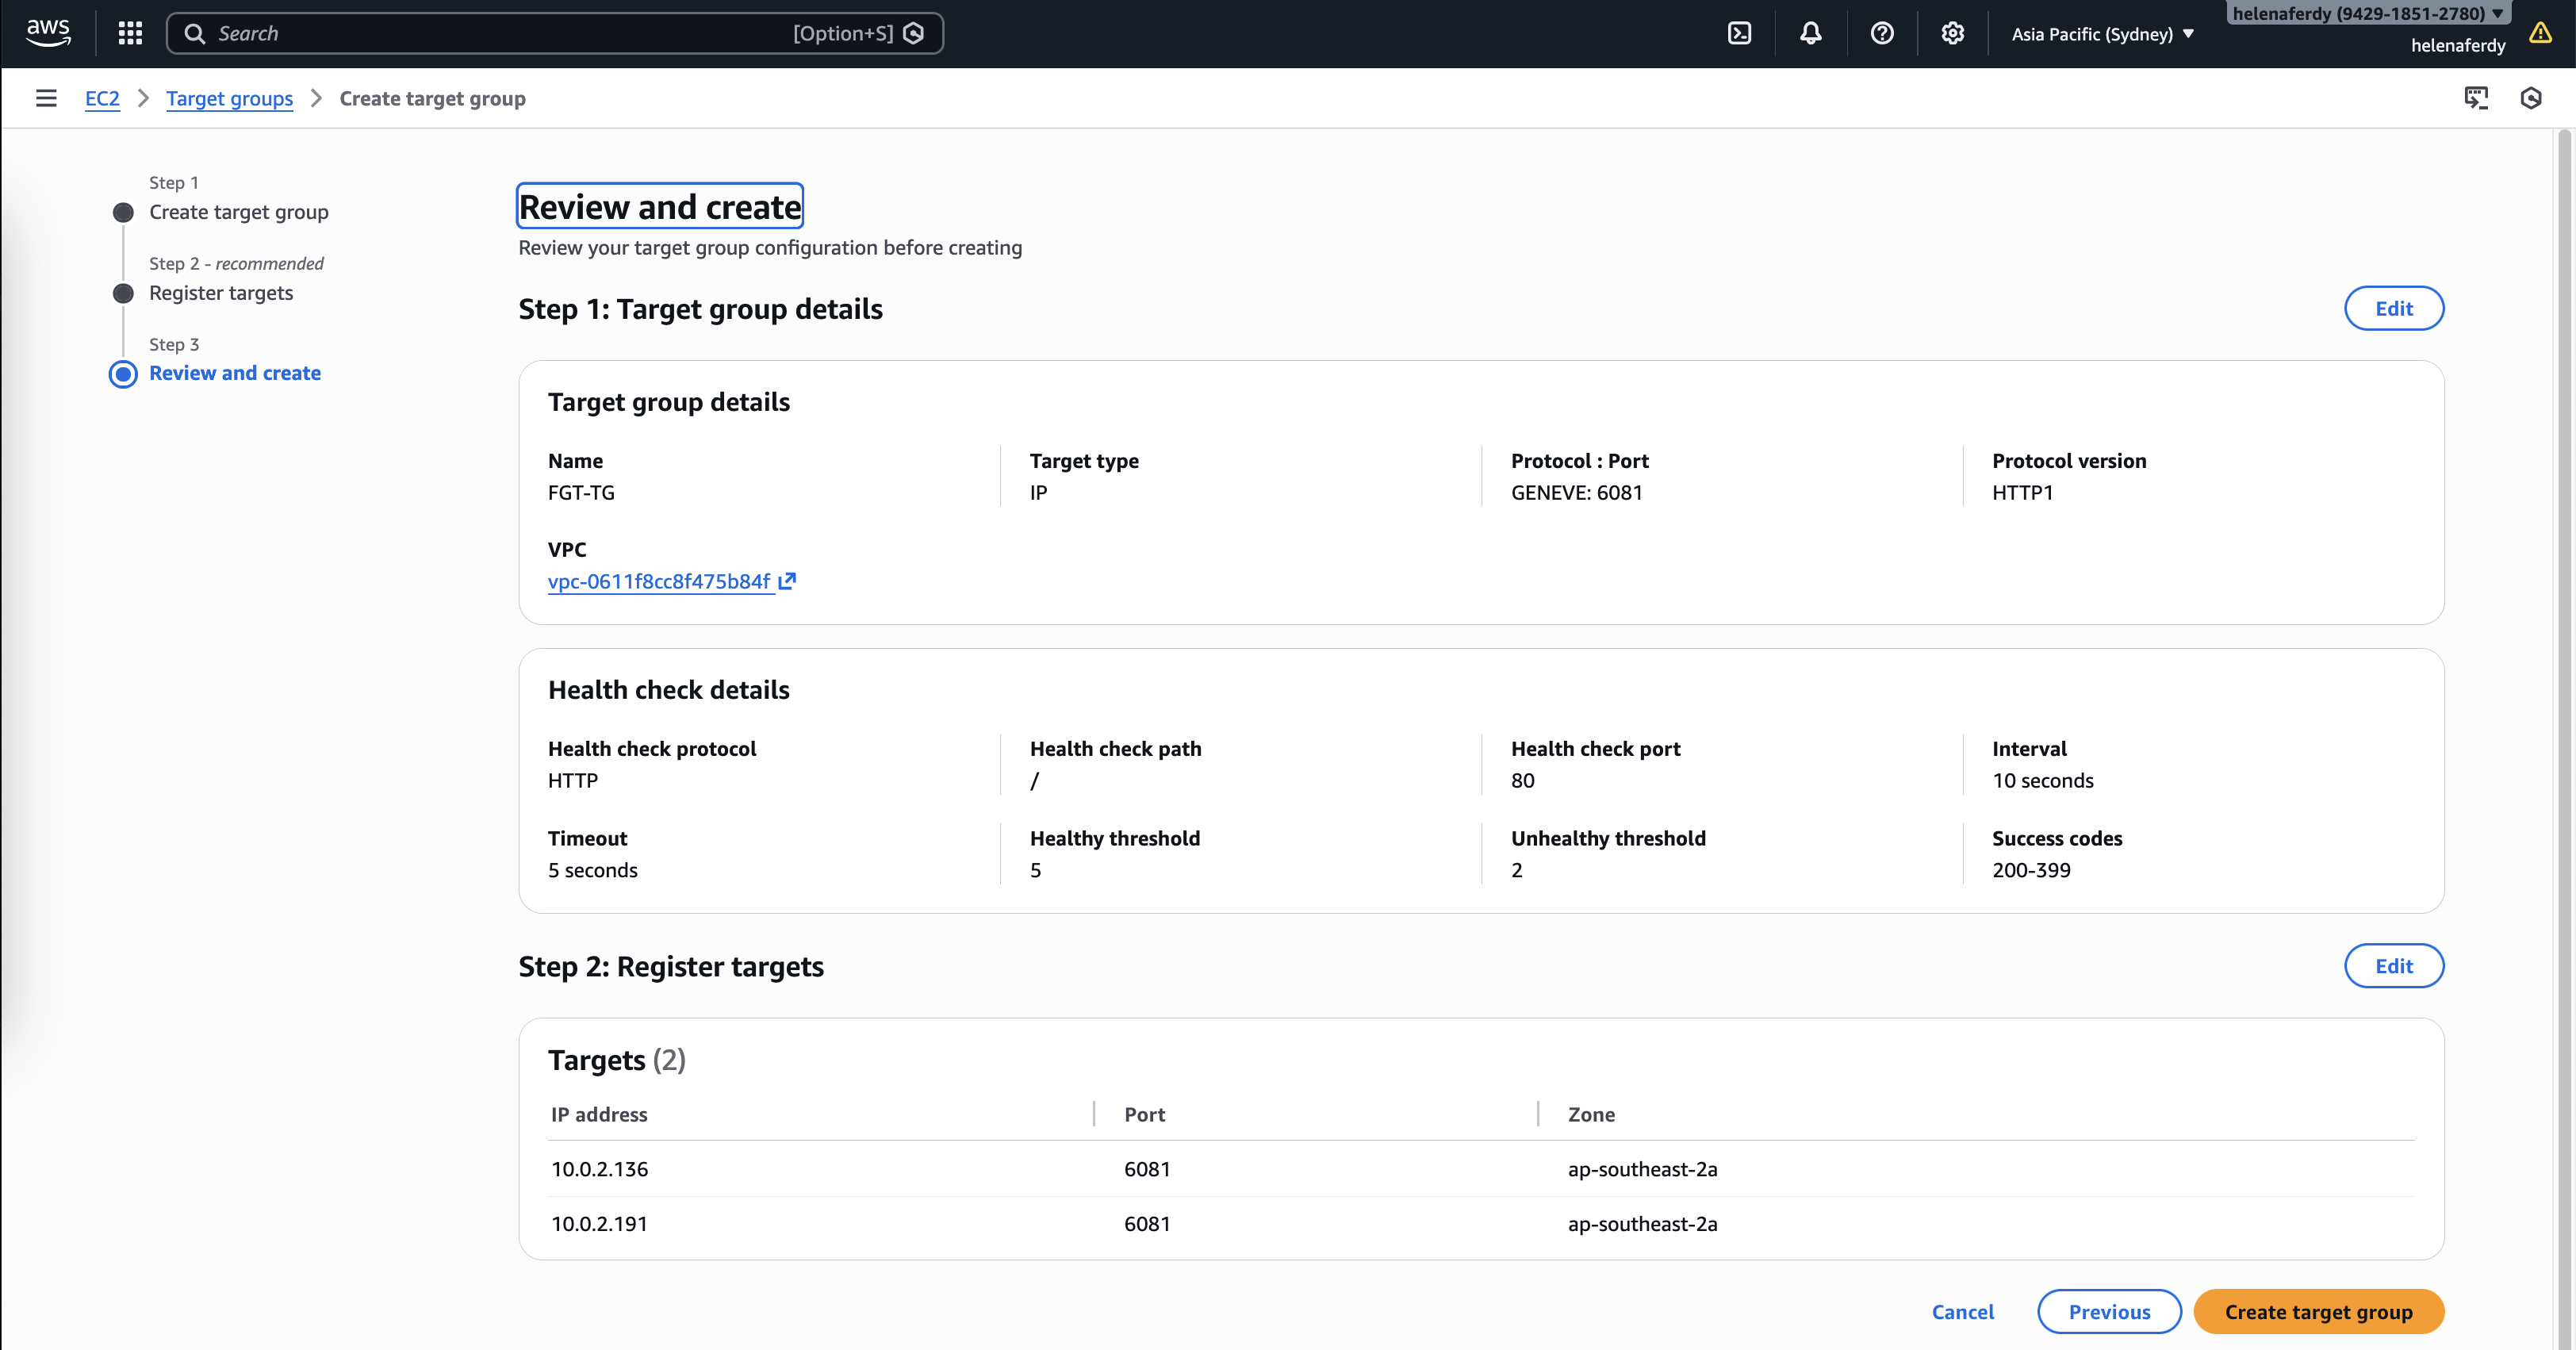
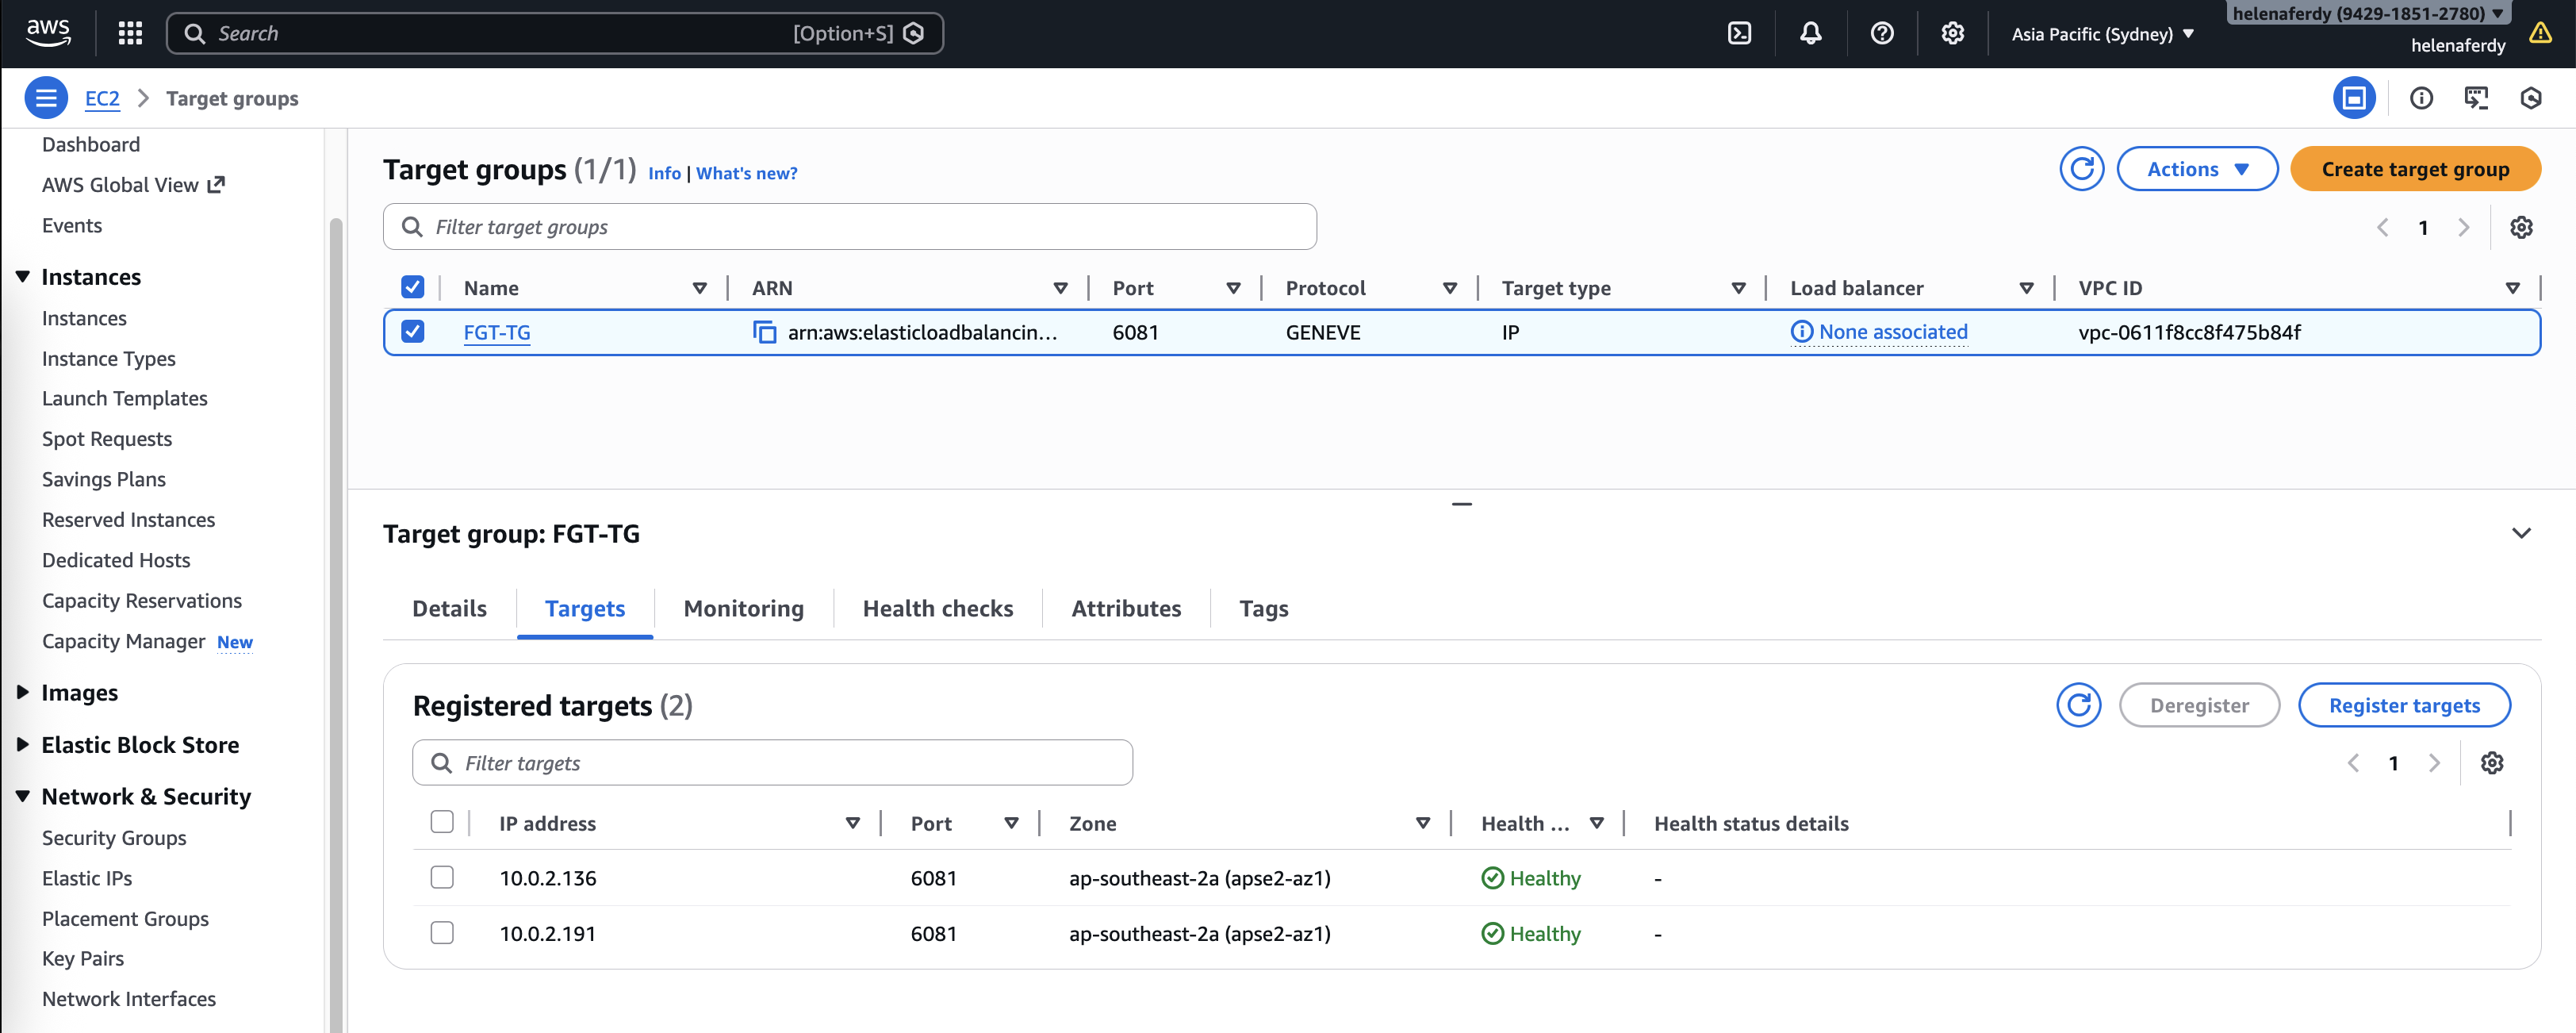
Next we’ll create a Target Group, here we select IP Address with protocol GENEVE
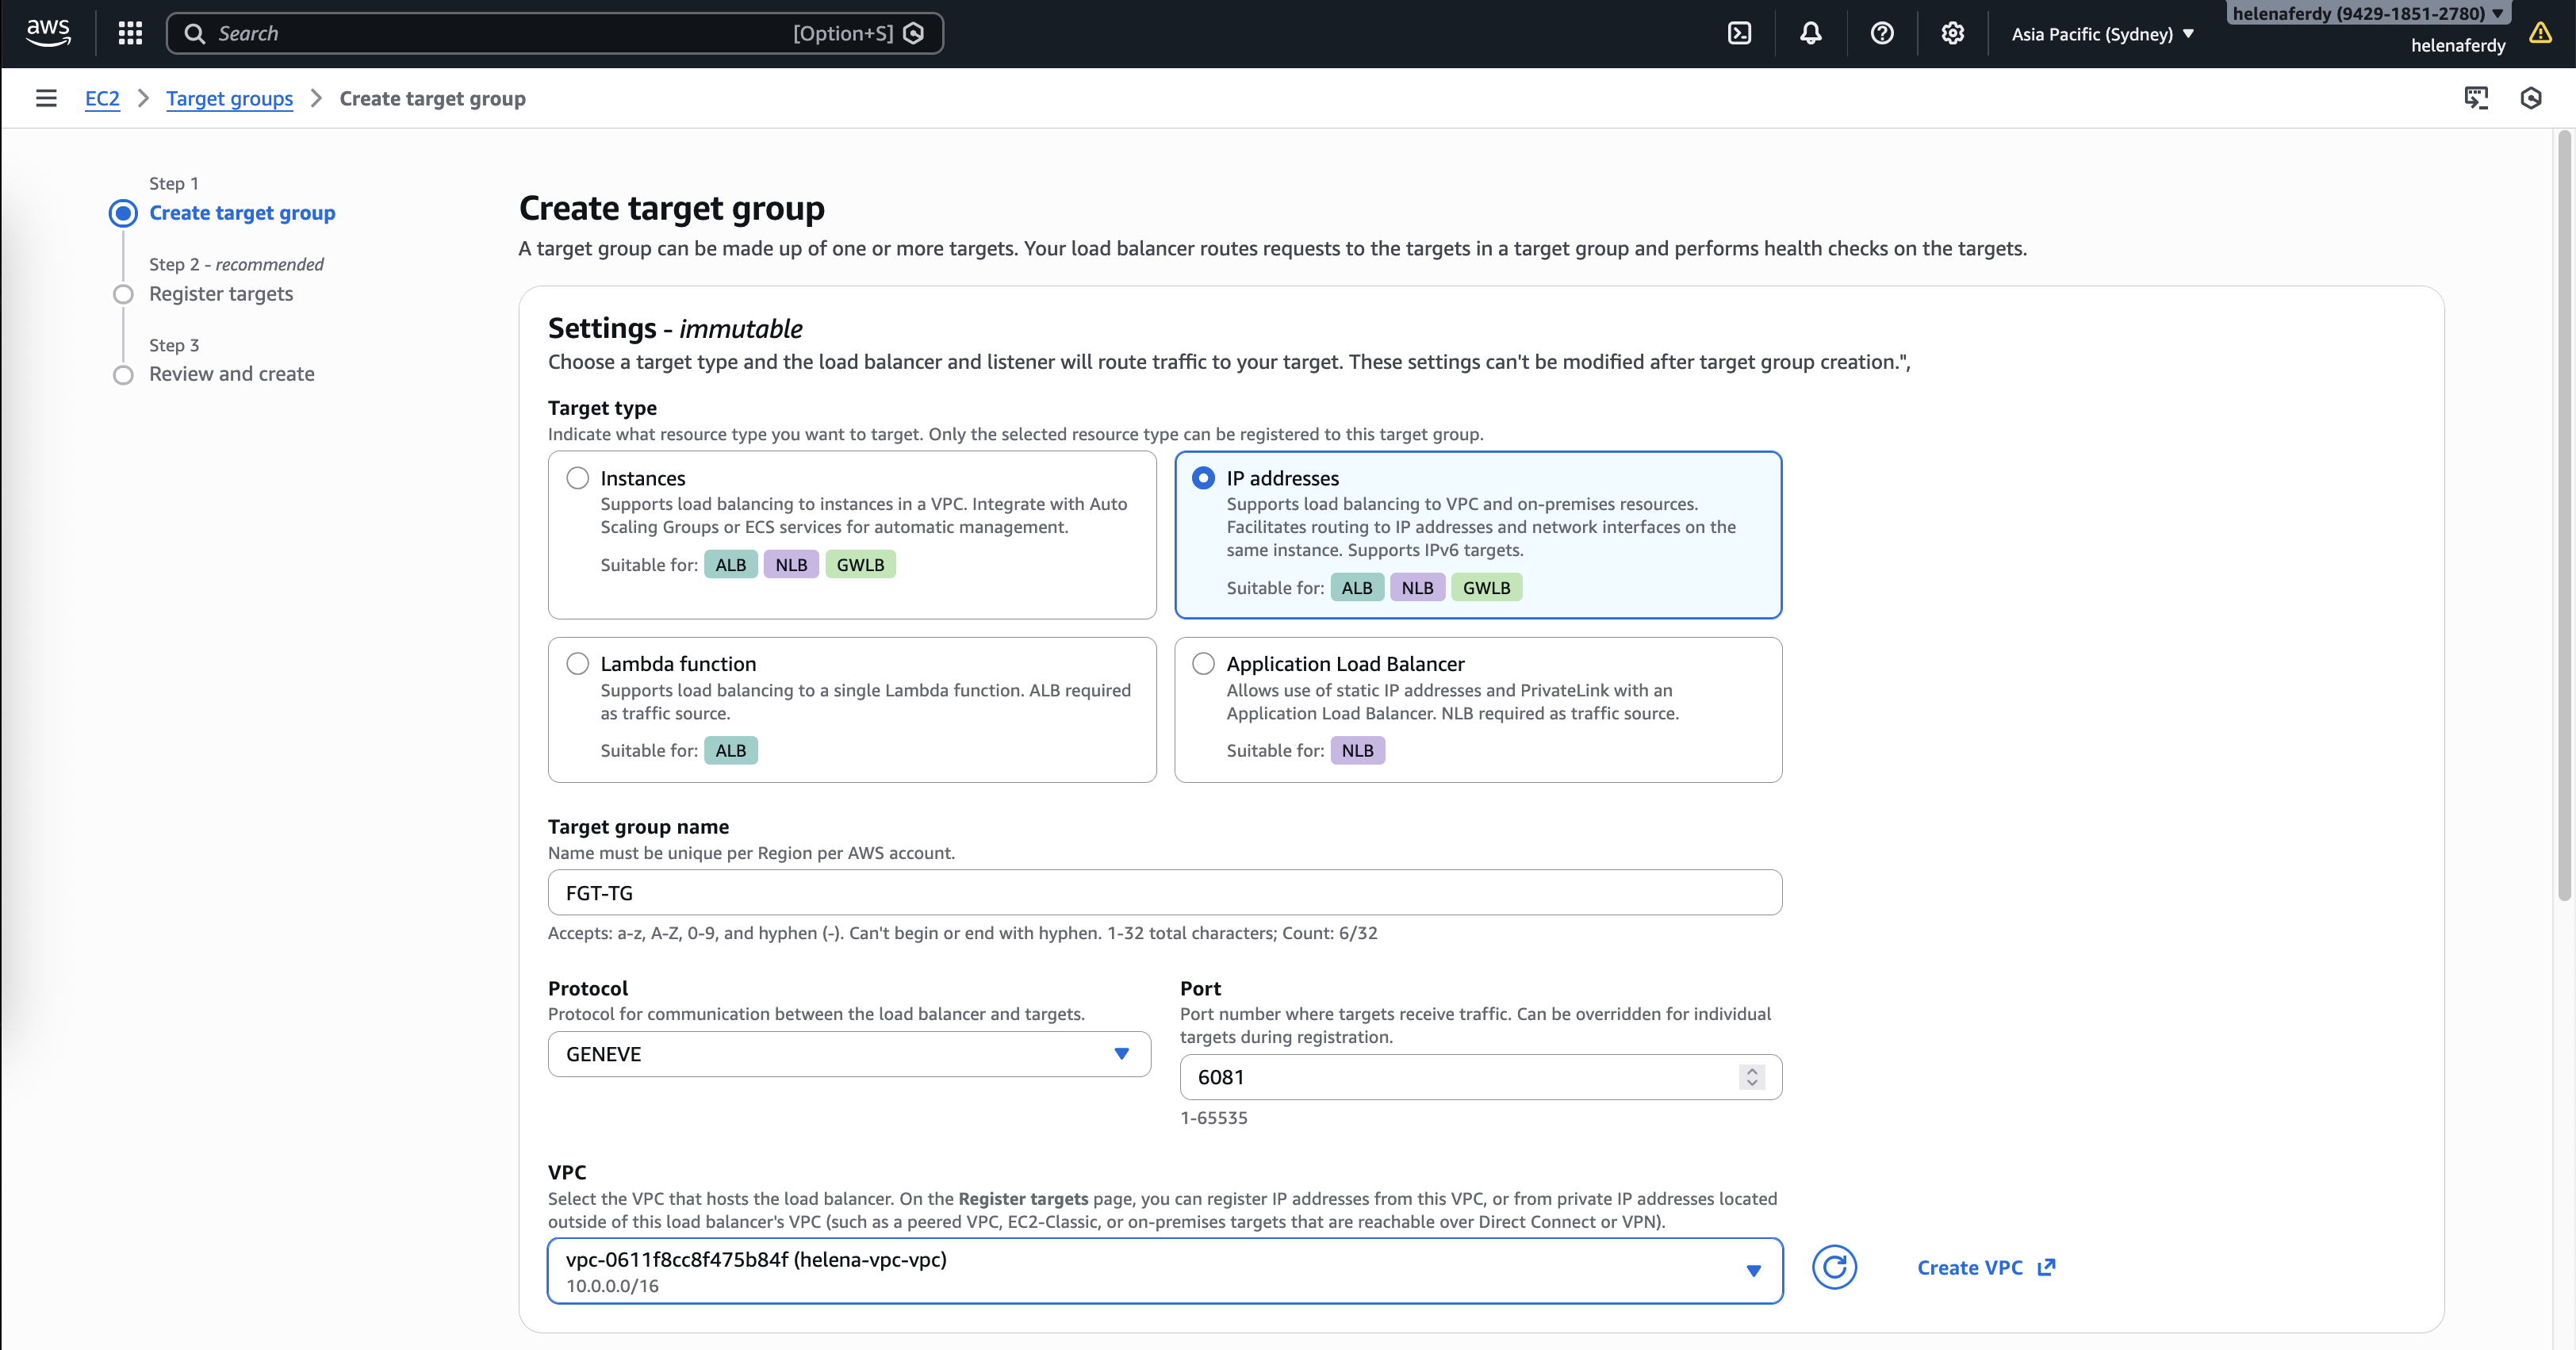
GENEVE (Generic Network Virtualization Encapsulation) is a tunneling protocol that wraps original packets inside a UDP header (port 6081), allowing the Gateway Load Balancer to ship traffic to the firewall without altering source or destination IPs. This enables “transparent inspection,” where the FortiGate sees and secures the real traffic flow while remaining completely invisible to our applications and routing tables.
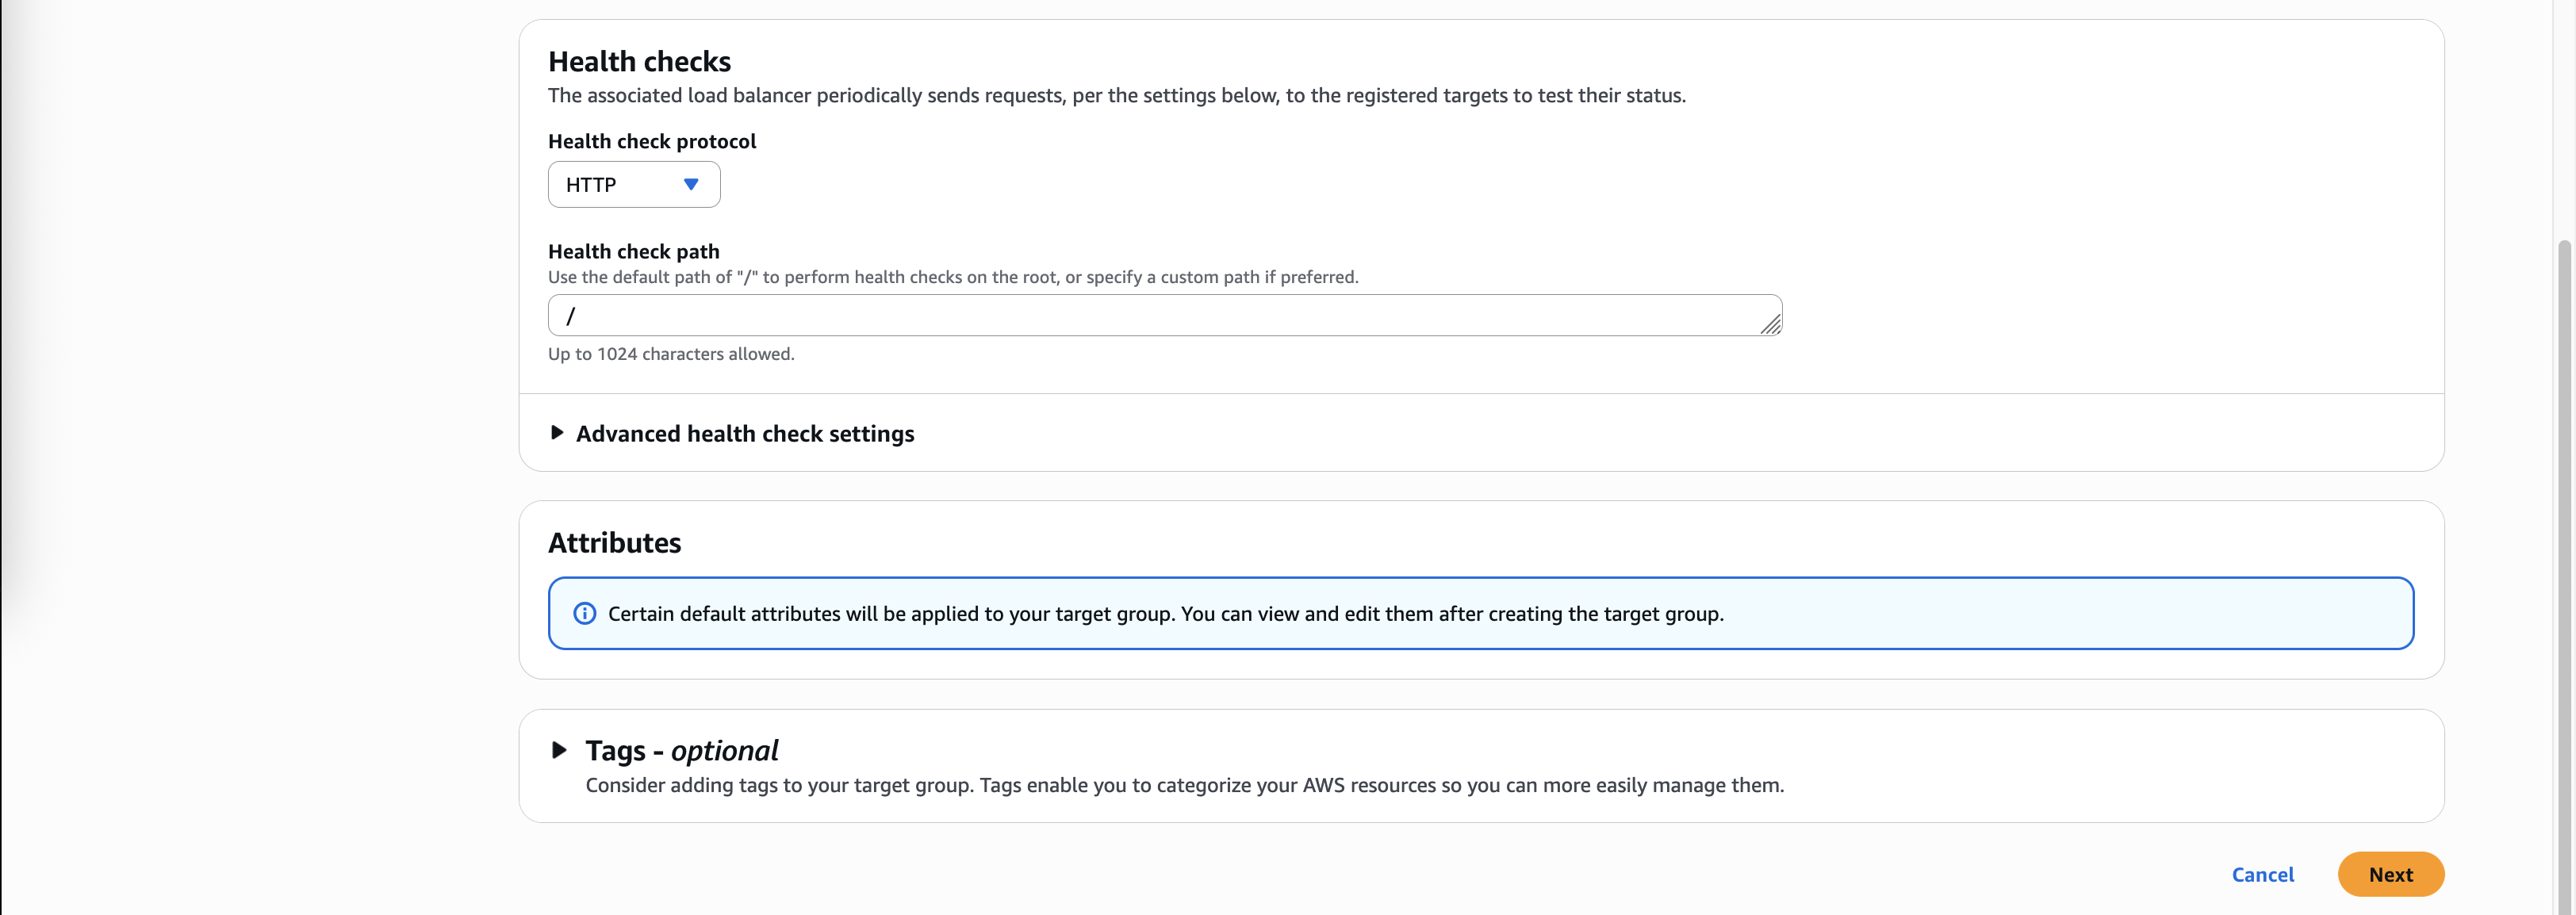
For health check we will use a simple HTTP check so Target Group knows whether FGT is up or not
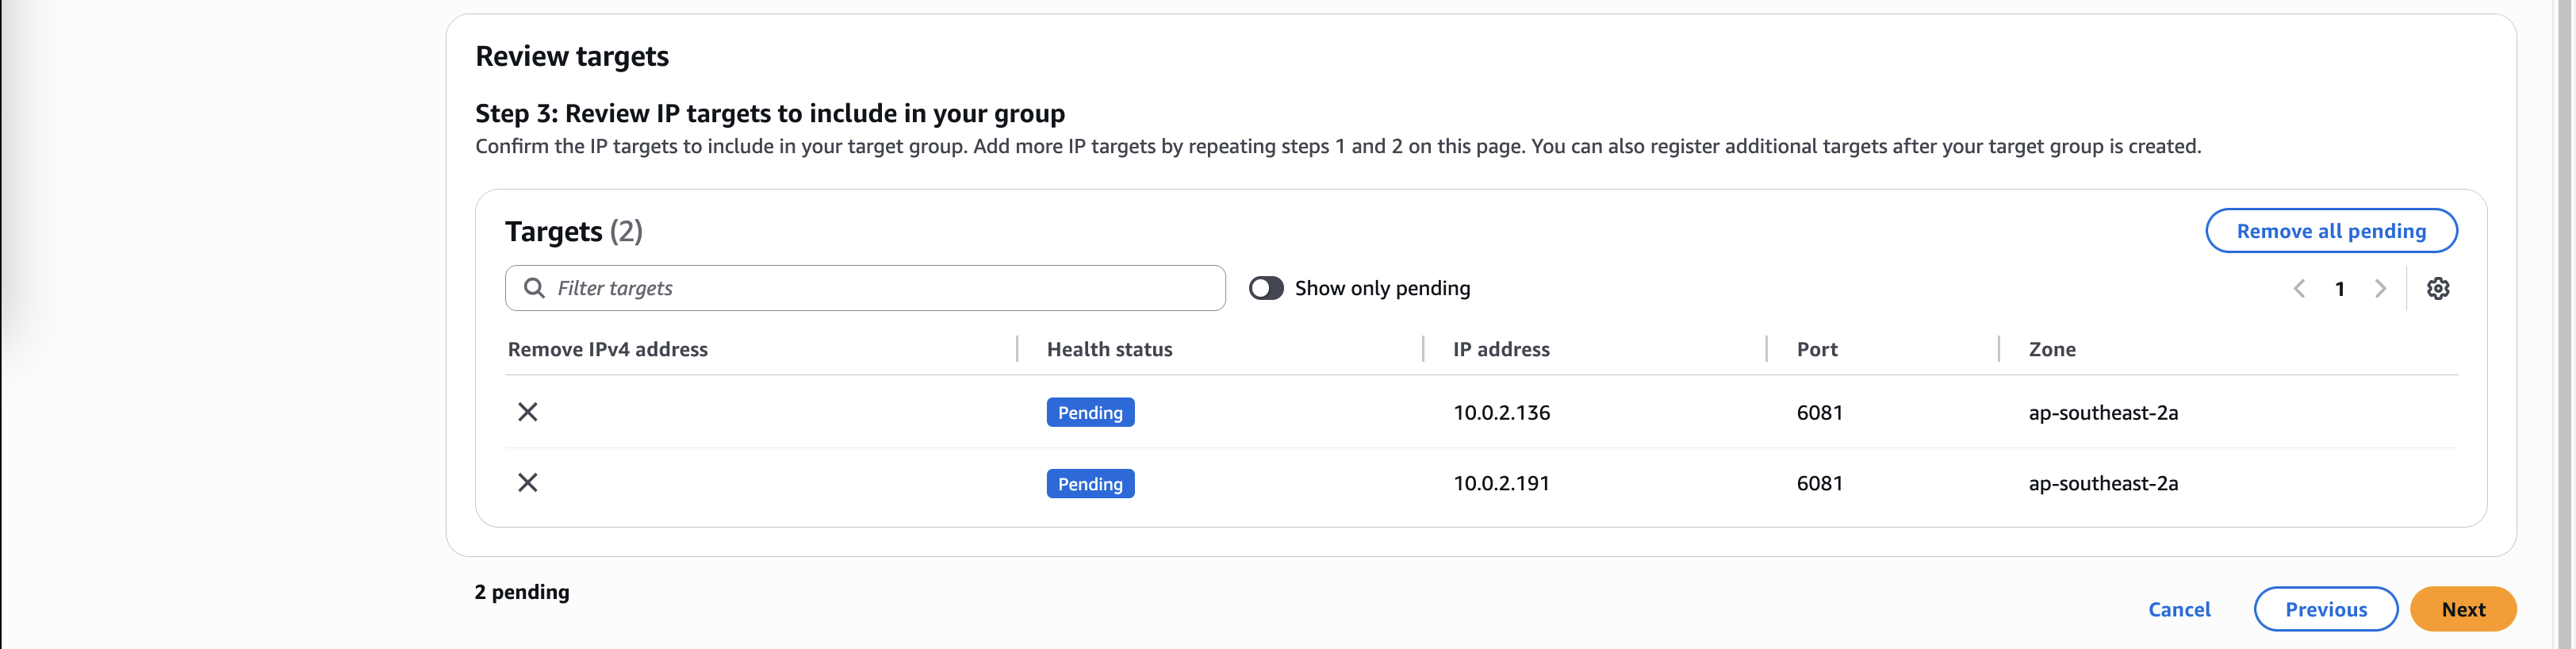
Then we add both FGT Private IP Addresses as the targets
Review and create
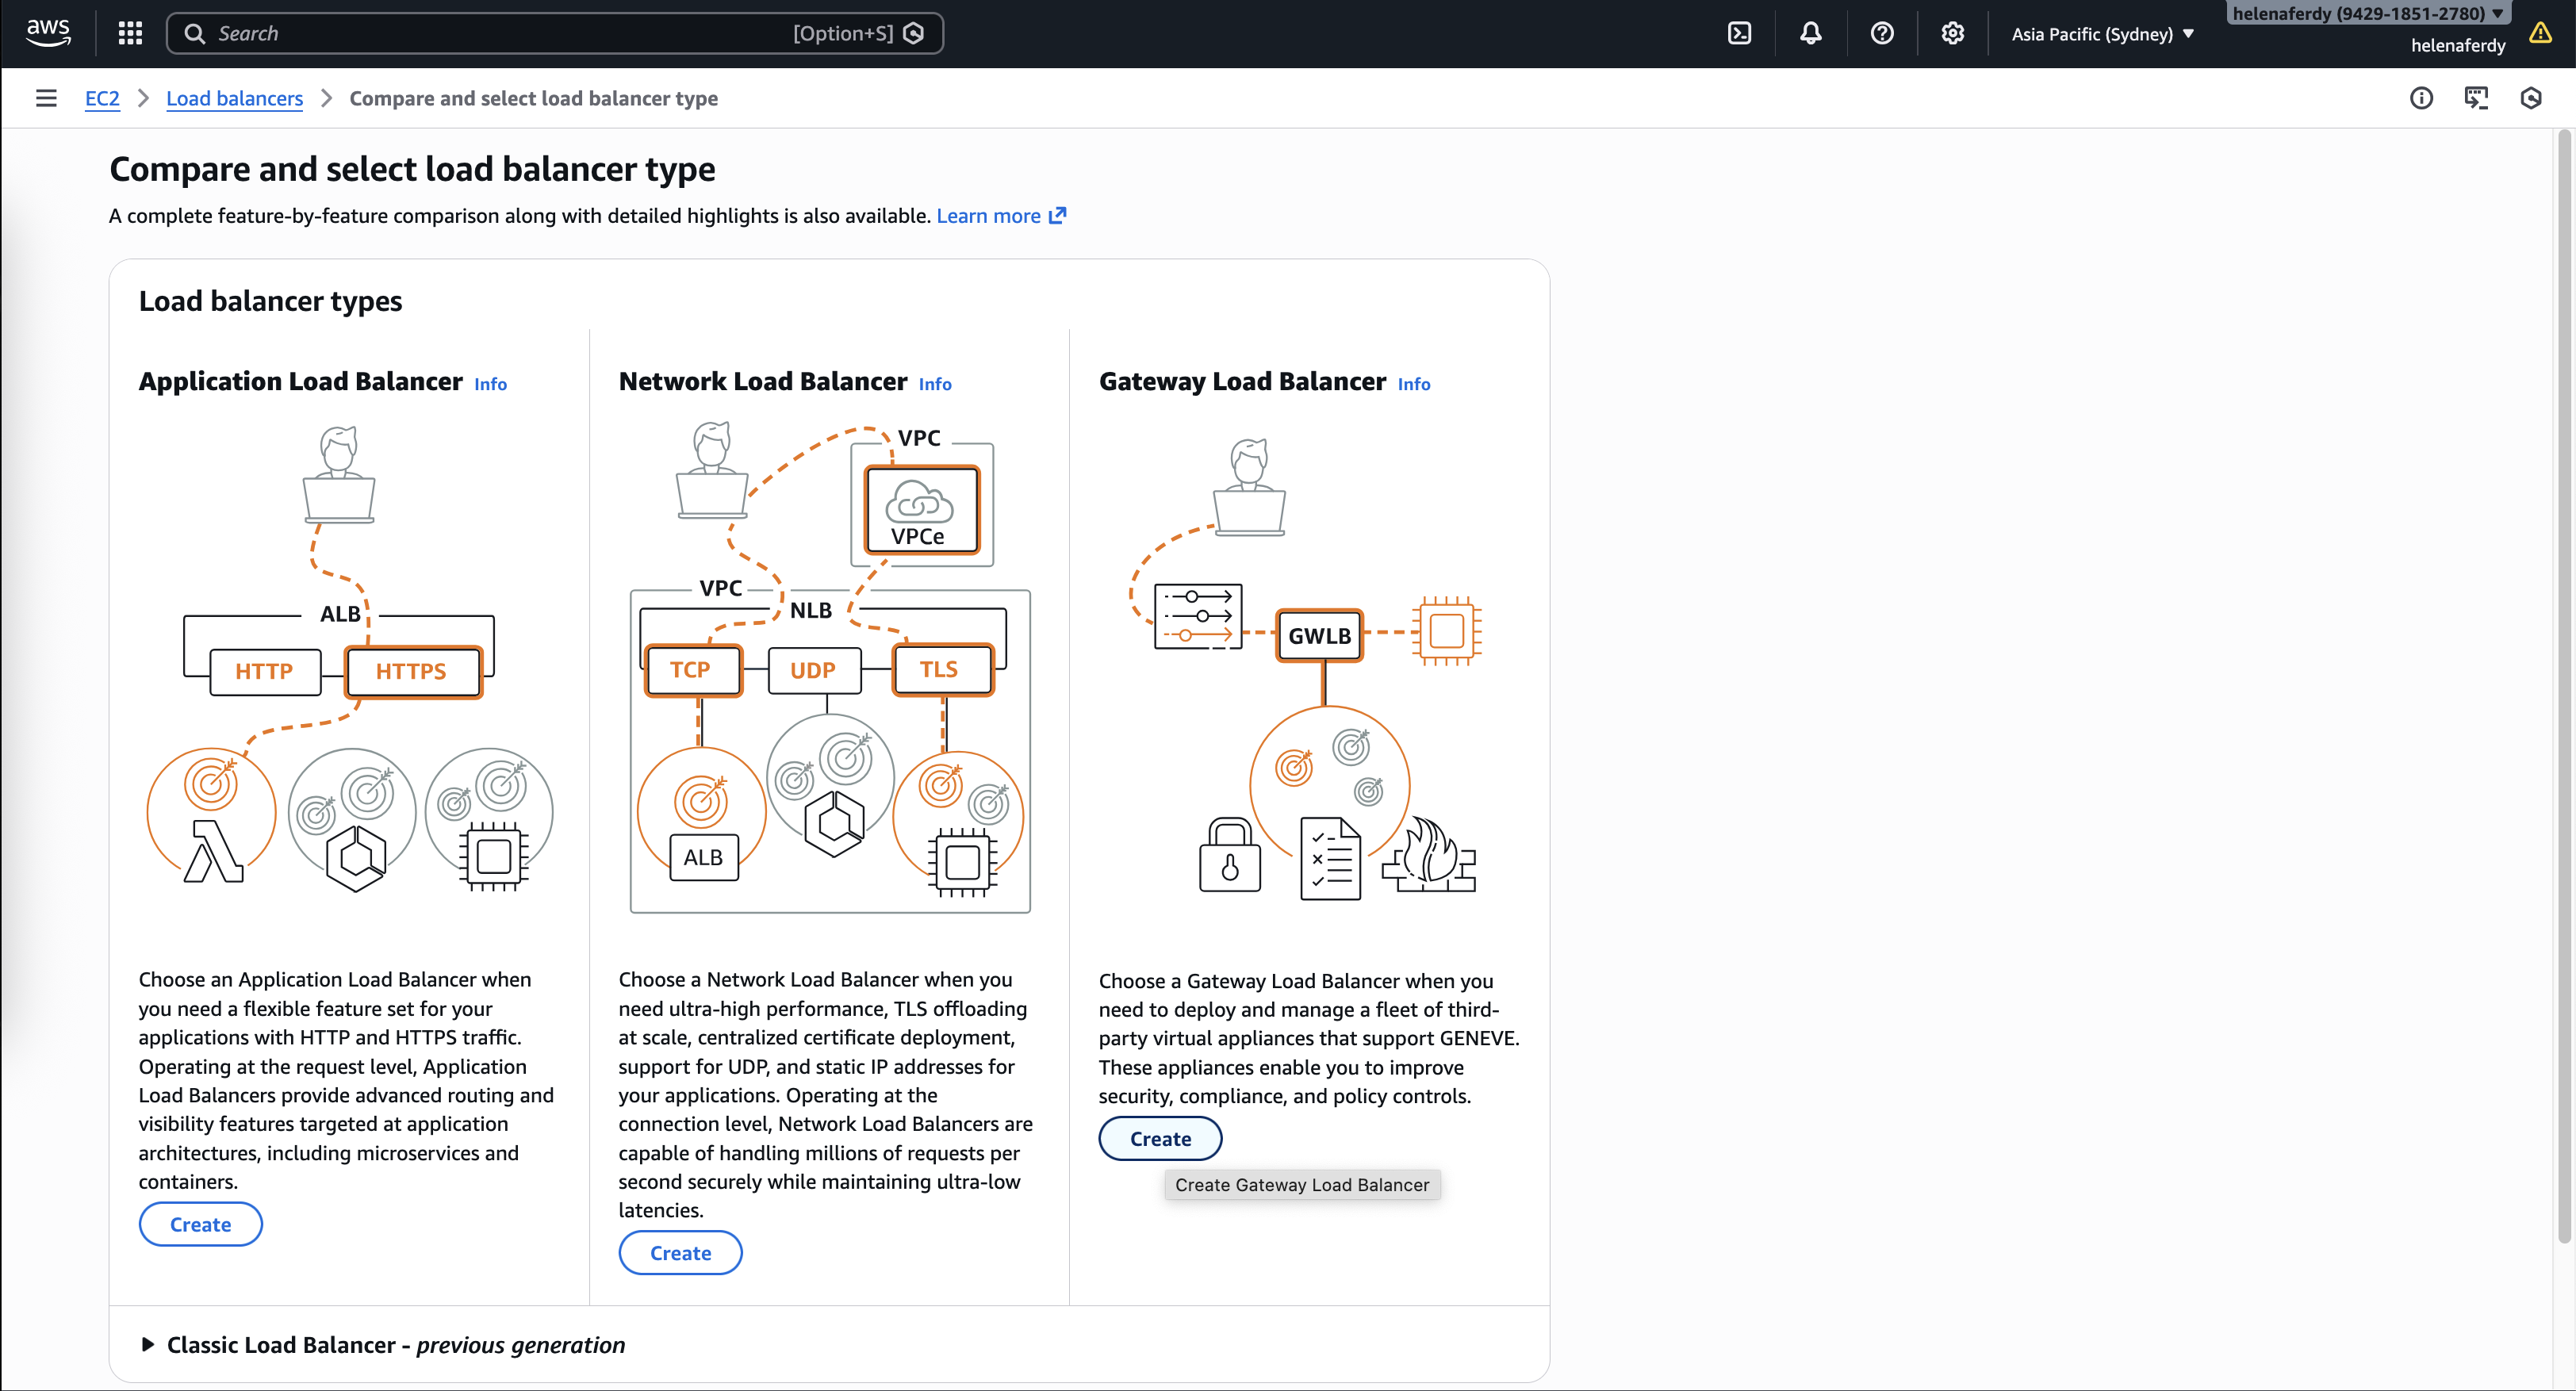
Next we create the Gateway Load Balancer
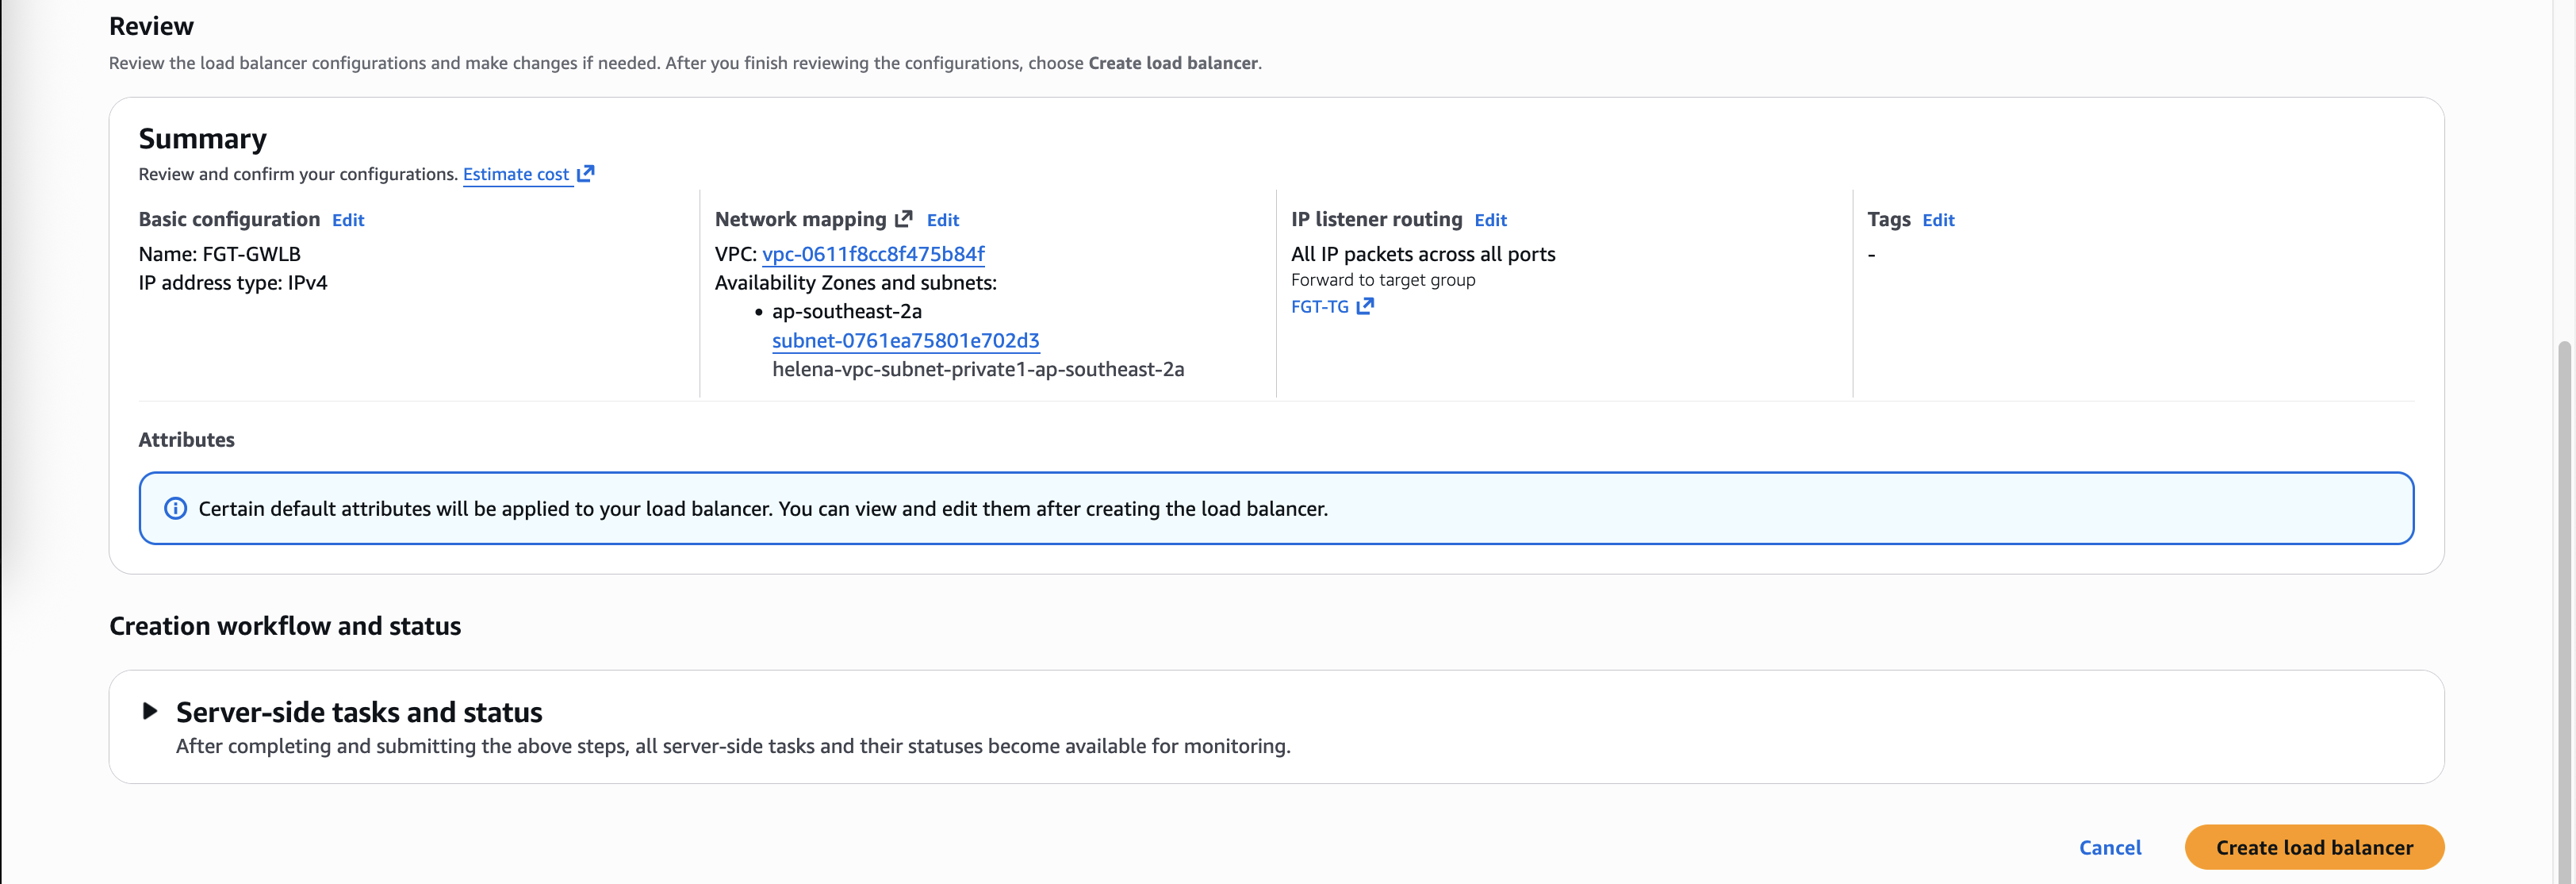
We map this GWLB to the private subnet and route it to the Target Group

Review and create
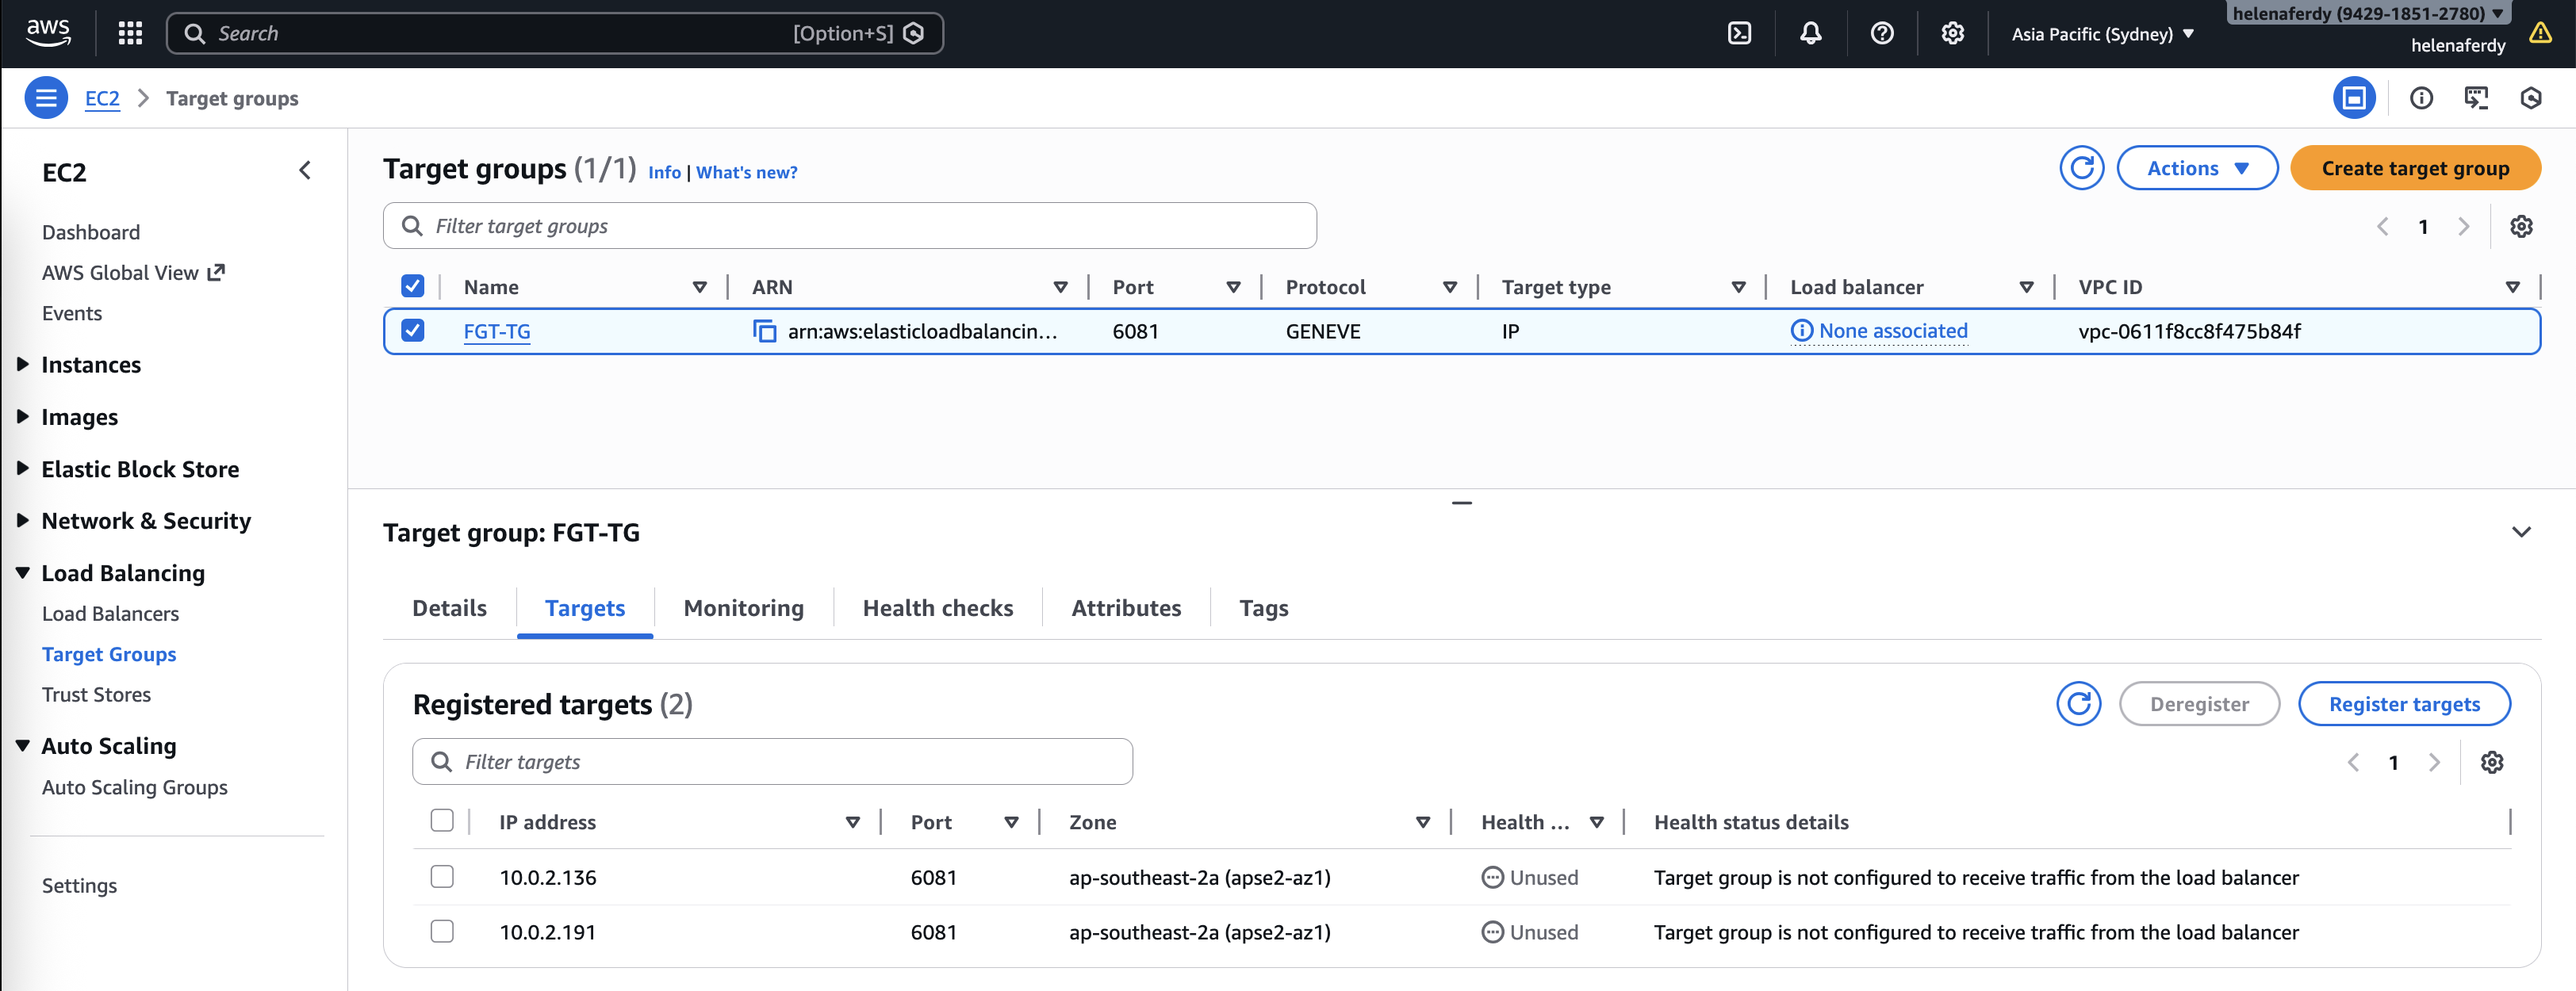
Now we have our GWLB configured
And the Target Group targets should turn green
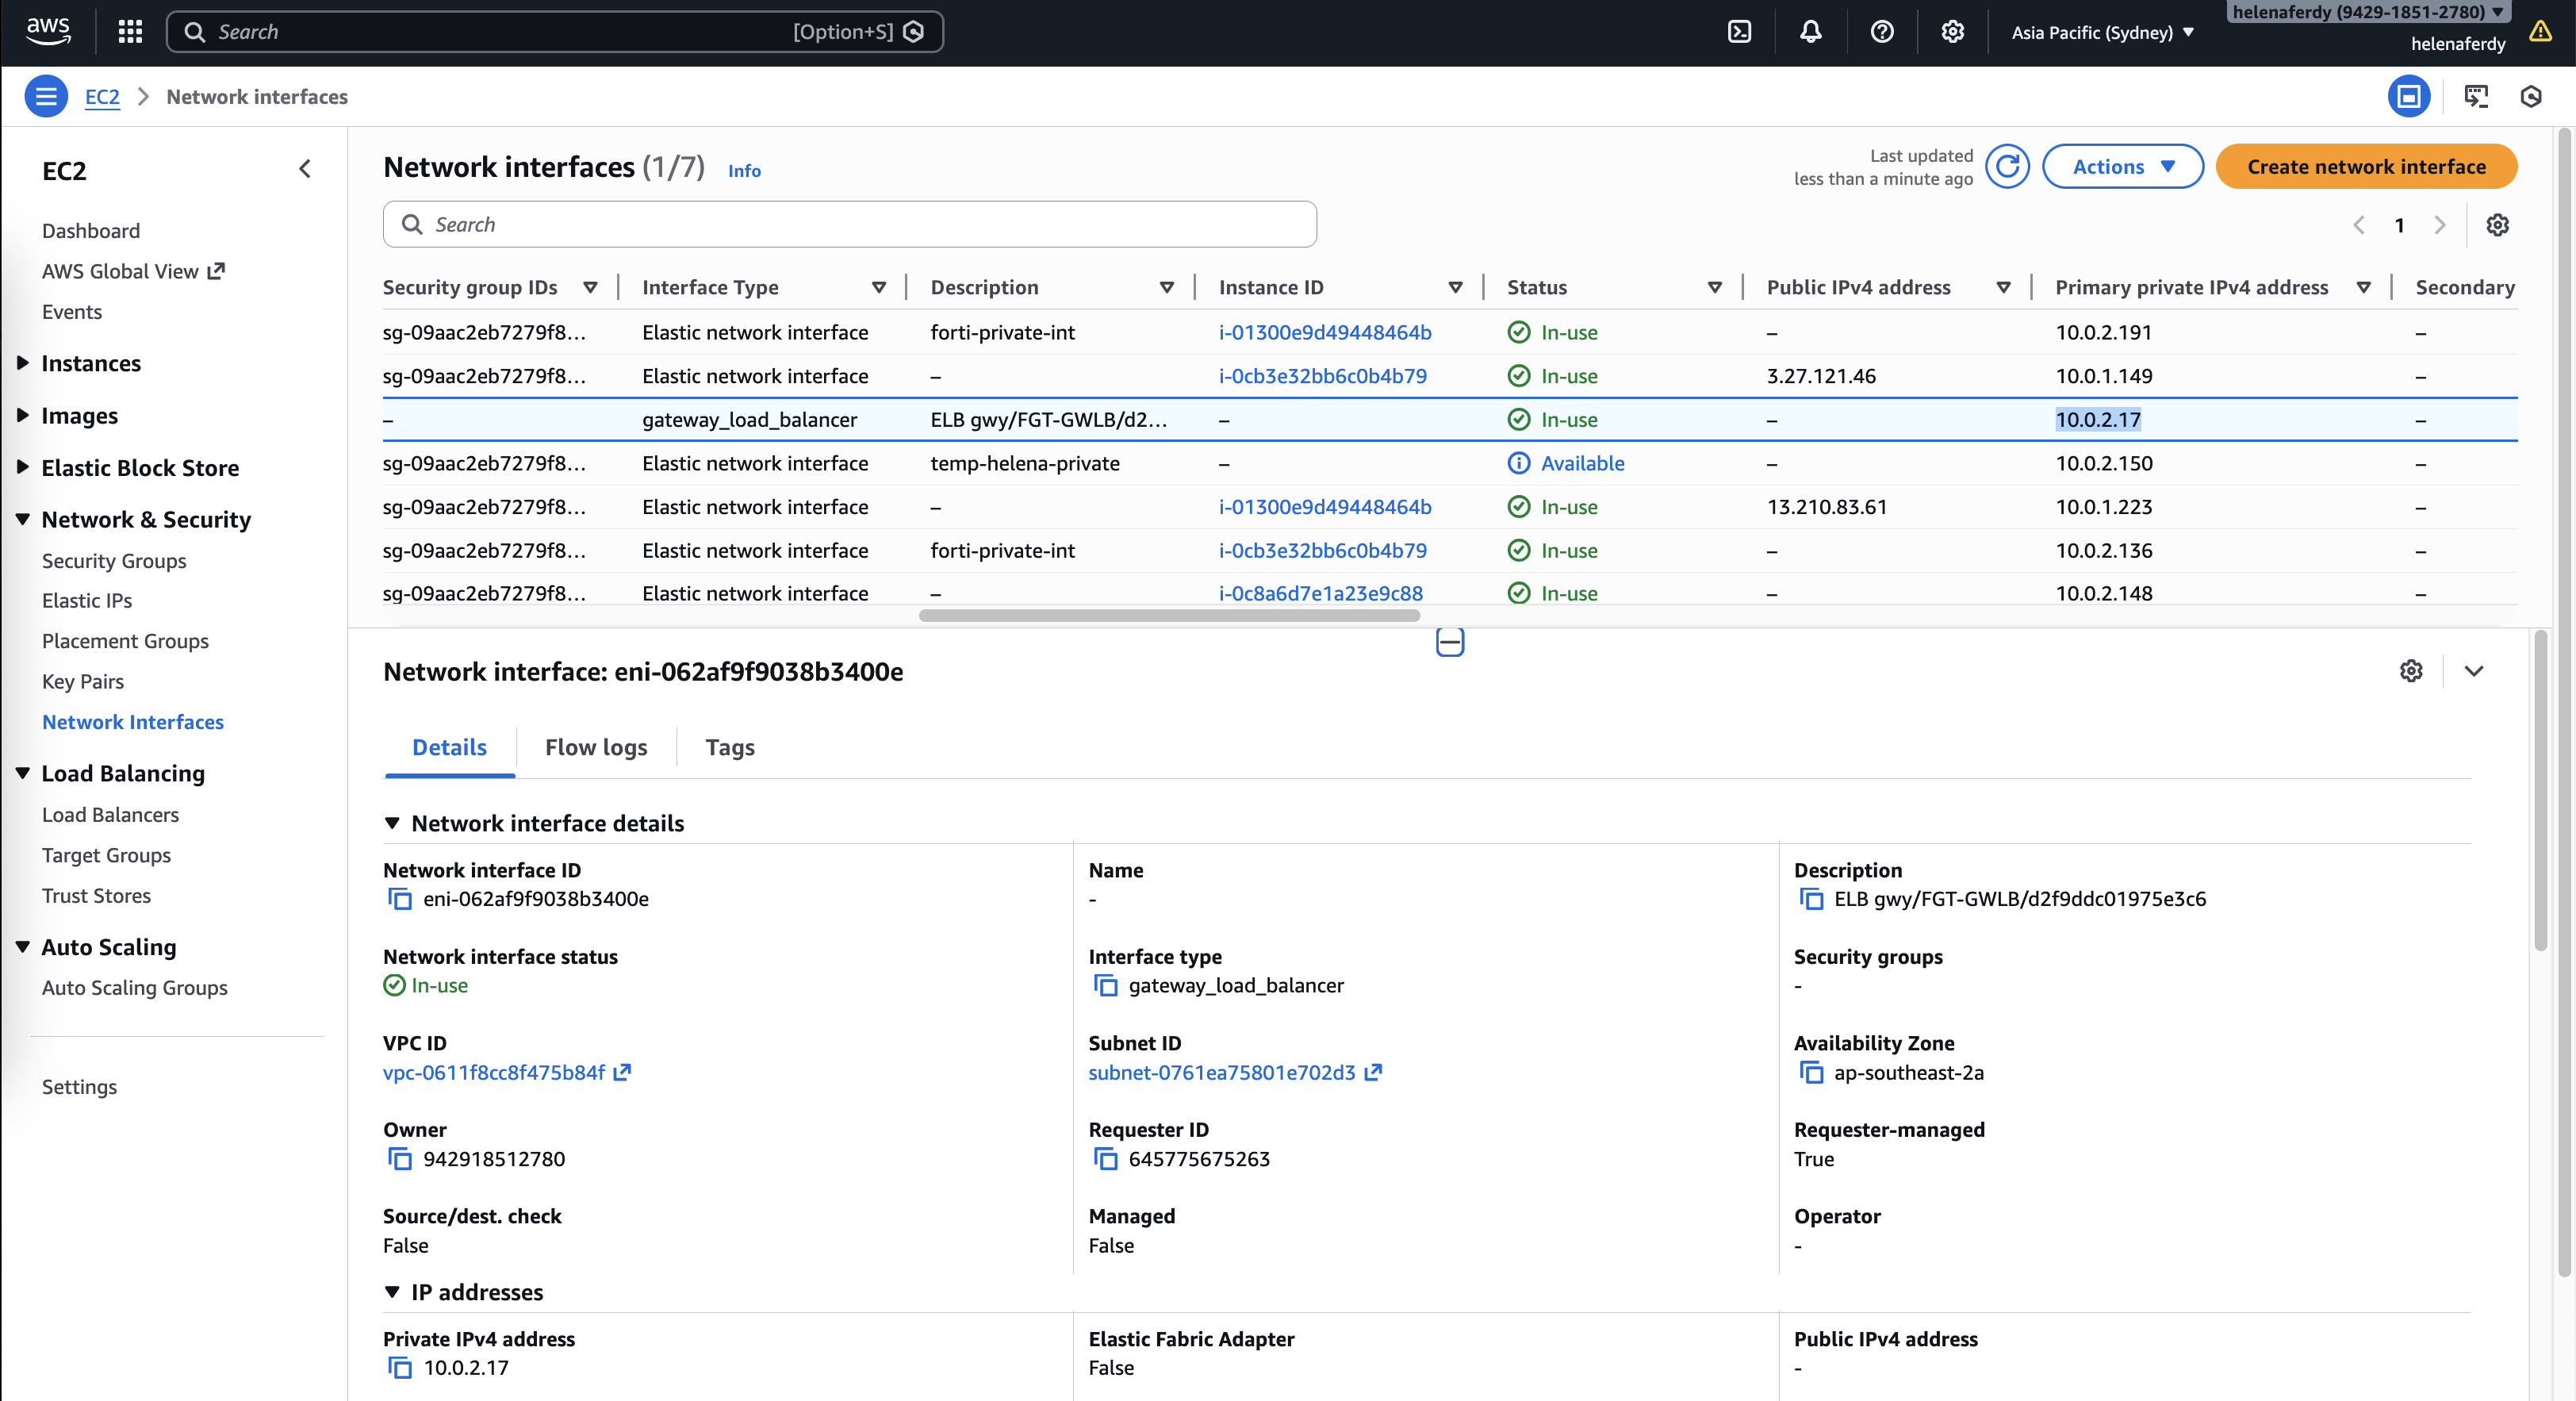
We need to take note for the GWLB’s IP Address for later configuration inside the Fortigate
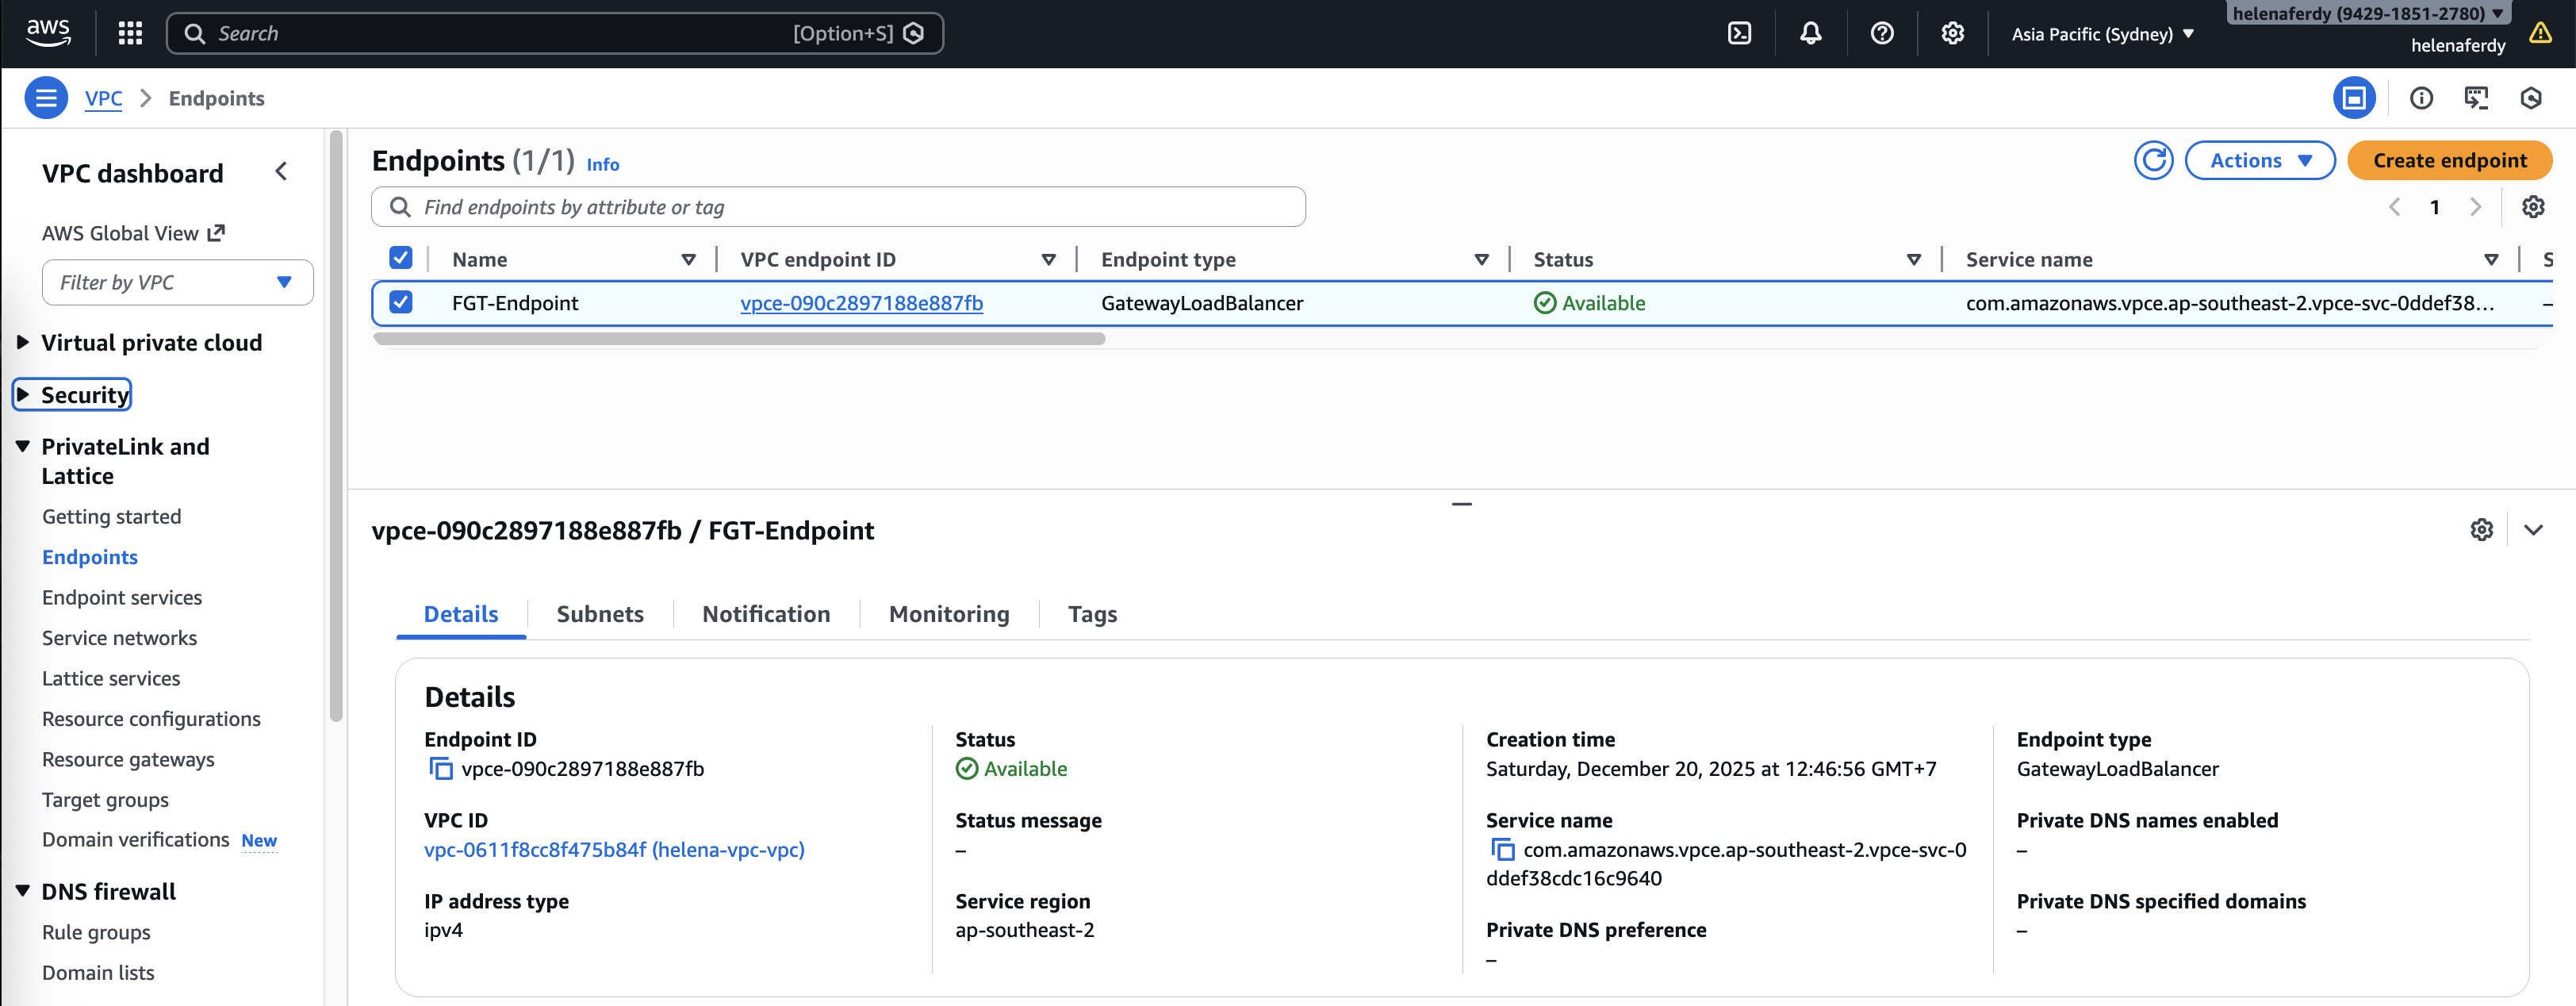
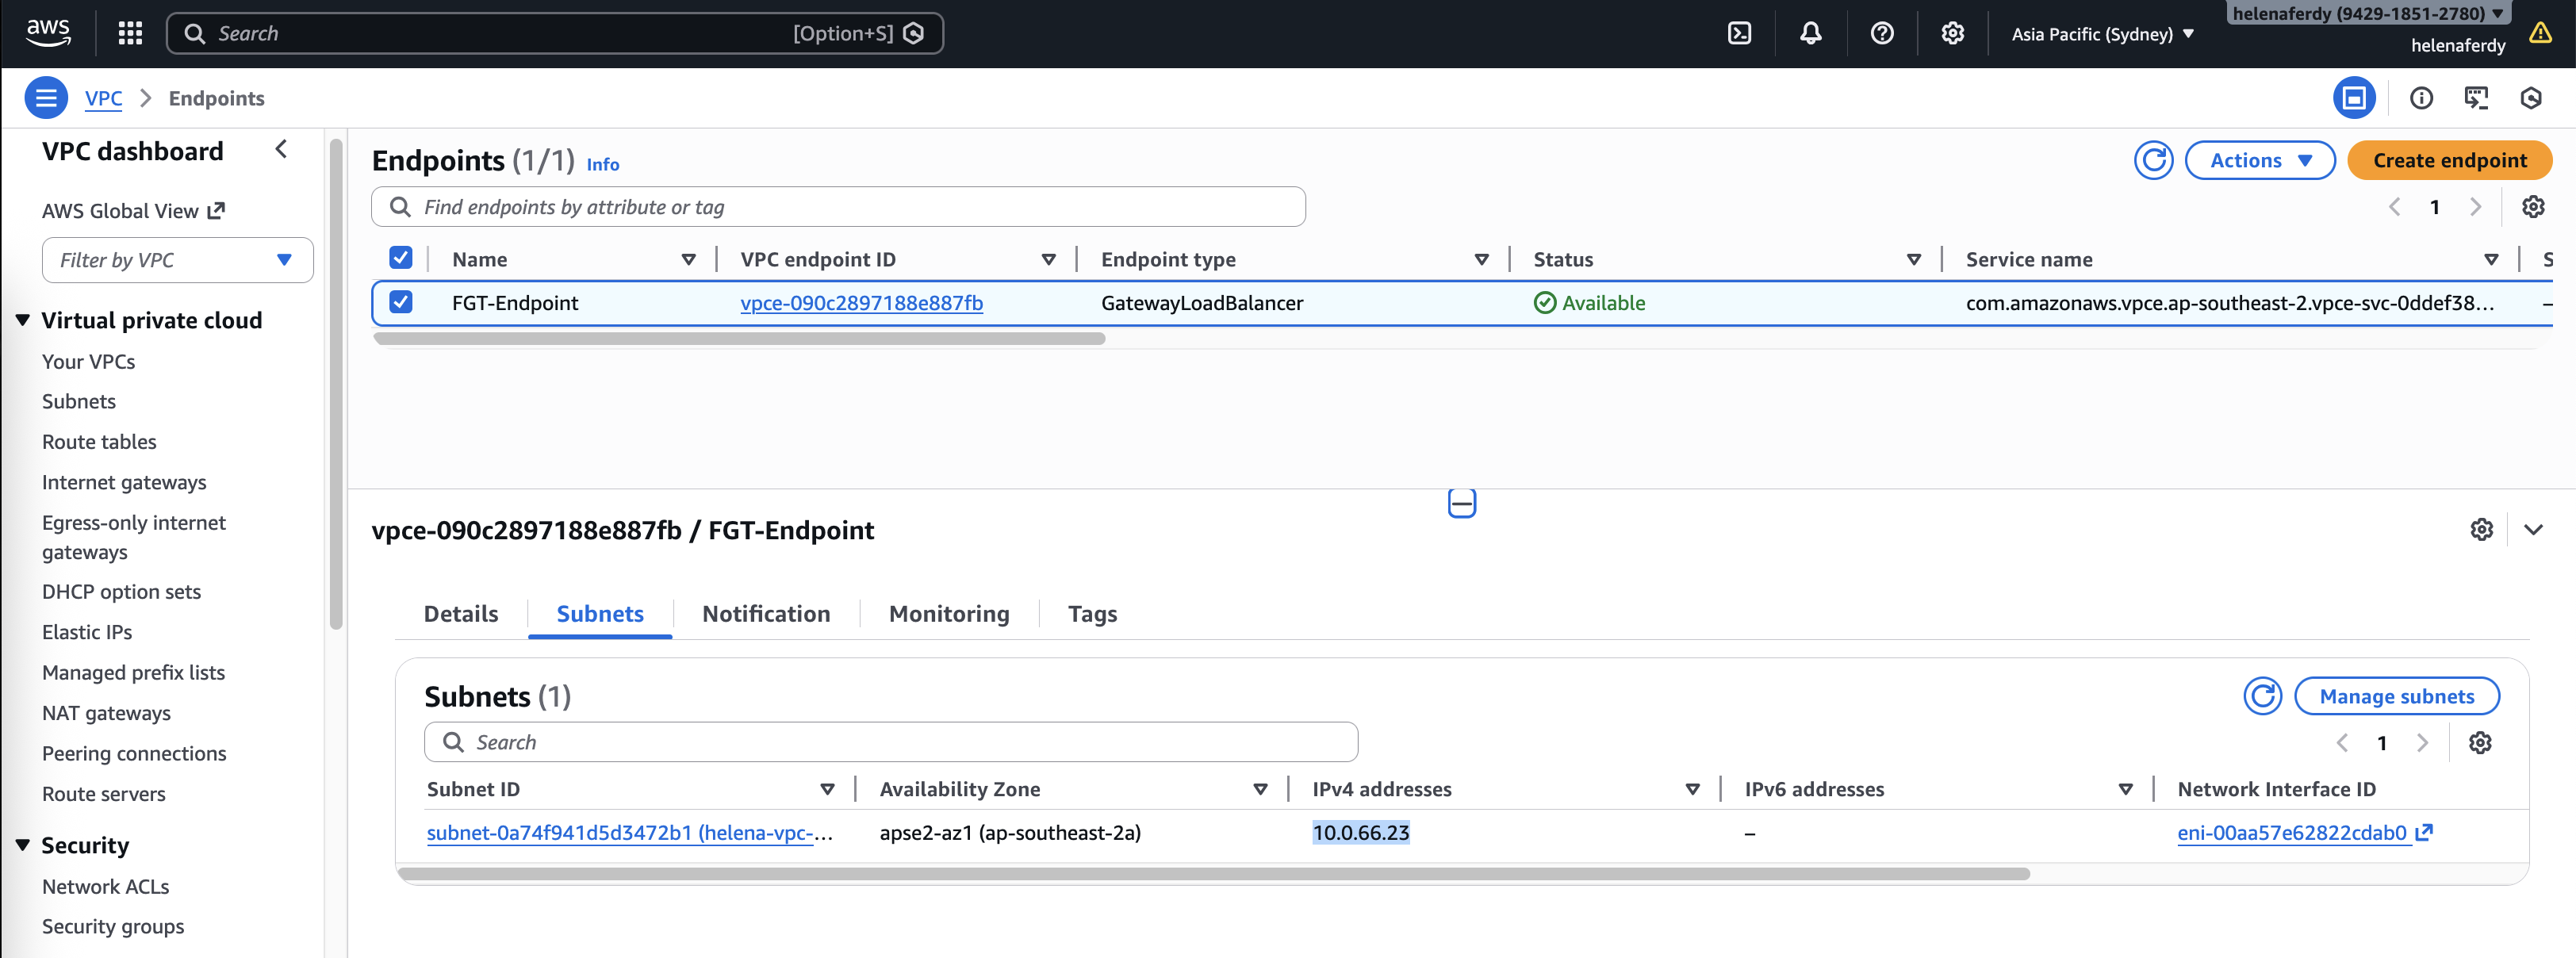
Endpoint
Next we’d create an Endpoint Service that points to the GWLB
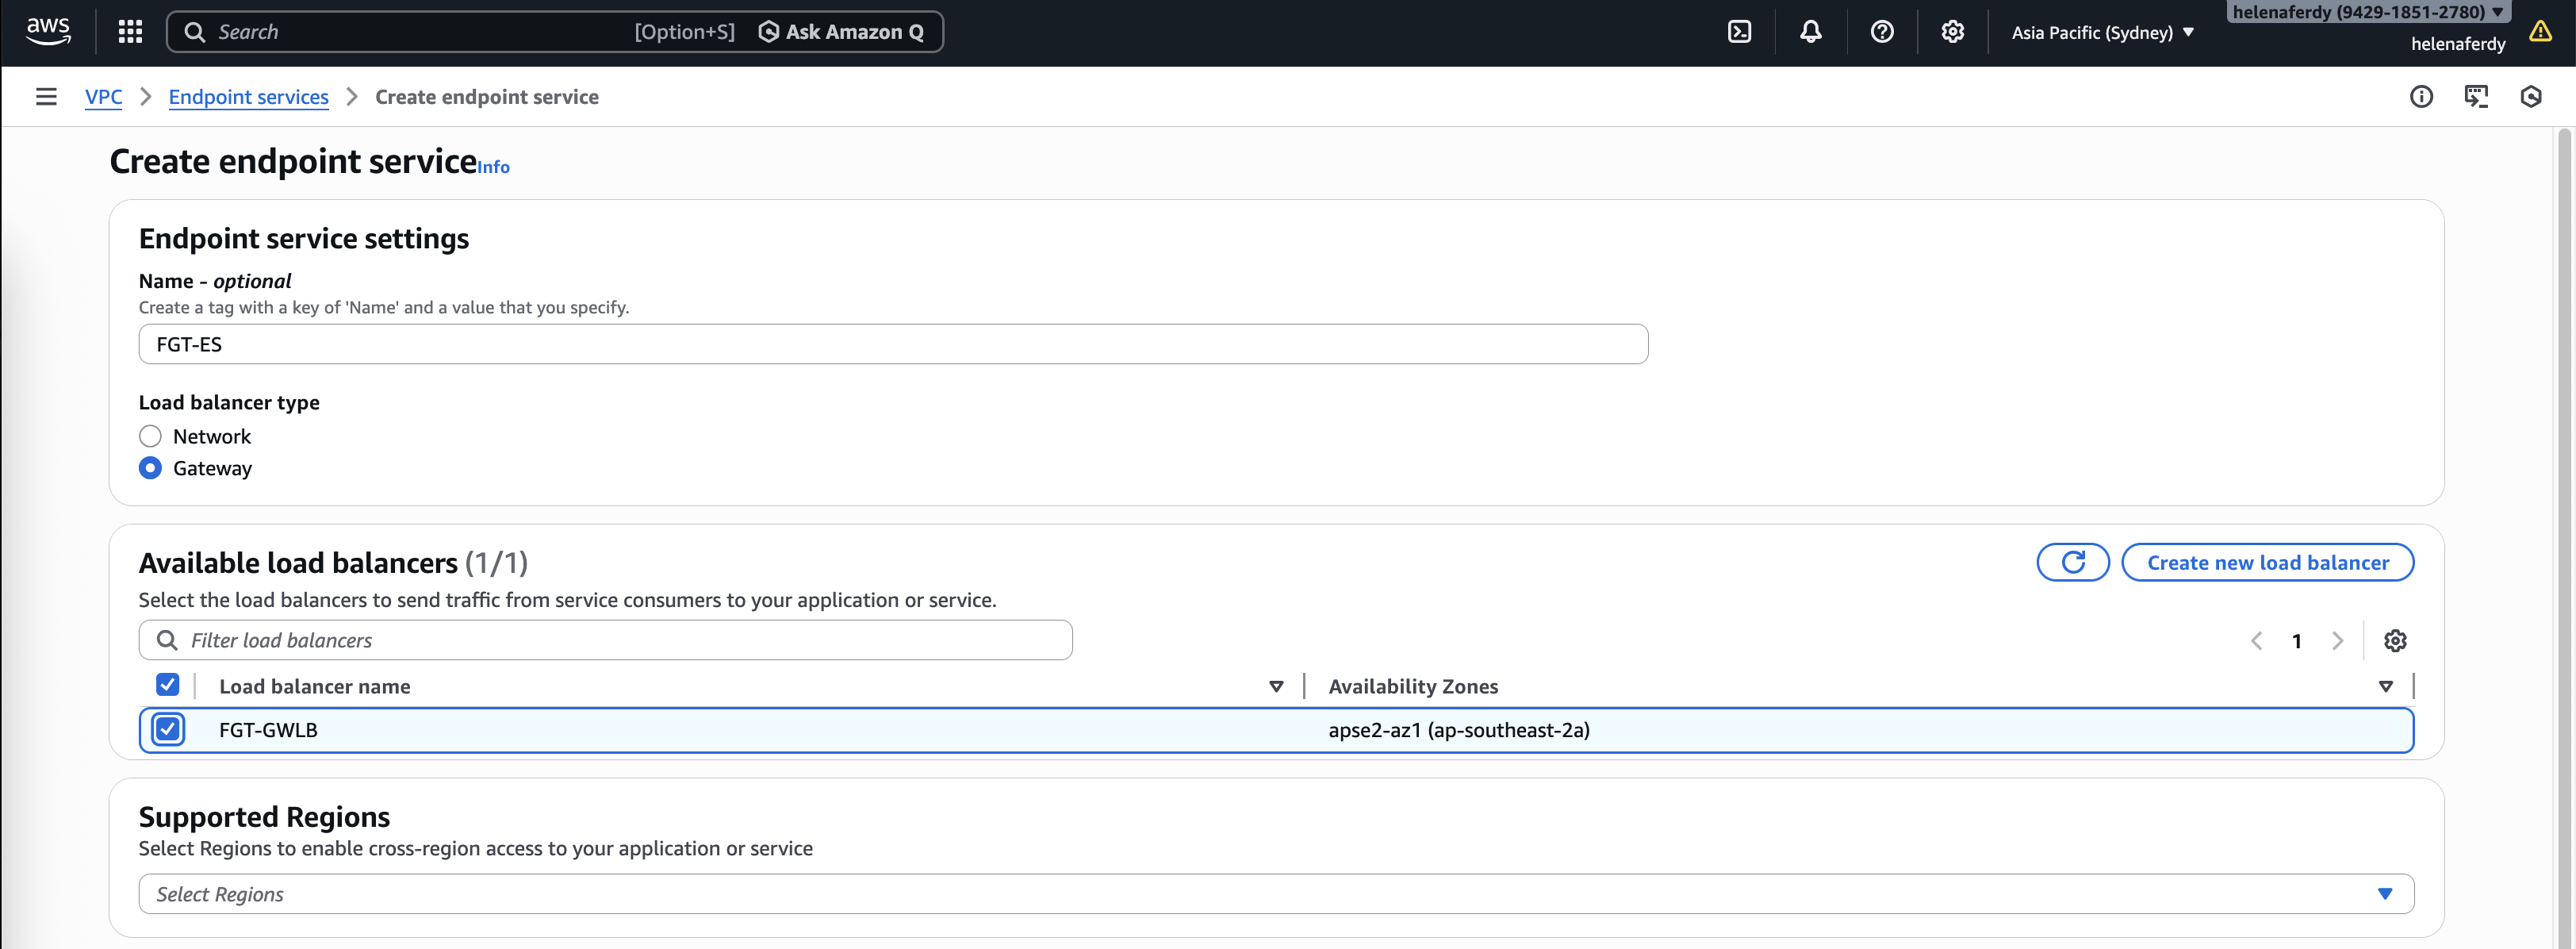
We can actually disable the acceptance requirements for easier configuration, then hit create
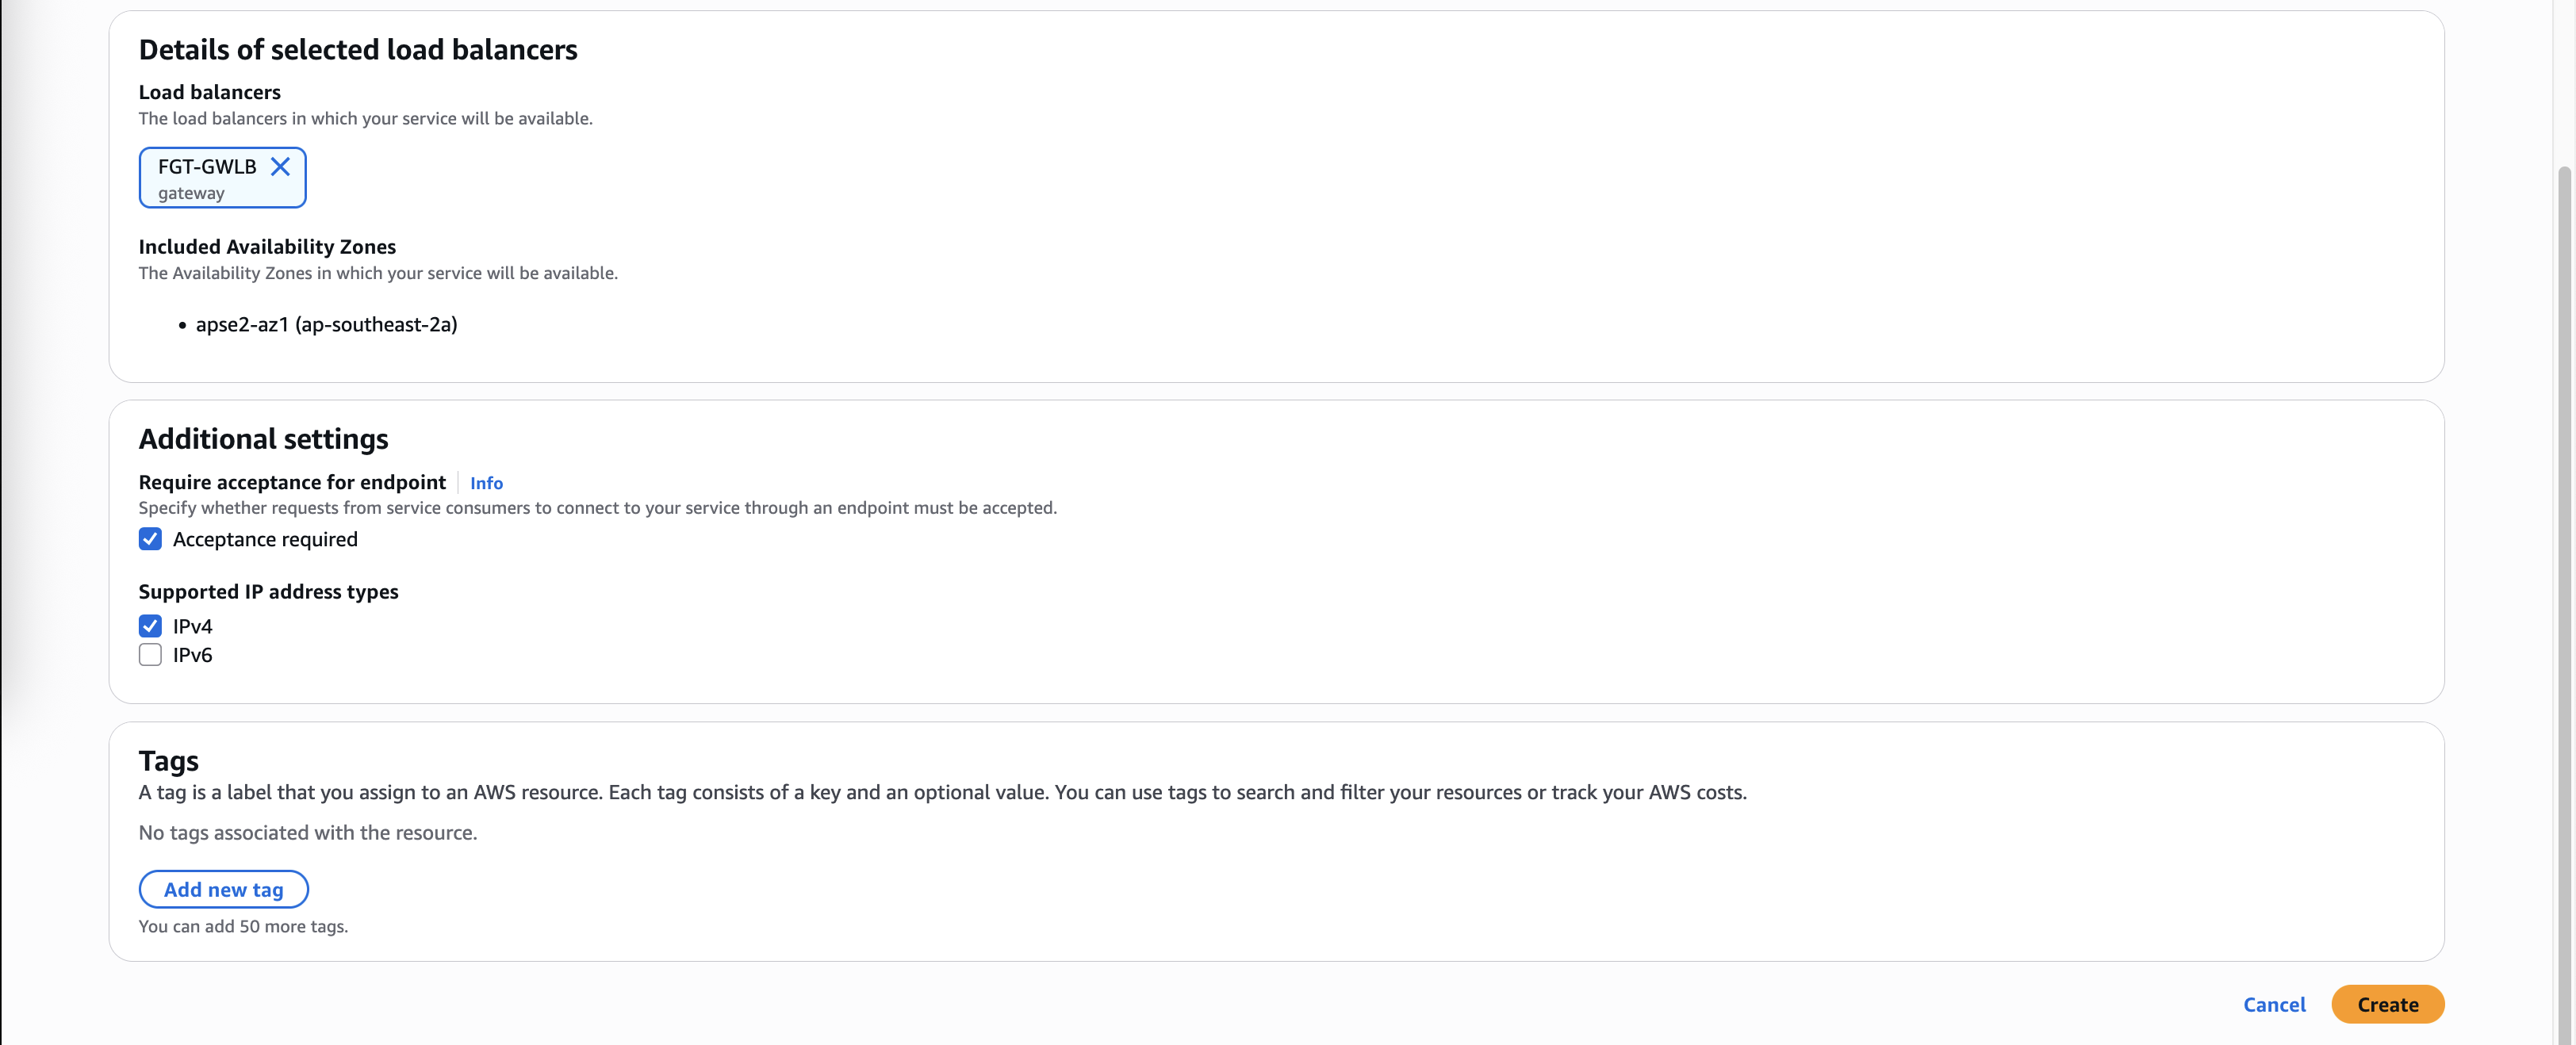
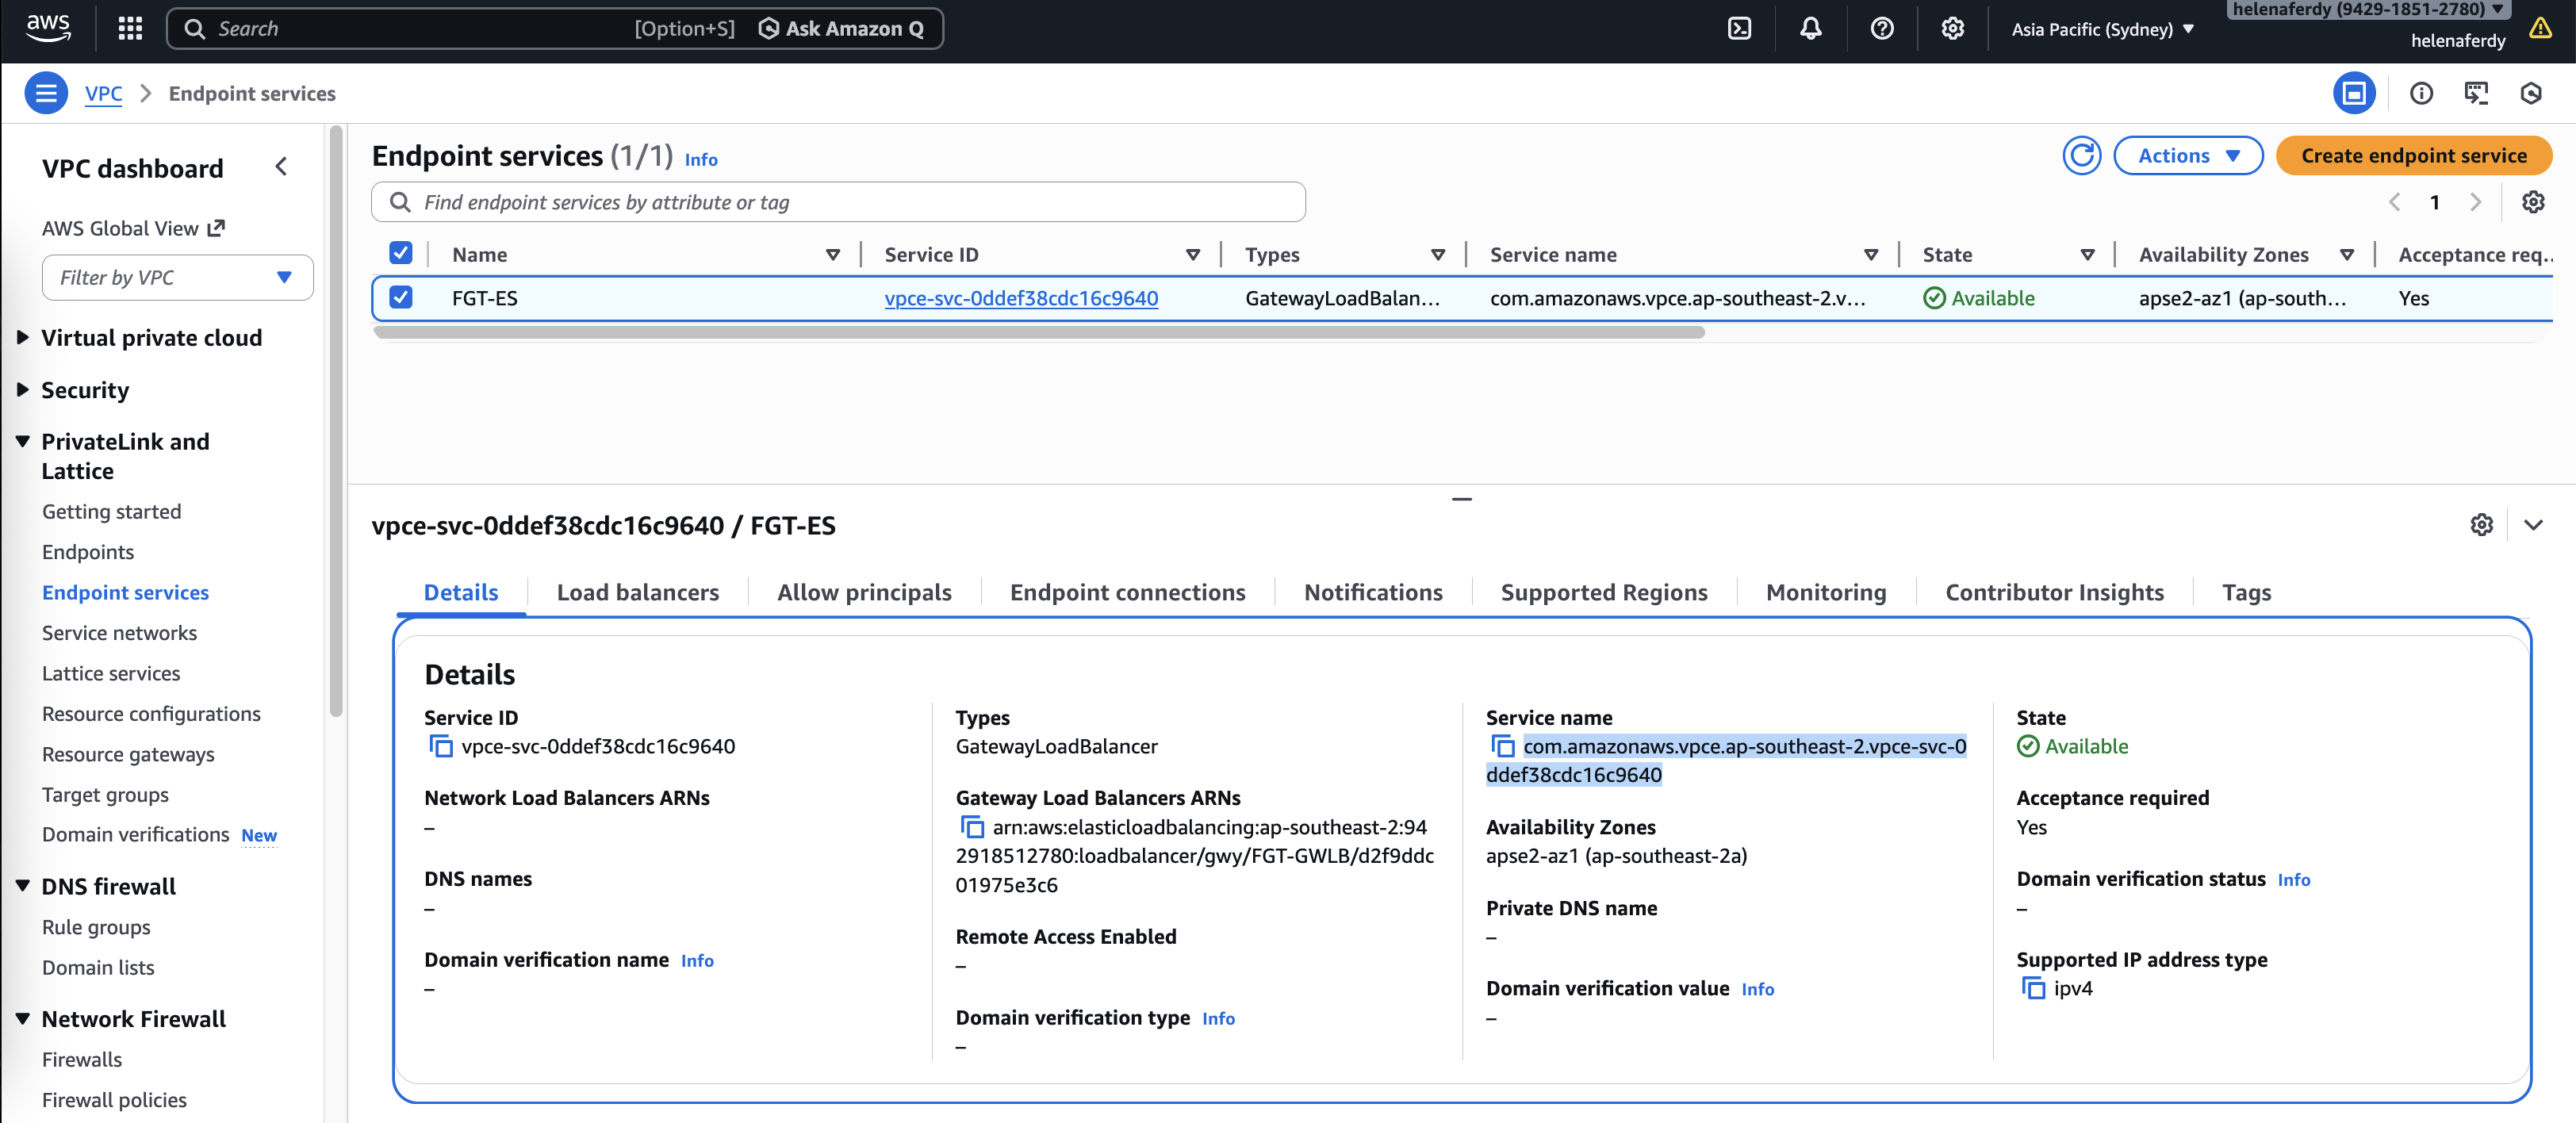
The Endpoint Service is now up, take note of the Service Name
Then create an Endpoint and use the Service Name
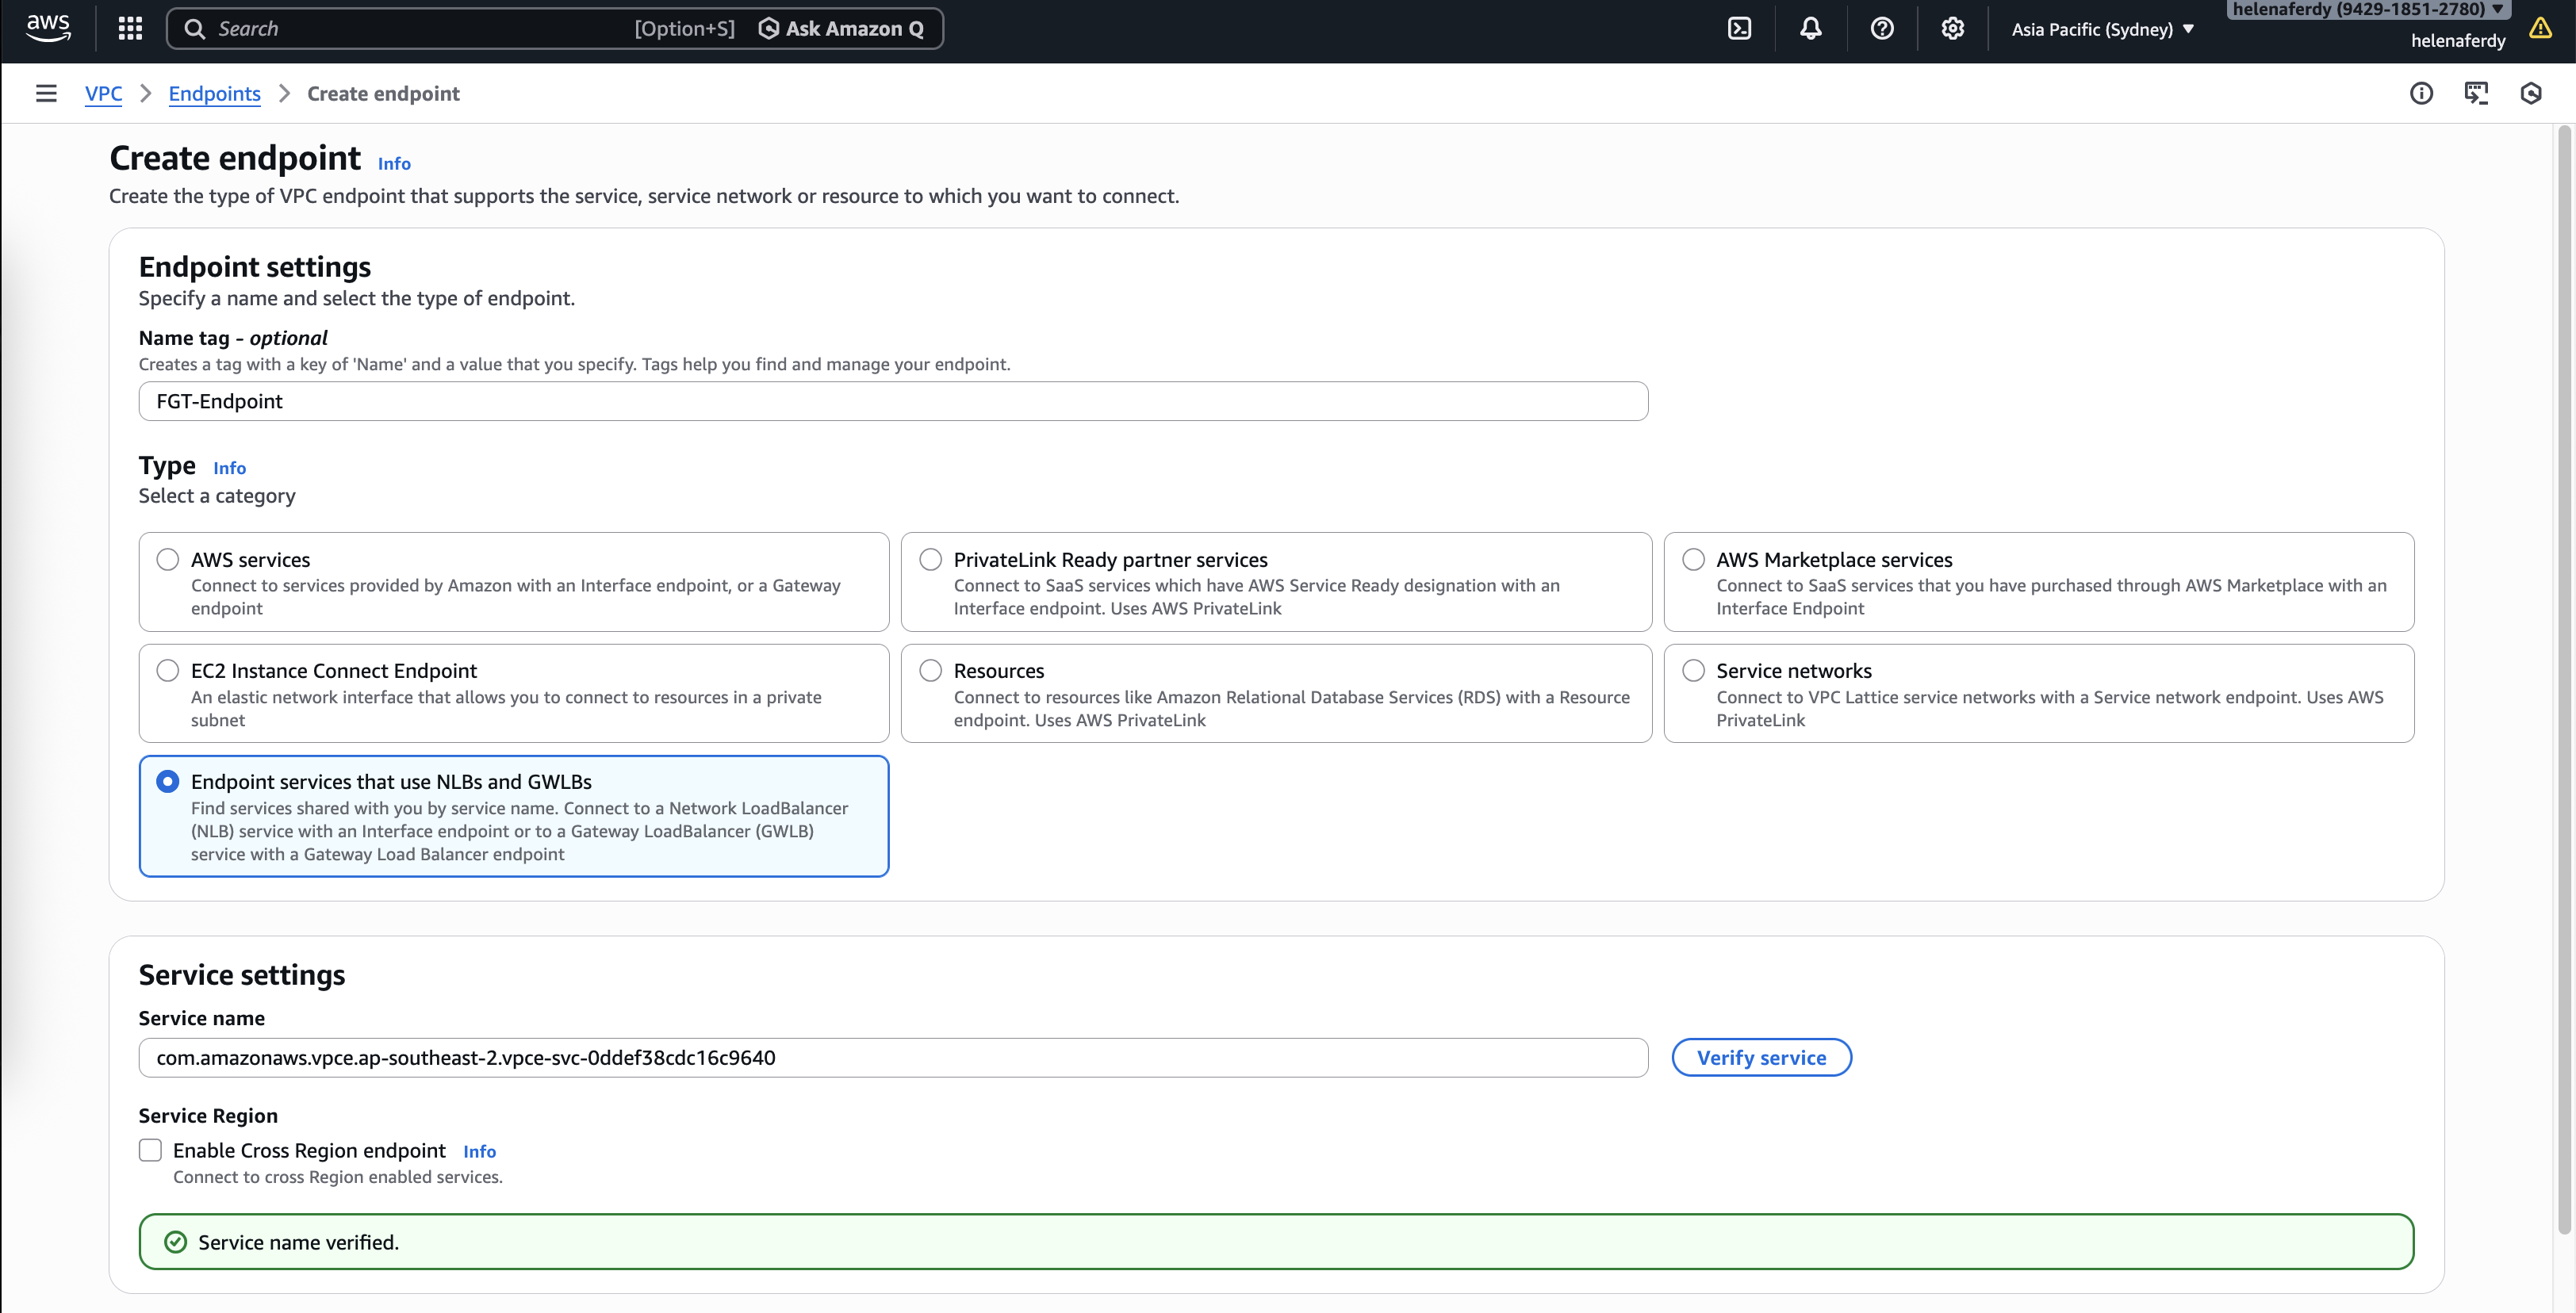
And importantly we’re gonna use the Endpont subnet for this
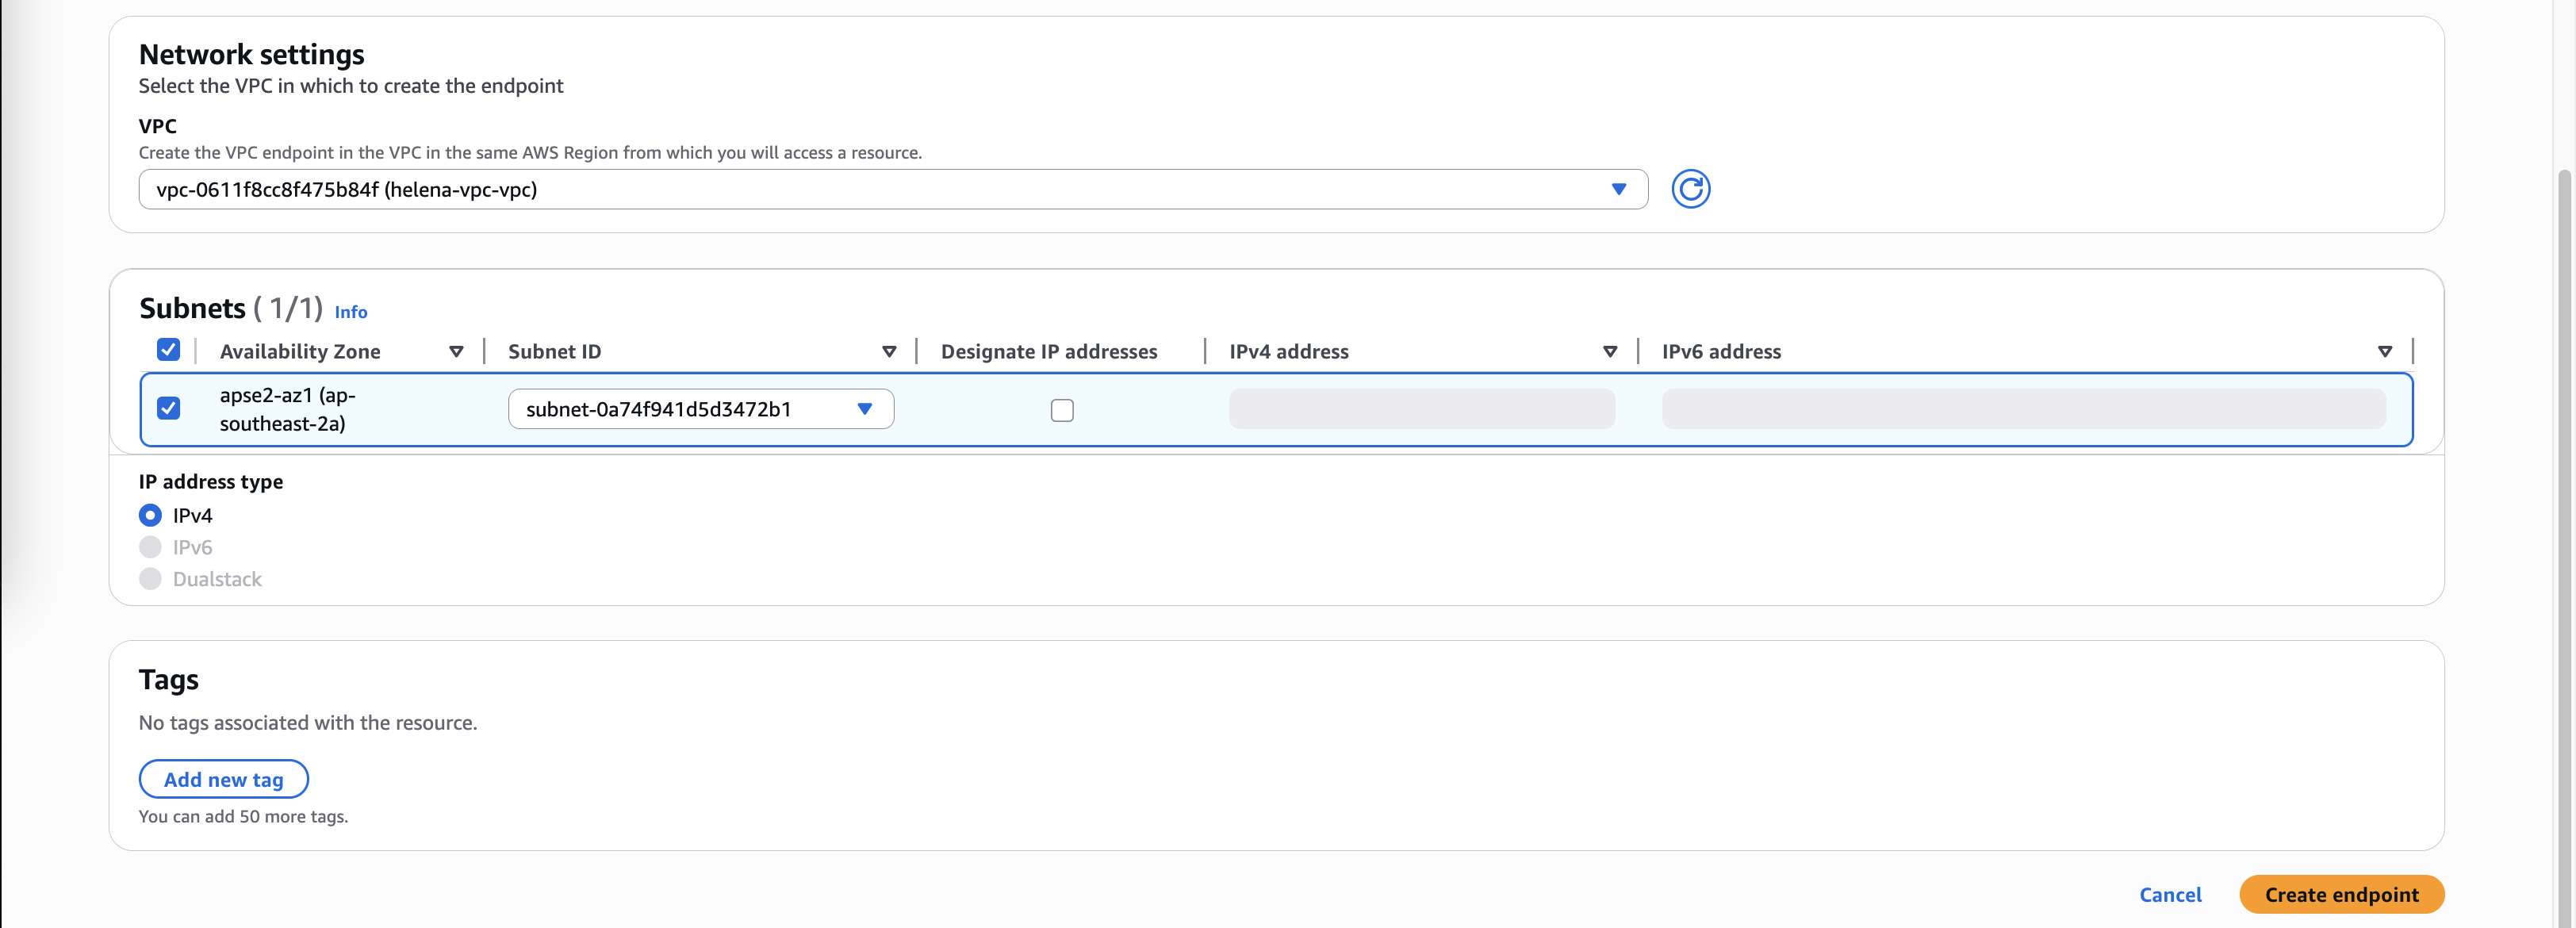
Now we have the GWLB Endpoint configured, take note of the generated IP Address for later configuration inside the Fortigate
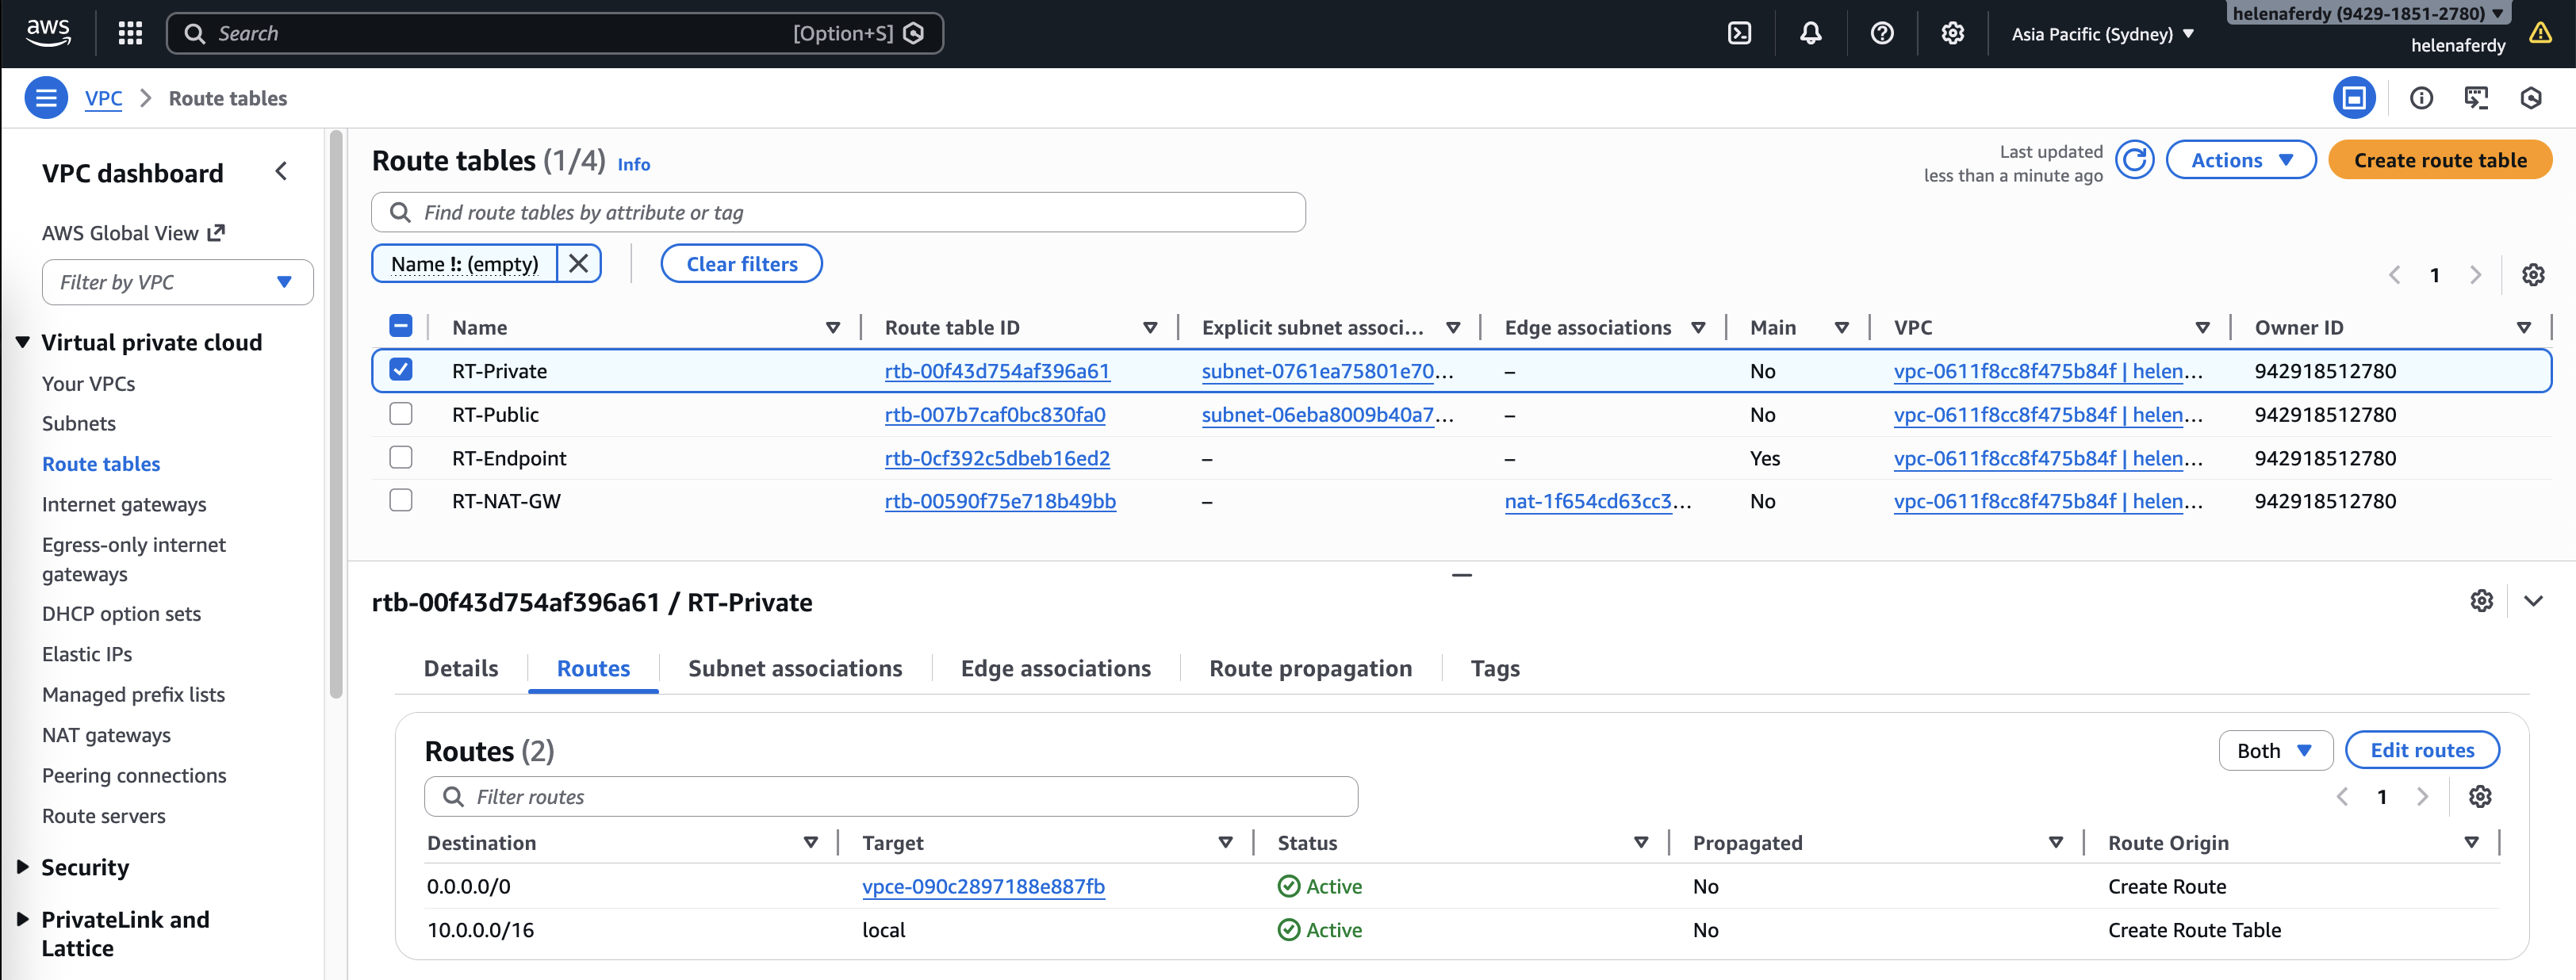
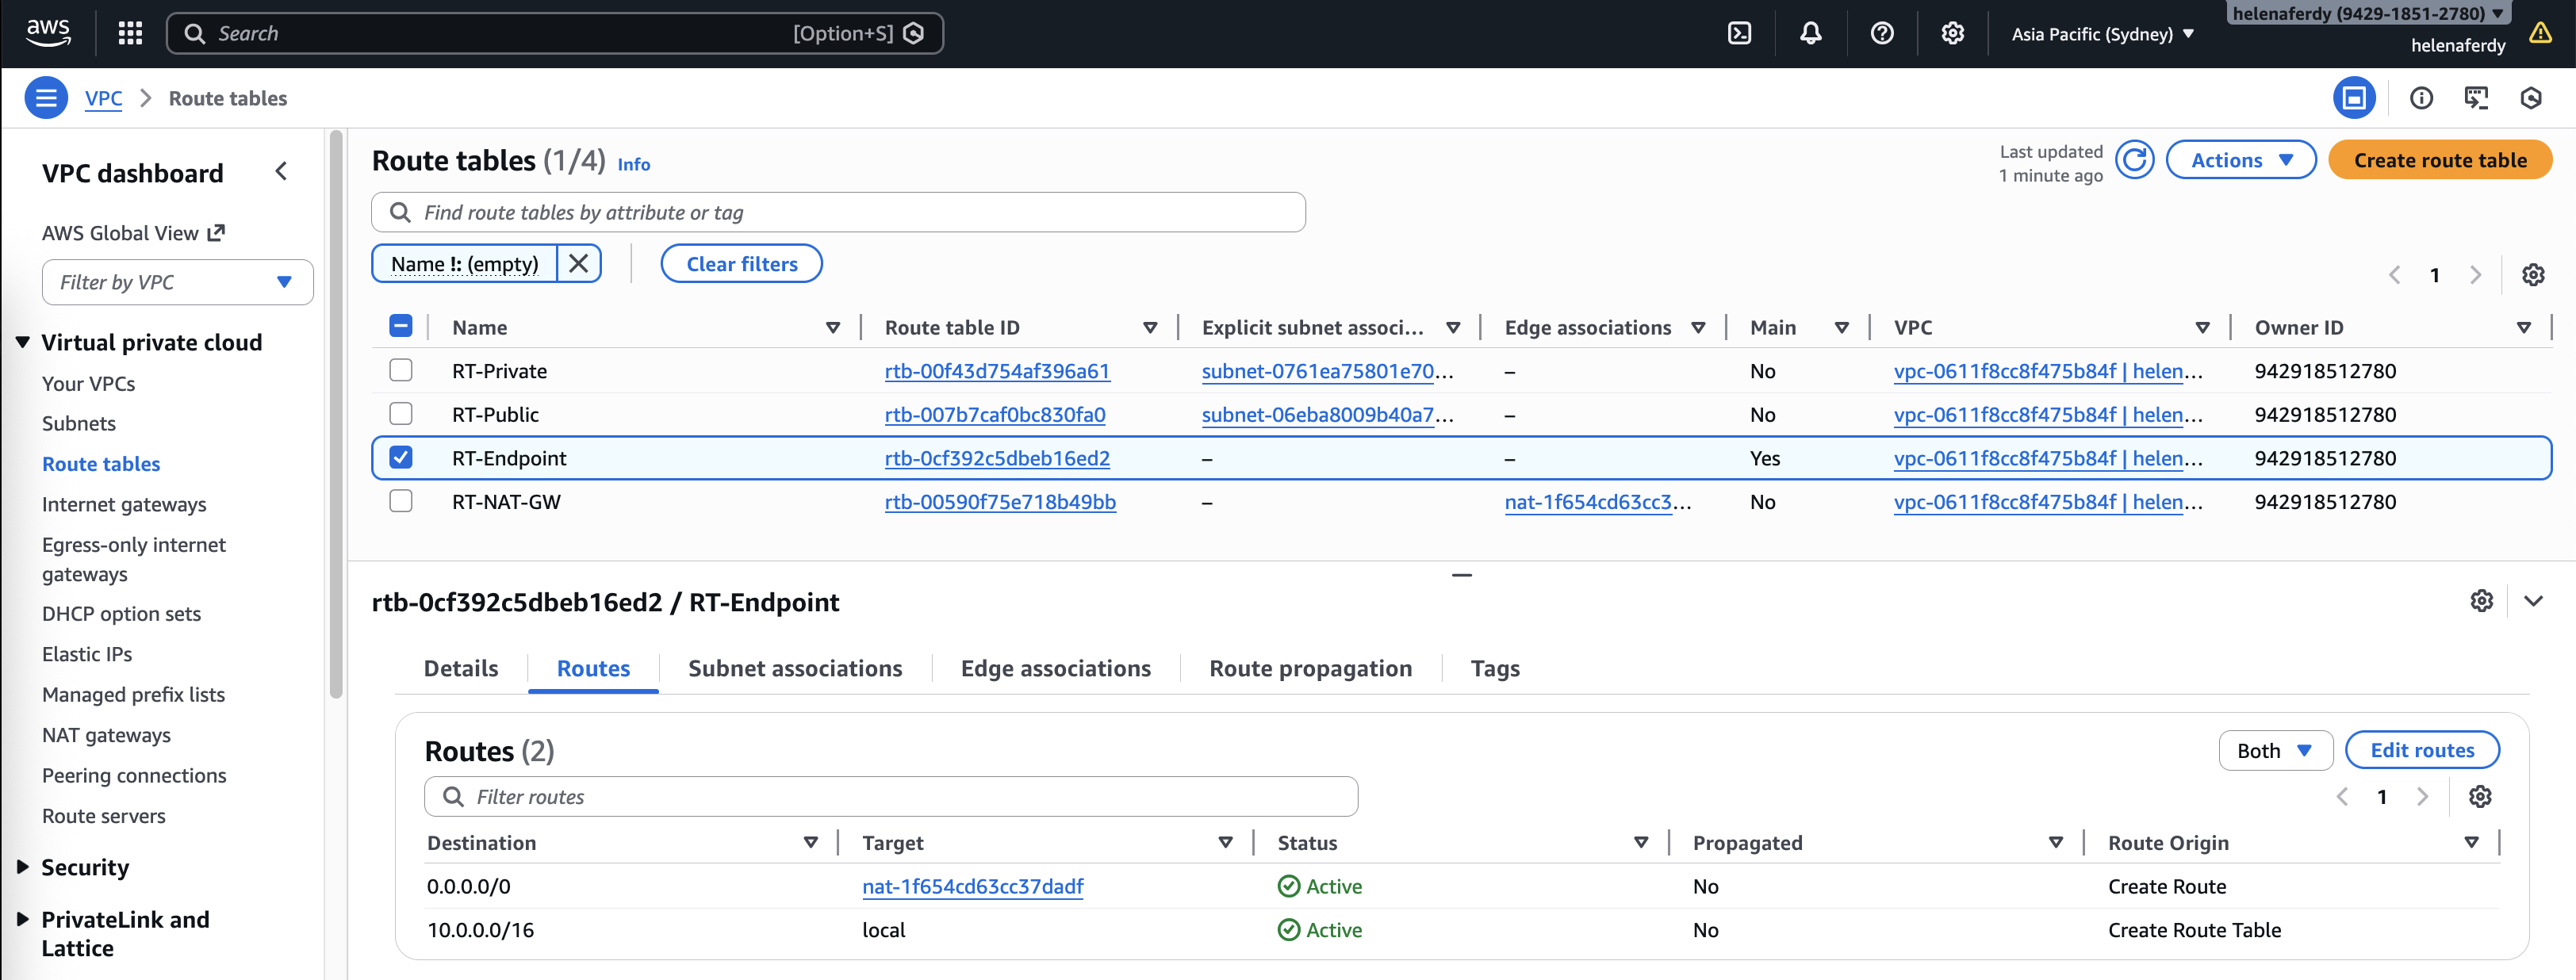
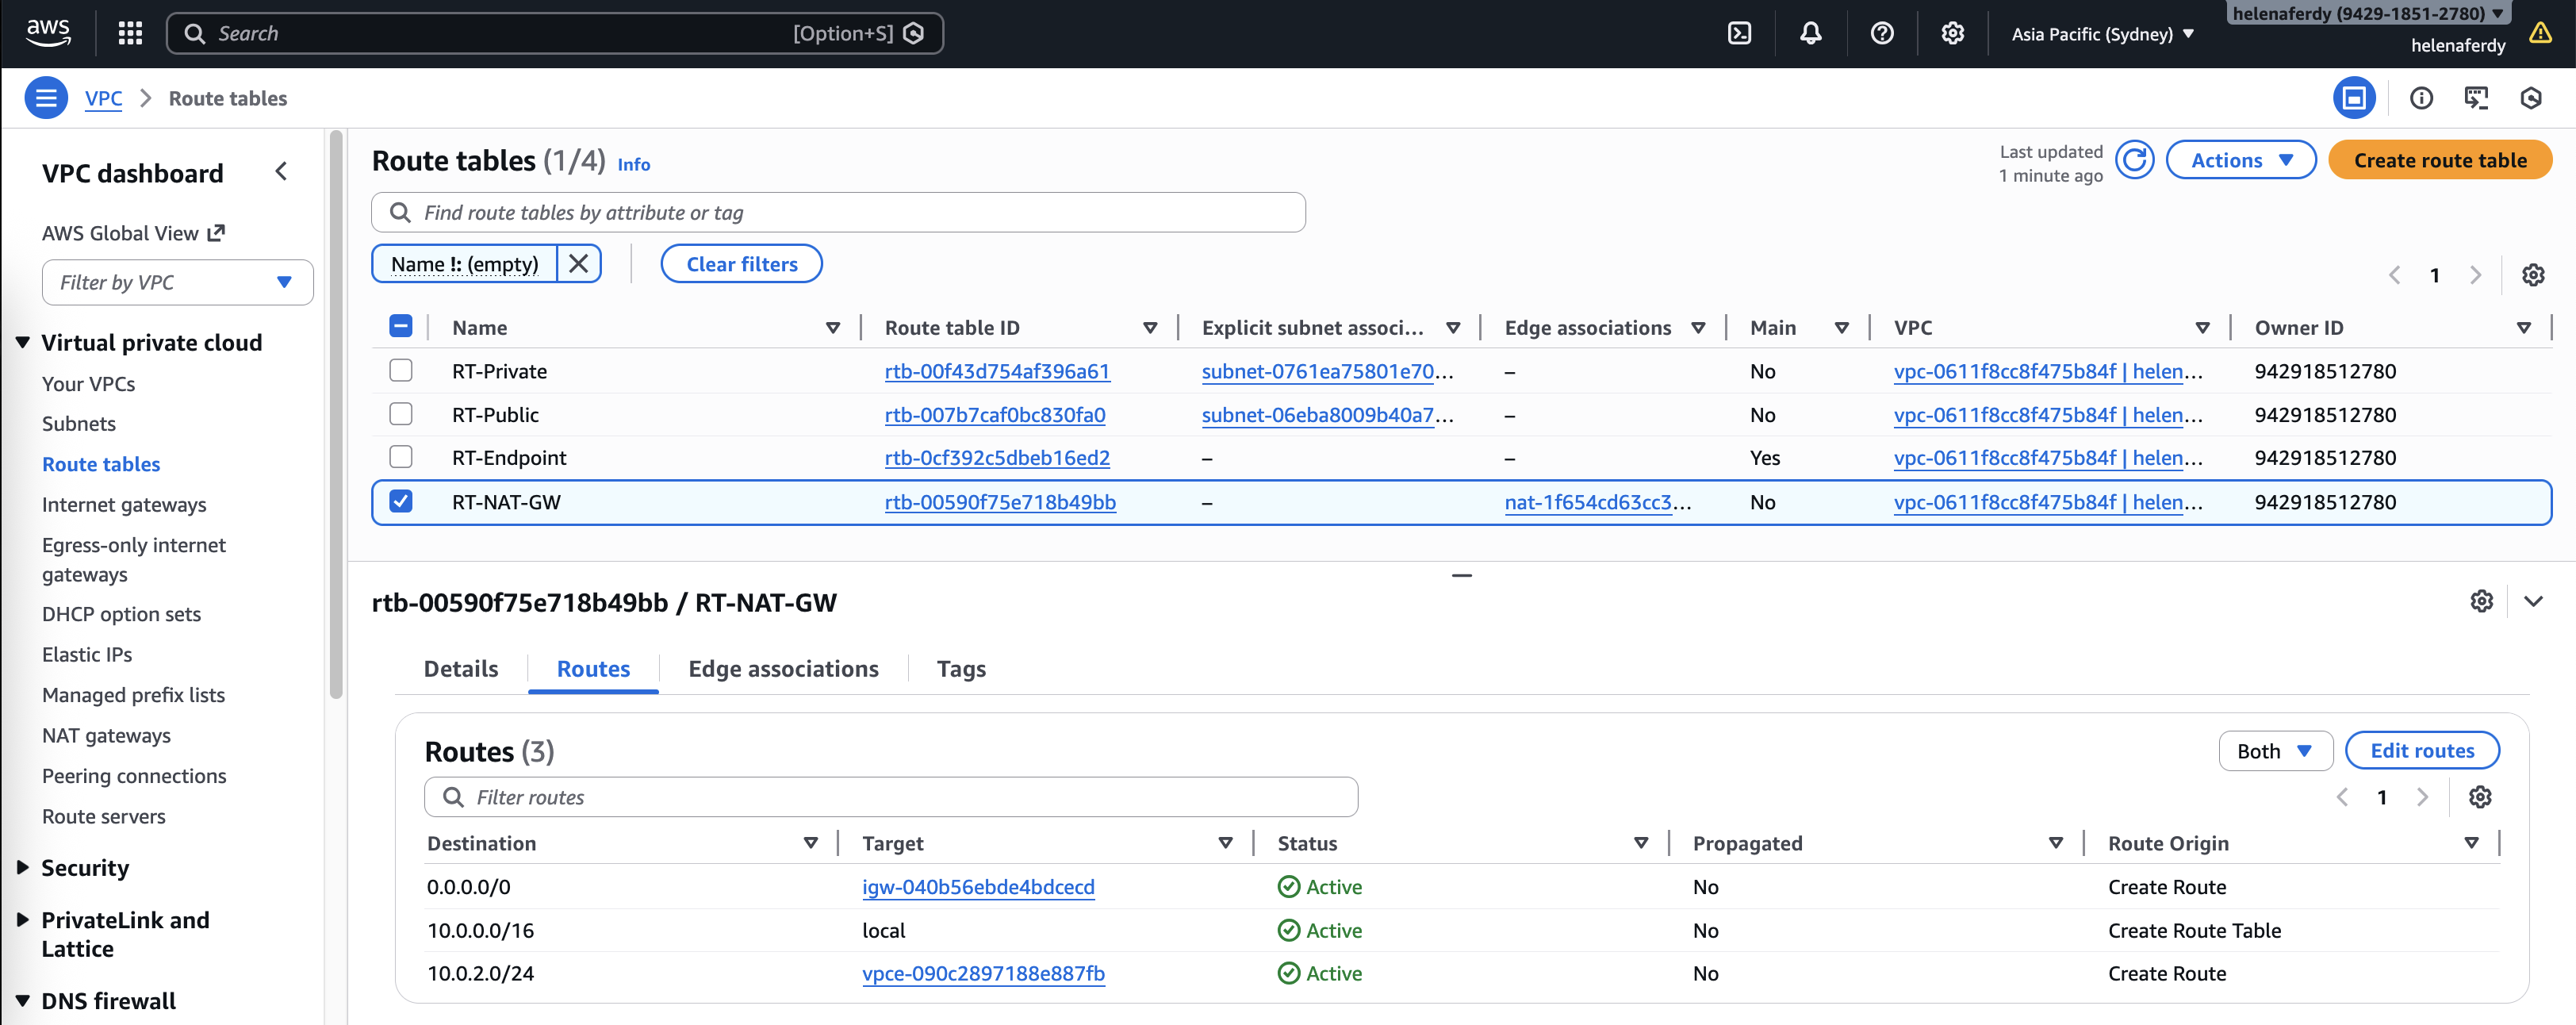
Routing
Next we deal with routing management, on Private subnet where the Linux client resides, we will send all traffic to our GWLB Endpoint
On Endpoint subnet we will send all internet-bound traffic to our NAT Gateway
And for our NAT Gateway route table, we send all internet-bound traffic to Internet Gateway, and for the returning traffic we send it to the GWLB Endpoint
Fortigate
On Fortigate side we add the following configurations to create Geneve interface under Port2 (private subnet), firewall policy and static routing
1
2
3
4
5
6
7
8
9
10
11
12
13
14
15
16
17
18
19
20
21
22
23
24
25
26
27
28
29
config system geneve
    edit "awsgeneve"
        set interface "port2"
        set type ppp
        set remote-ip 10.0.2.17
    next
end

config firewall policy
    edit 10
        set name "awsgeneve_policy"
        set srcintf "awsgeneve"
        set dstintf "awsgeneve"
        set srcaddr "all"
        set dstaddr "all"
        set action accept
        set schedule "always"
        set service "ALL"
        set nat disable
    next
end

config router static
    edit 1
        set dst 0.0.0.0/0
        set gateway 10.0.66.23
        set device "awsgeneve"
    next
end
Testing GWLB
On Linux client, we confirm that we can access internet
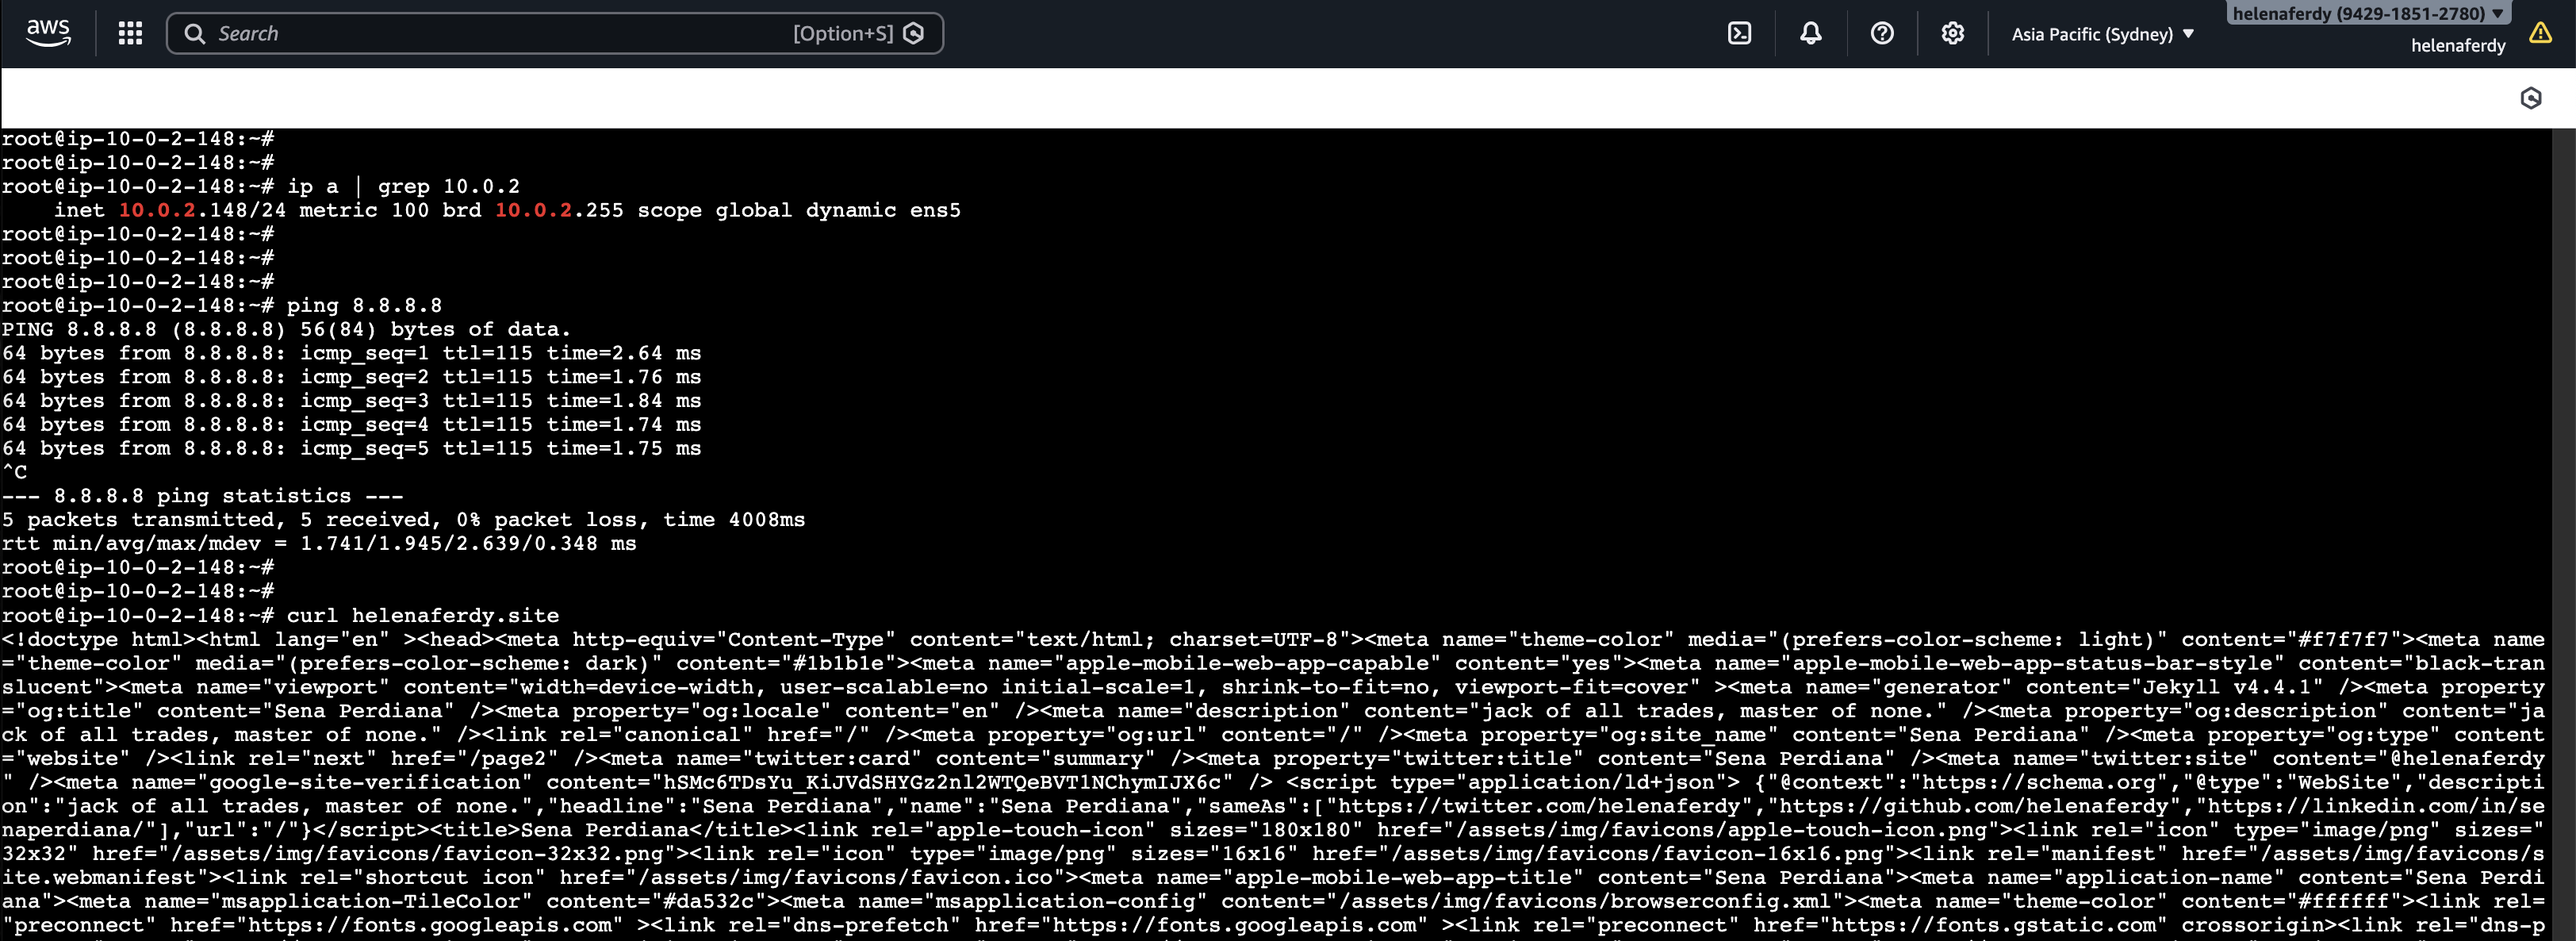
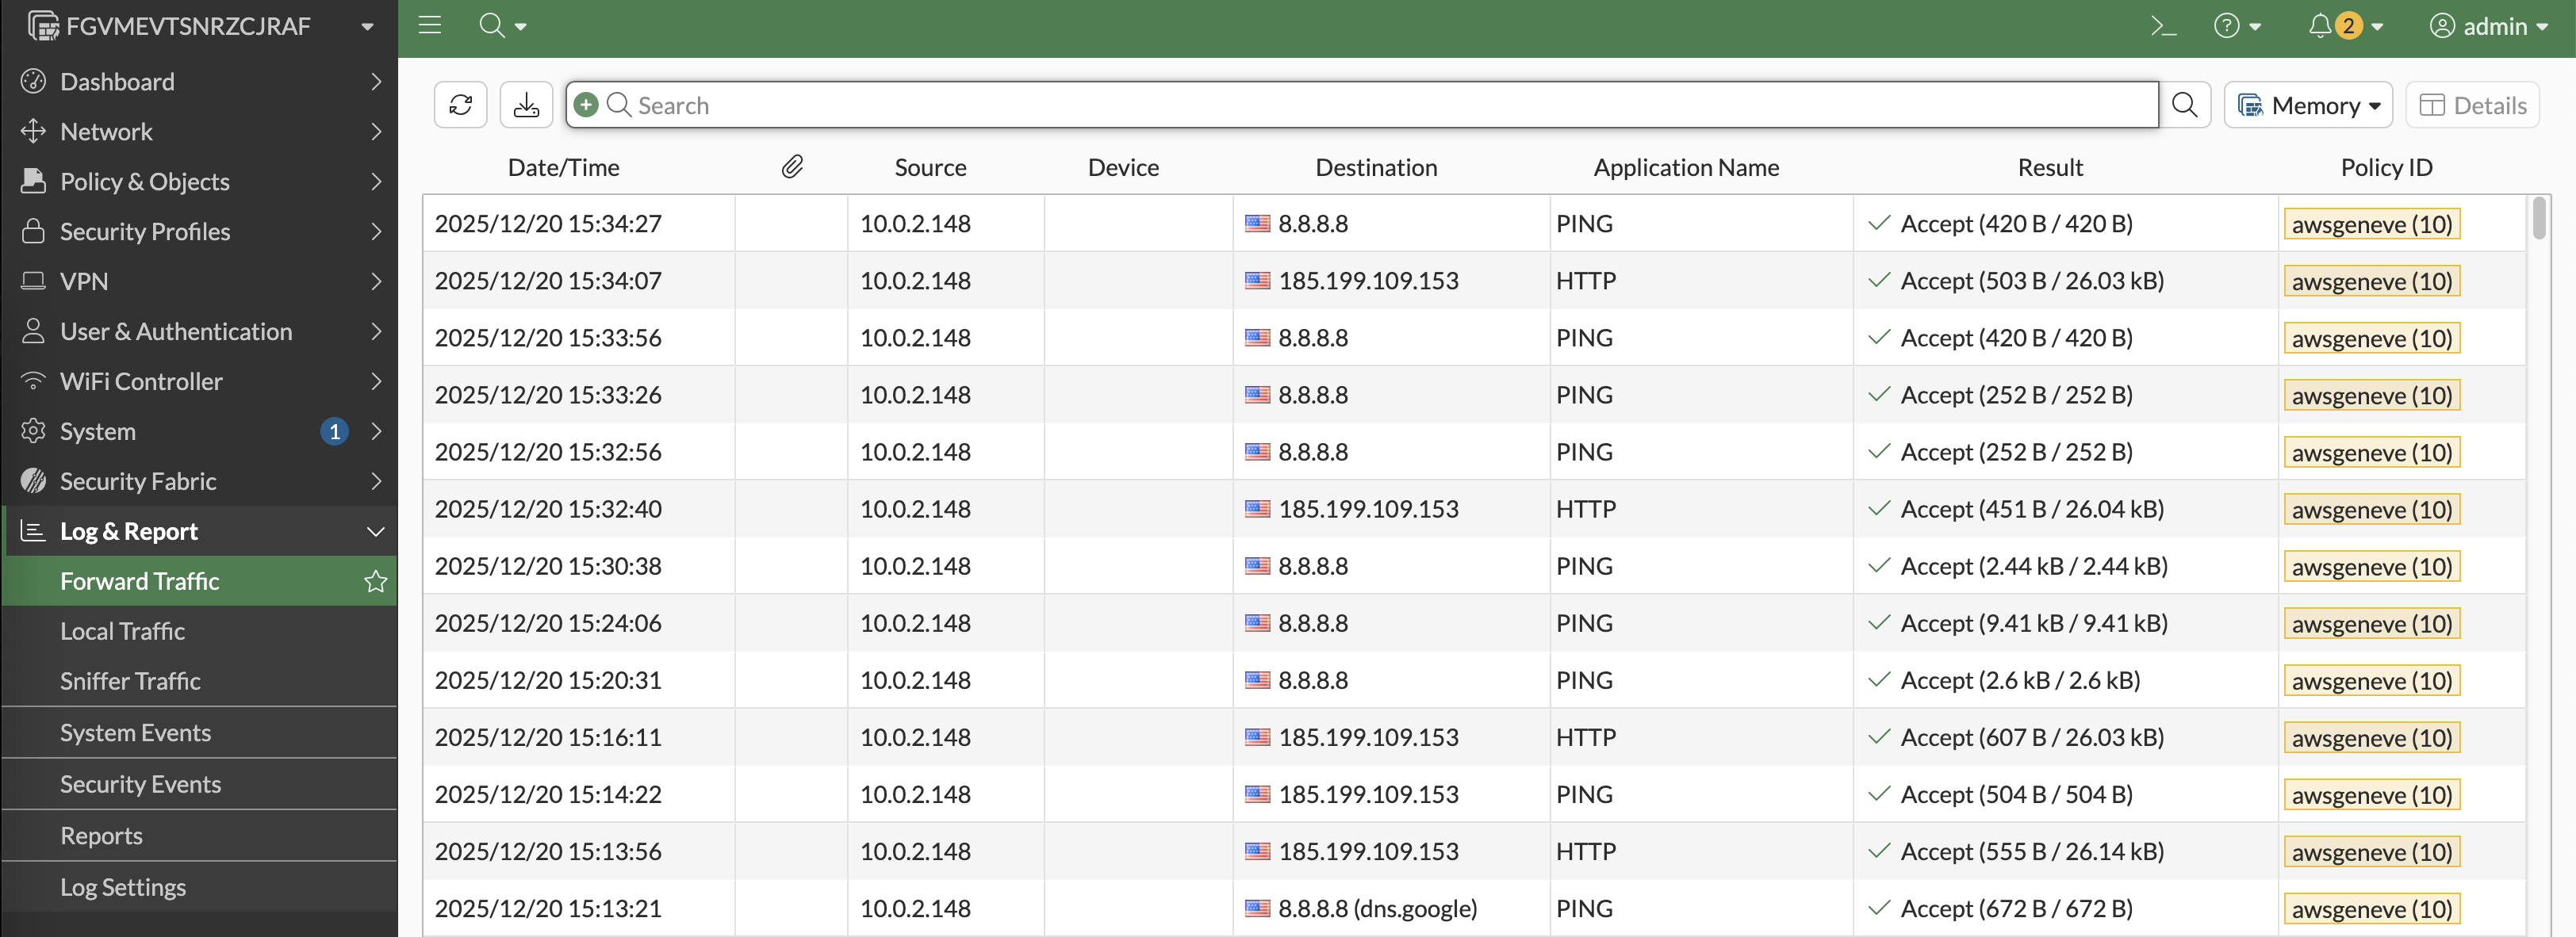
We can see on Fortigate that traffic is hitting the awsgeneve policy, confirming that traffic is coming in and out of the geneve interface
And if we put both Fortigate side by side, we can see that they both handle traffic in turn, thus confirming the load balancing is working
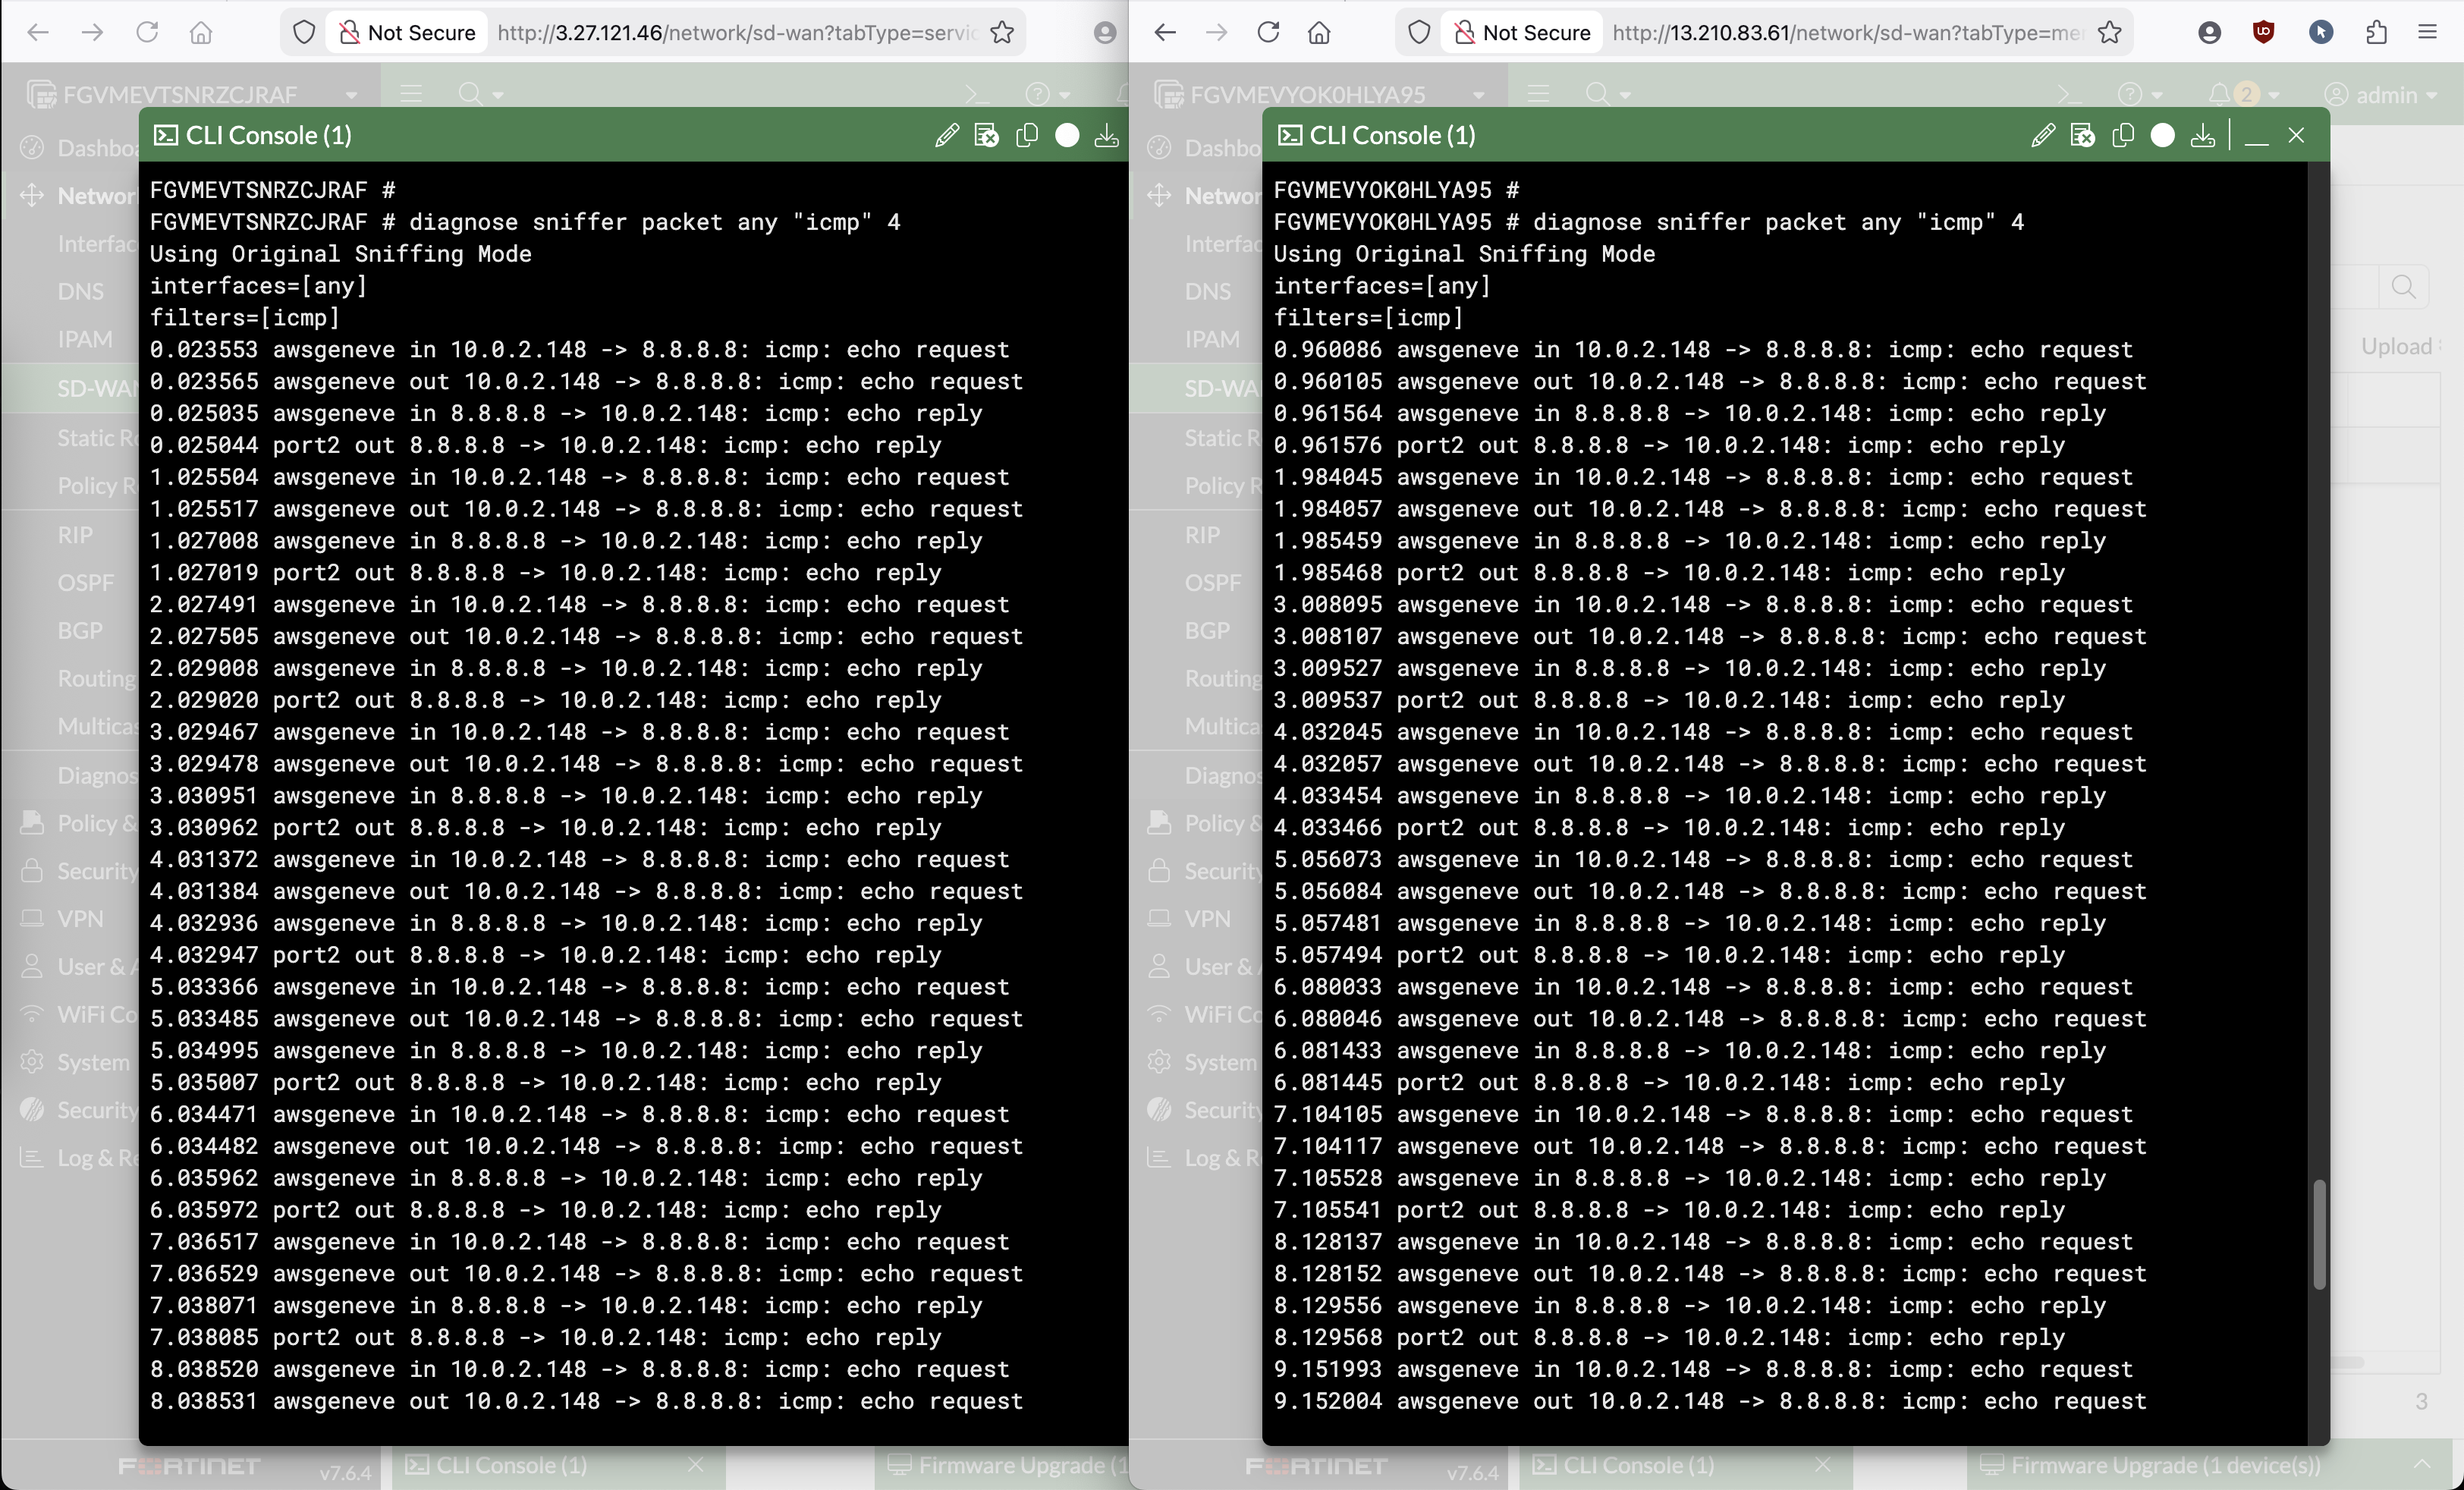
This setup is not perfect because we can see the returning traffic from Internet back to Linux host is sent out of the port2 instead of to geneve, this is because the Linux host is on the same subnet as FGT’s port2. Room for improvement!