GCP (Google Cloud Platform)
Google Cloud Platform (GCP) is a cloud infrastructure service that provides virtual machines, networking, and storage resources on demand. In this setup, we deploy a FortiGate VM as a routed firewall between two VPCs to manage east-west and north-south traffic. The FortiGate performs NAT and packet inspection, allowing us to control and monitor all outbound traffic from a Linux VM before it reaches the internet.
Setting Up GCP
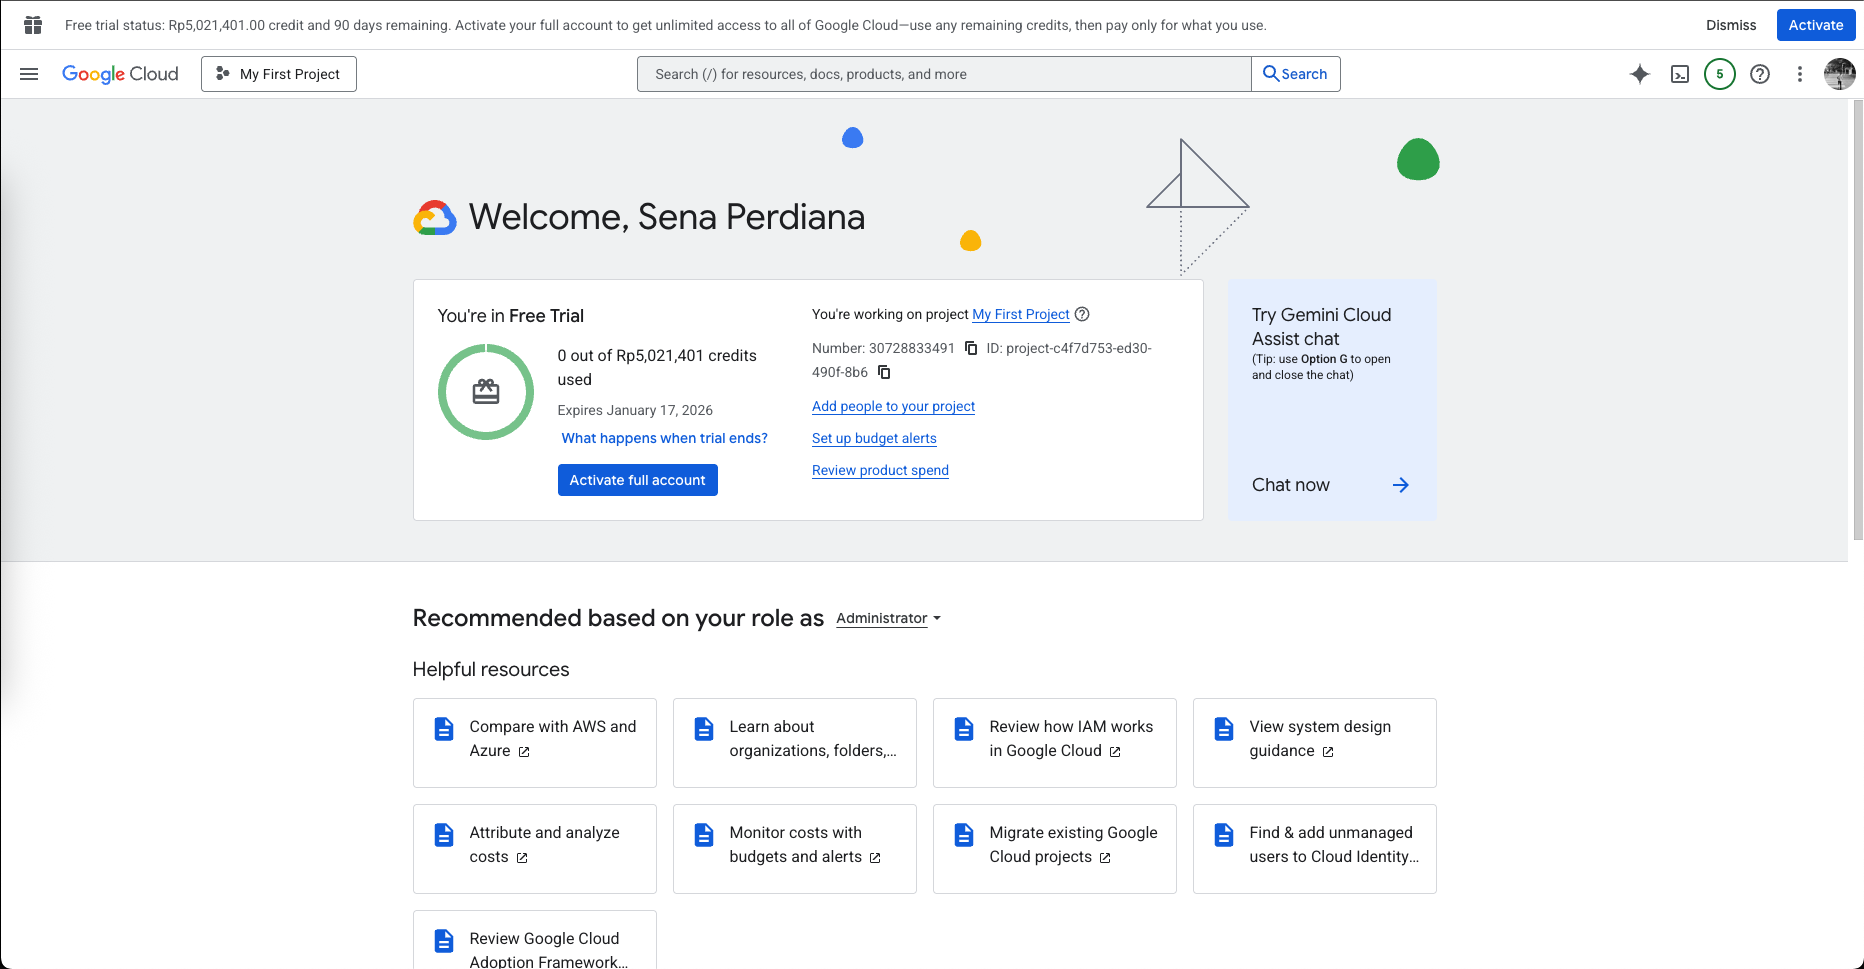
GCP gives us a free 3 months trial with $300 credits that here we will use to deploy some VMs and Firewalls and do some testings
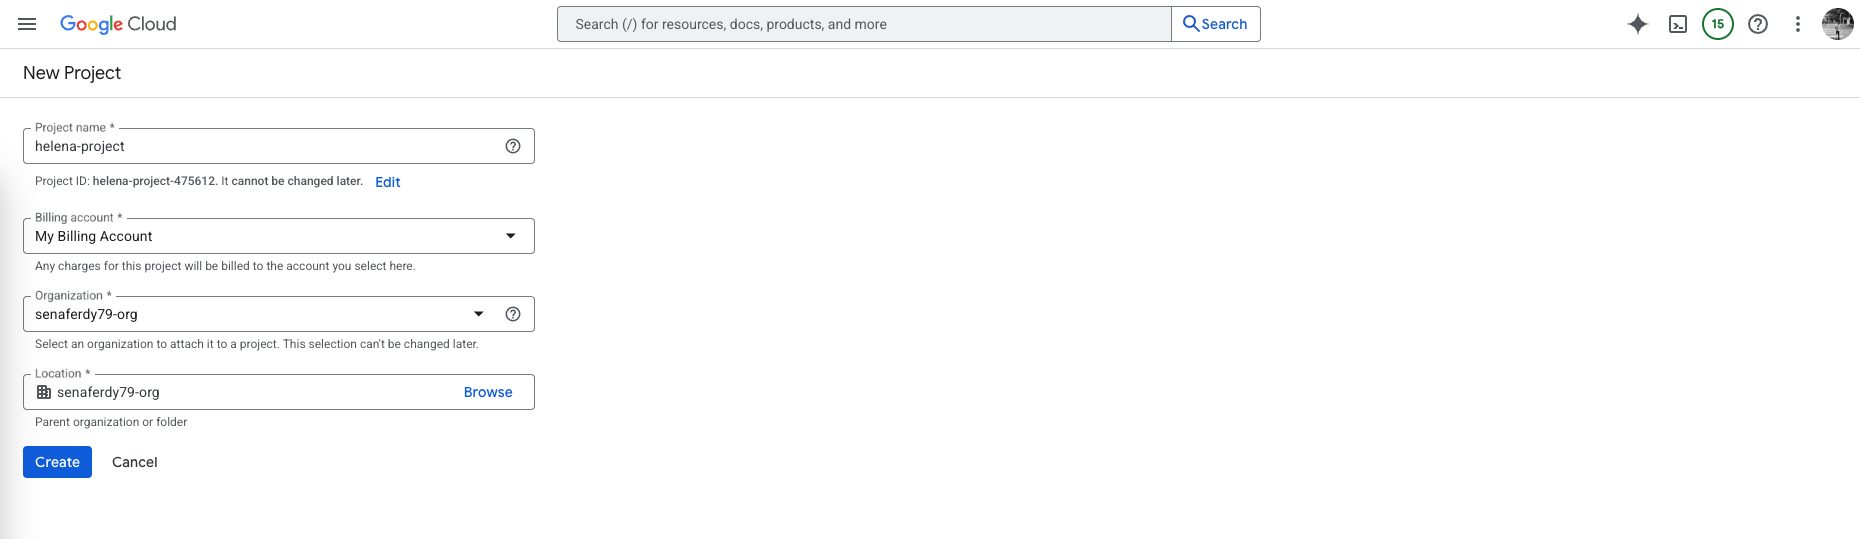
First, we will create a new project, in GCP, a project is the fundamental container for all resources—VMs, networks, storage, and IAM policies. Each project has its own billing, permissions, and resource boundaries.
When we deploy a FortiGate firewall or a Linux VM, those instances, their VPCs, and firewall rules all exist within a specific project, ensuring isolation from other environments and clear control over access and cost.
After that we will set up a Virtual Private Cloud (VPC), which is a software-defined network that provides private IP space, routing, and firewall controls for resources within a project. It behaves like an isolated LAN in the cloud.
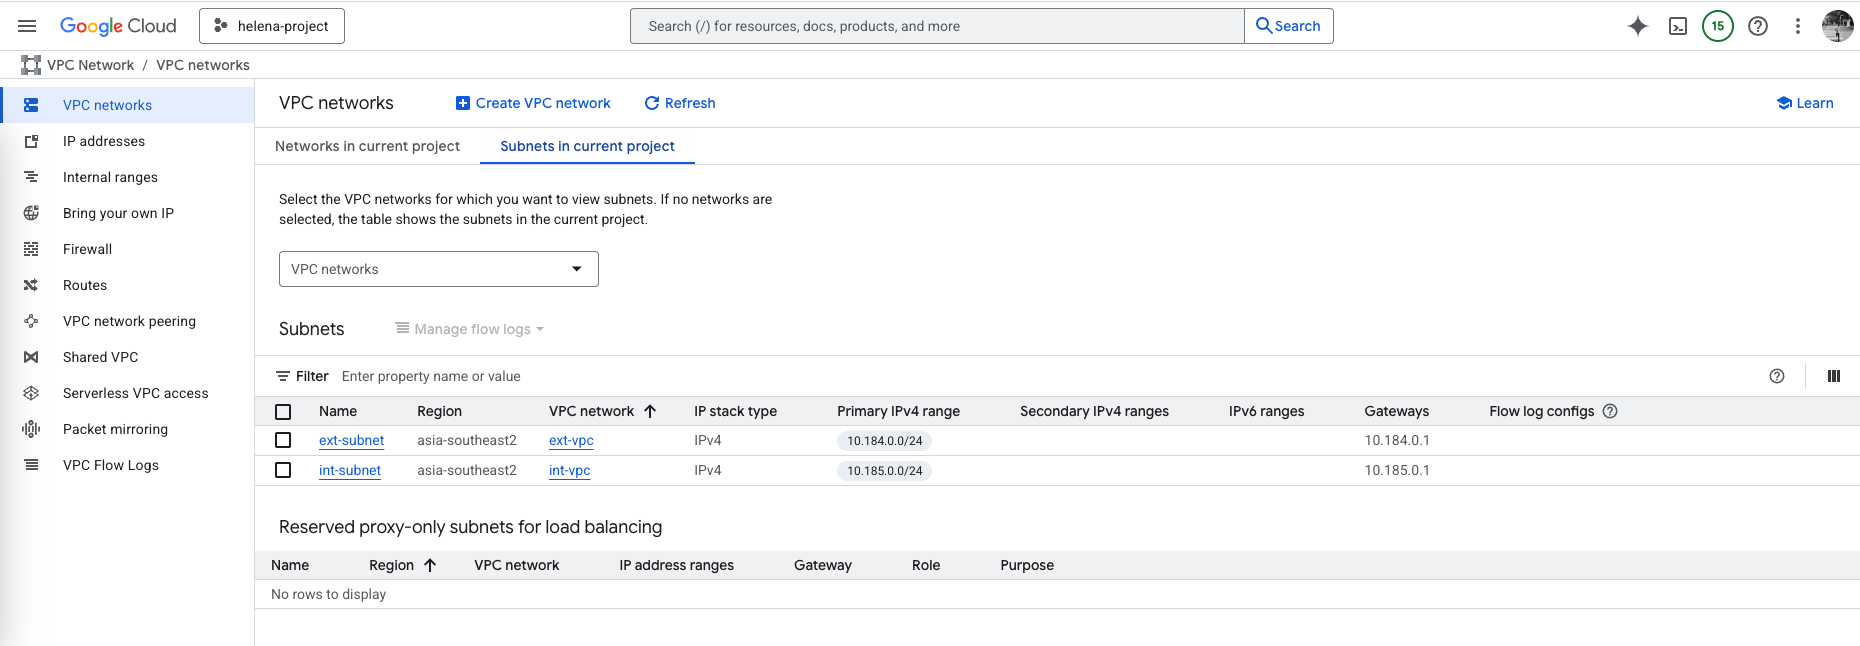
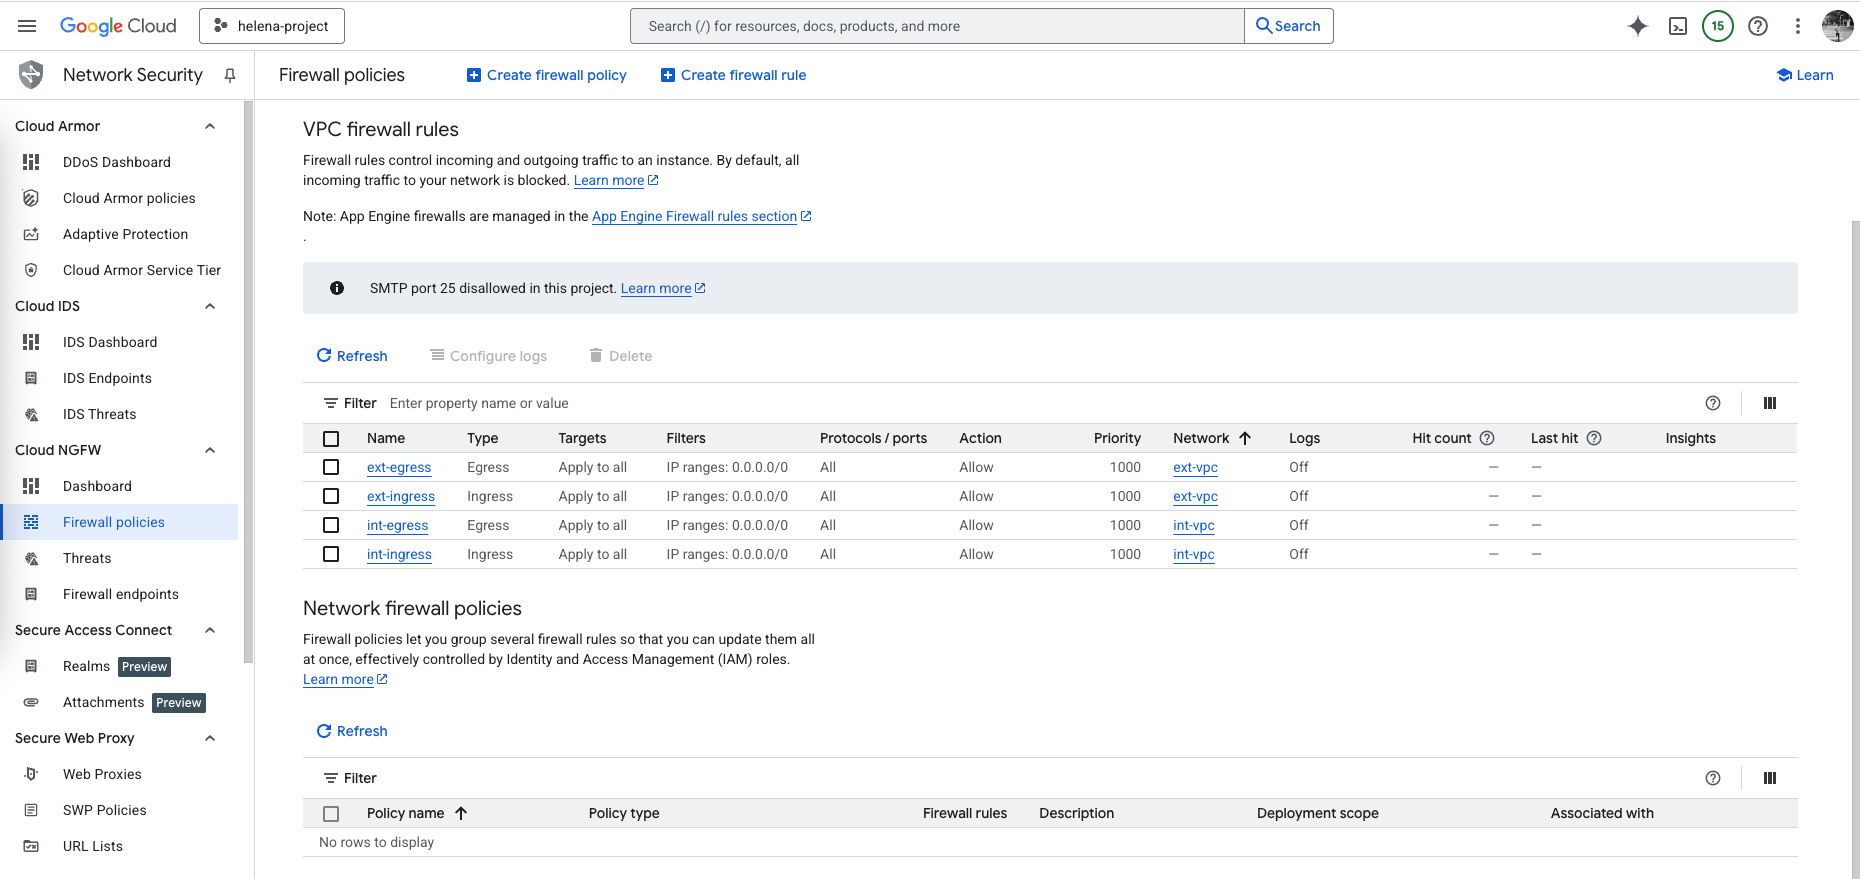
On VPC Networks, here we set up ext-vpc and int-vpc
We deploy two VPCs to separate internal workloads from external internet access. The internal VPC hosts private instances such as the Linux VM, while the external VPC connects to the internet through FortiGate’s WAN interface. This separation enforces traffic control boundaries and allows the FortiGate to act as the single inspection and NAT point between the two networks.

And each VPC contains its own subnet for network separation
Next we create a very simple firewall rule to pretty much allow any traffic going anywhere
Deploying Fortigate
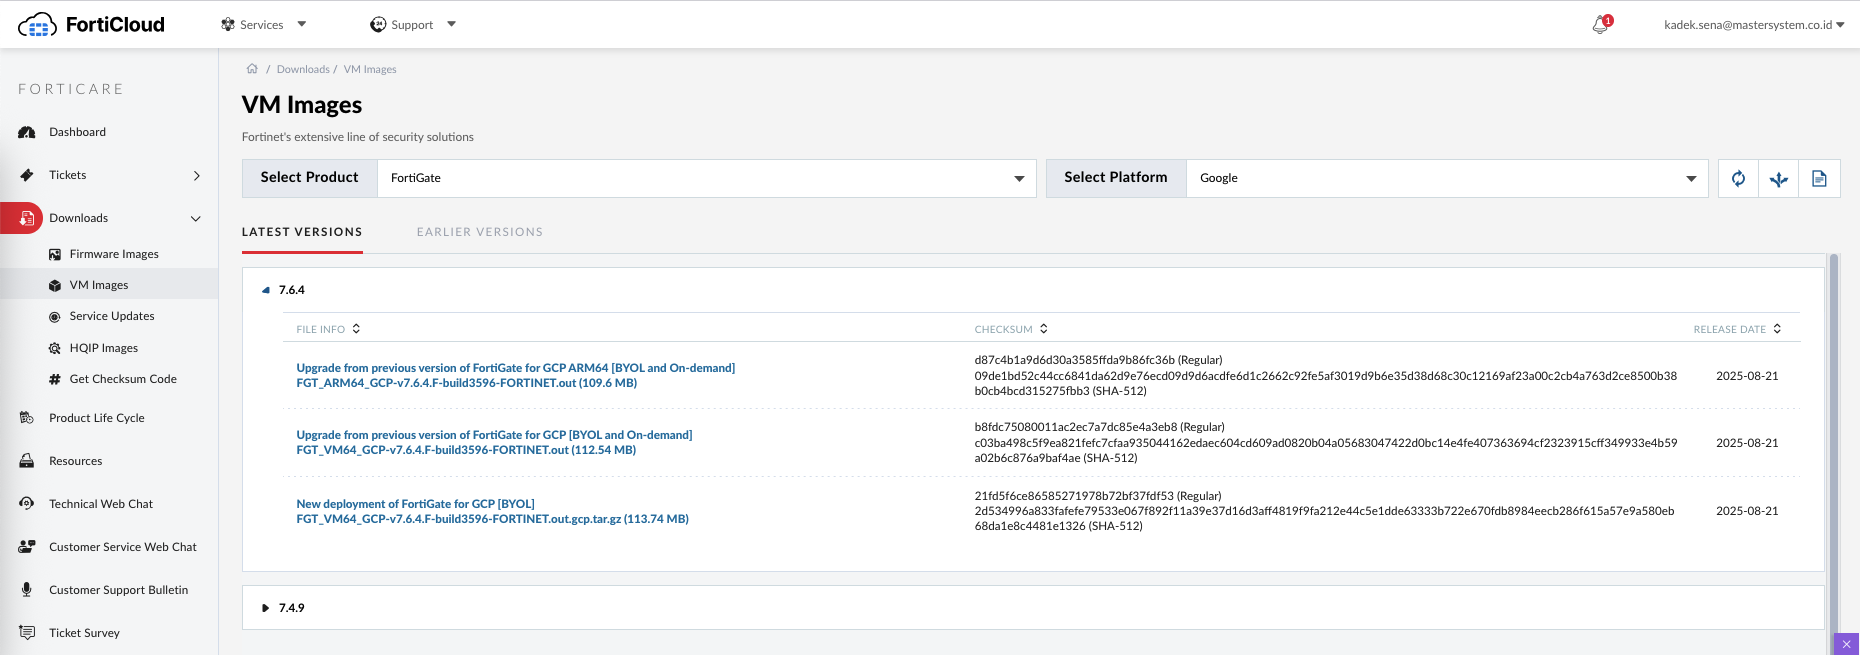
To deploy fortigate firewall, first we need to download a GCP-compatible image
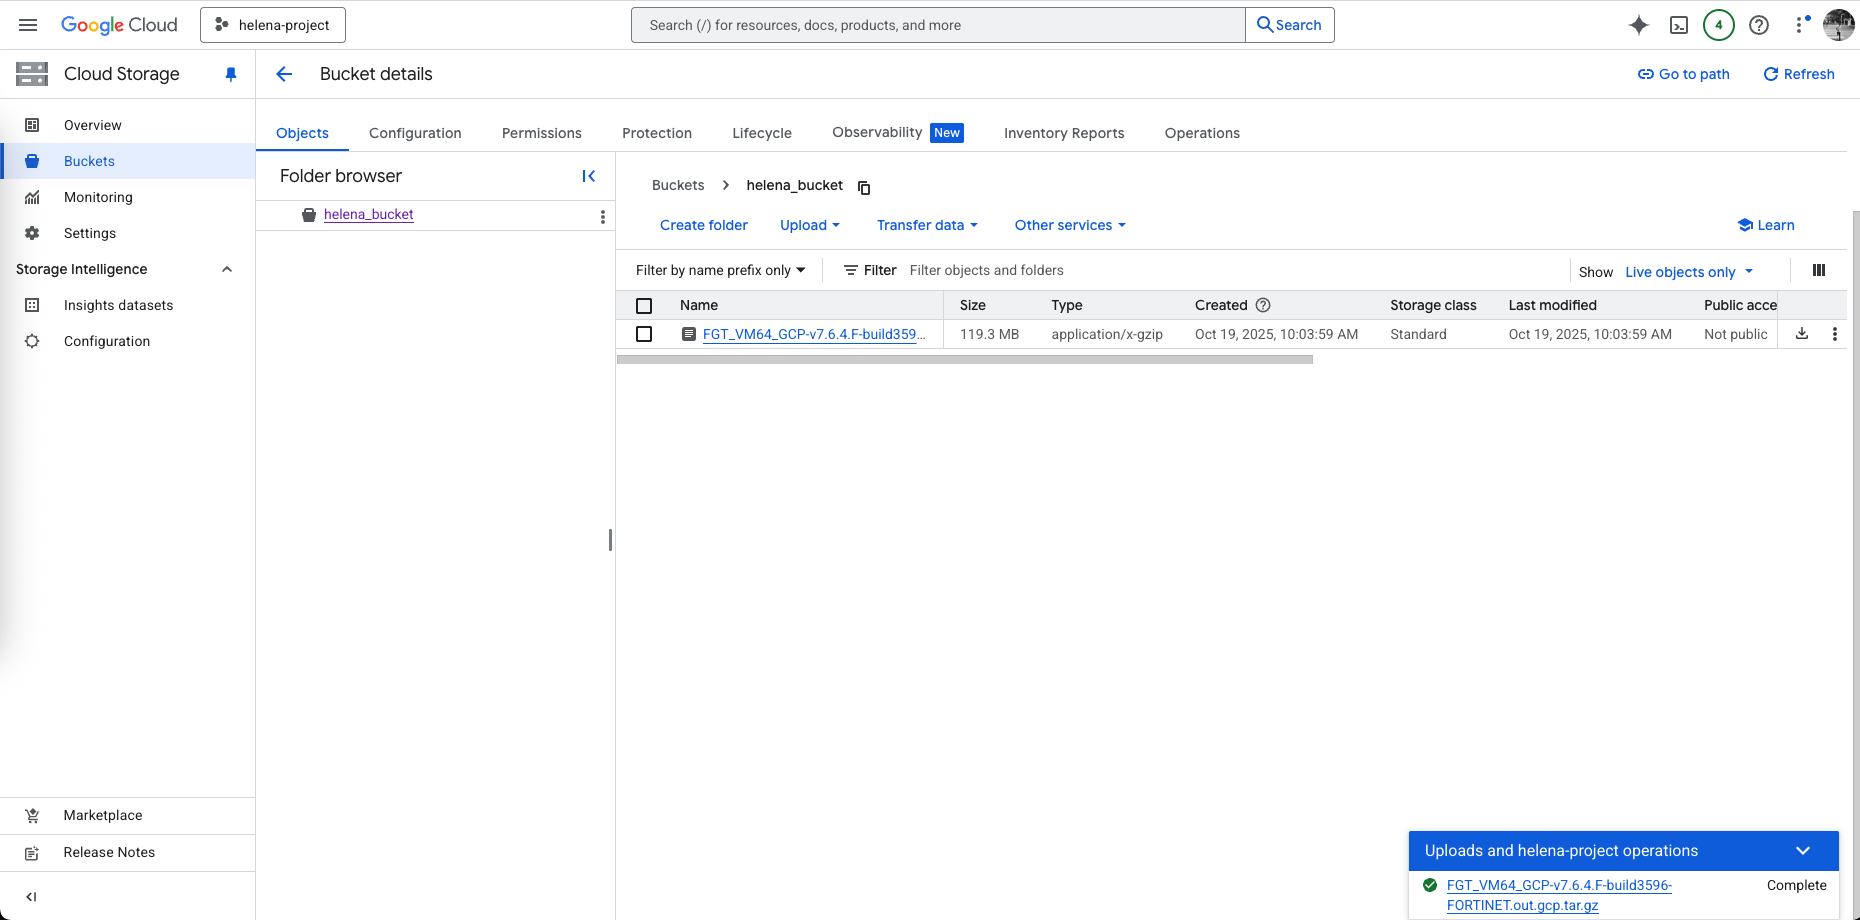
Next on Cloud Storage » Buckets, we need to create a virtual bucket so we can upload and store the image
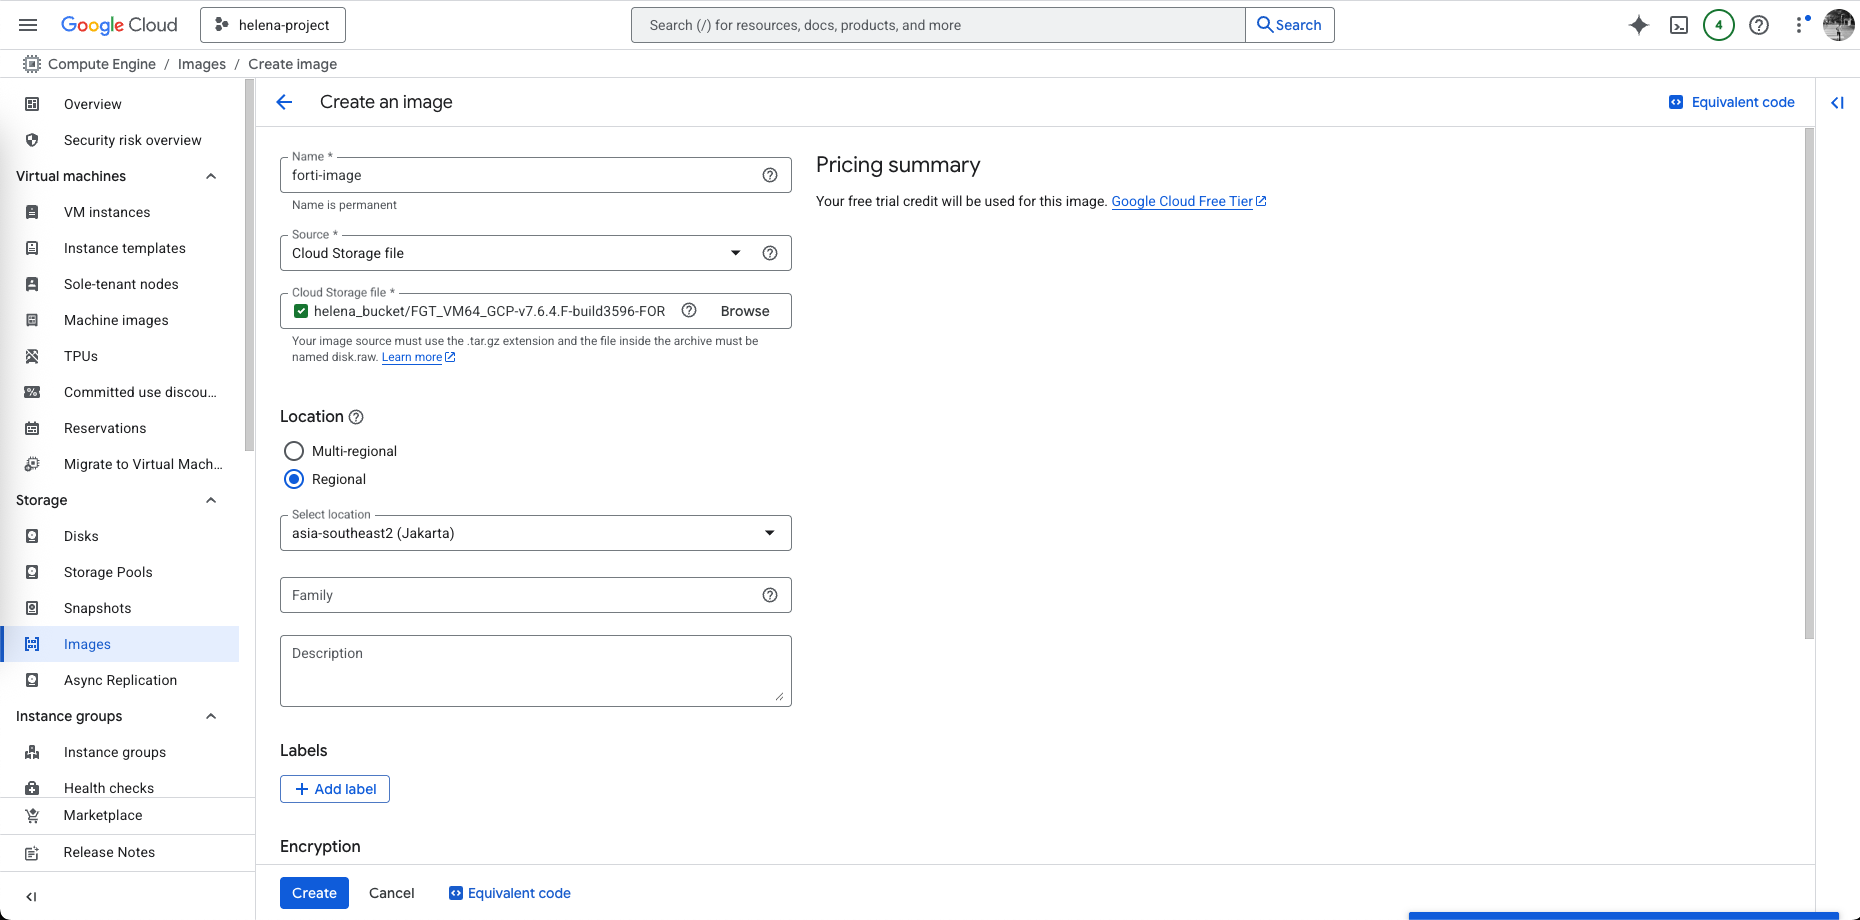
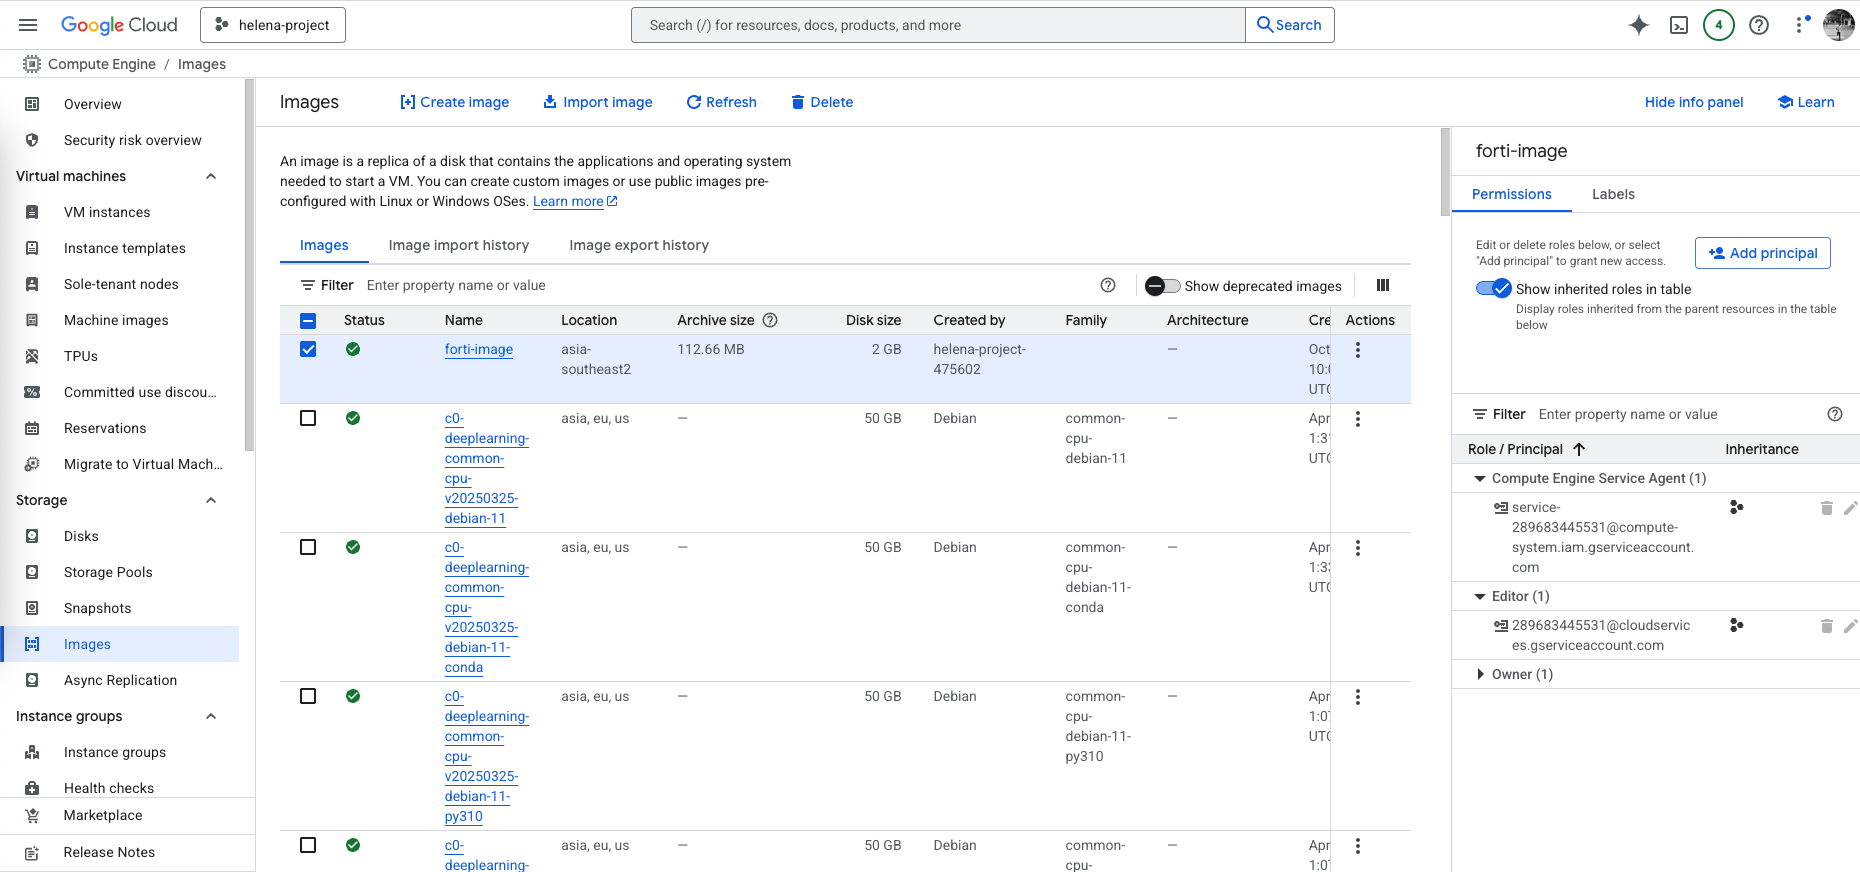
Then on Compute Engine » Images, we create a custom fortigate image that we can later use to create VM
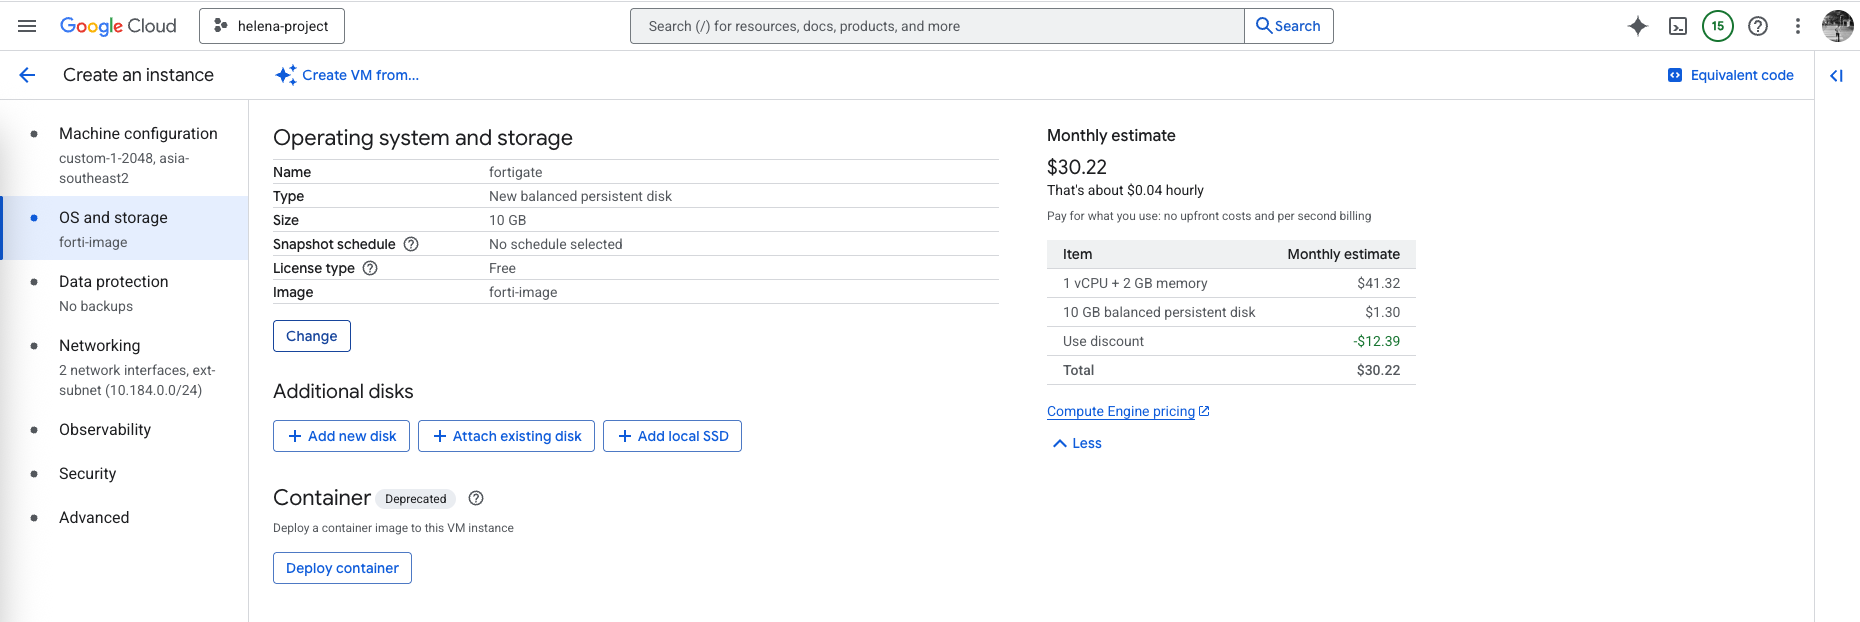
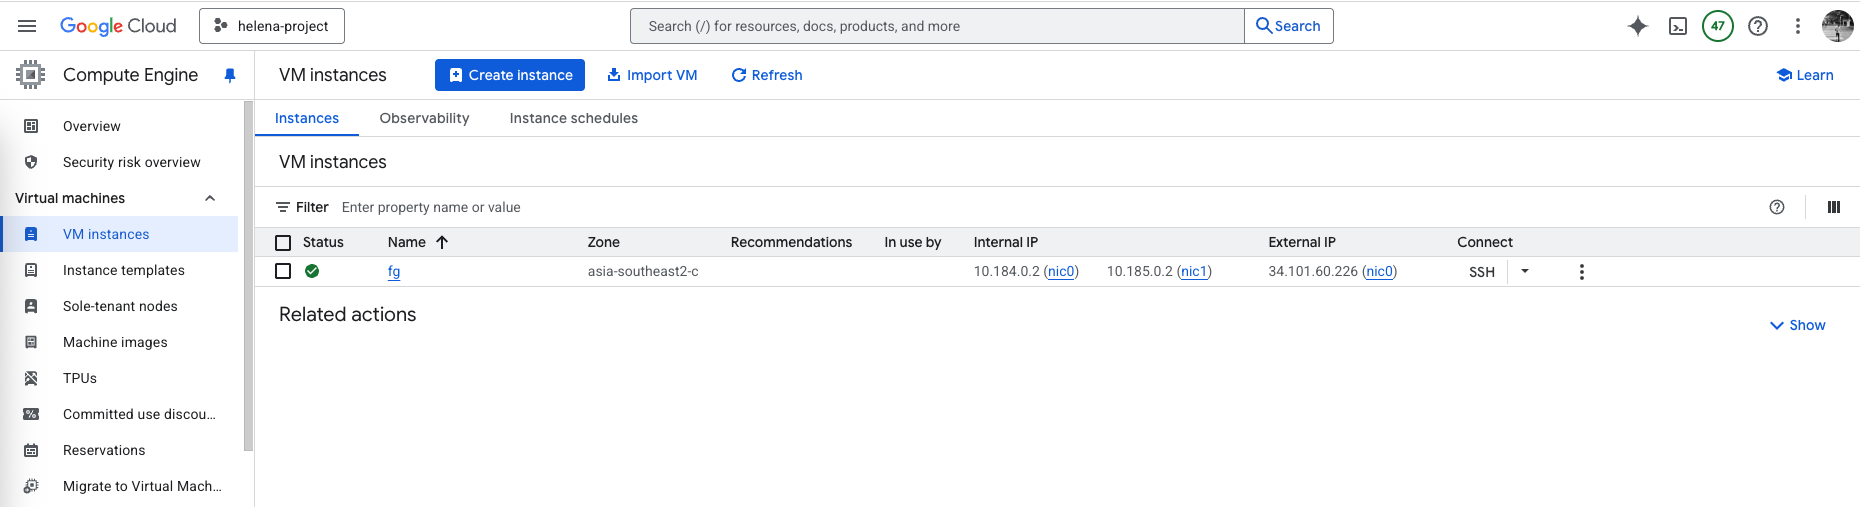
Now on Compute Engine » VM Instances, we can create new VM using the custom forti image
To allow this VM to act as firewall, which is to inspect and forward traffic, we need to enable IP Forwarding

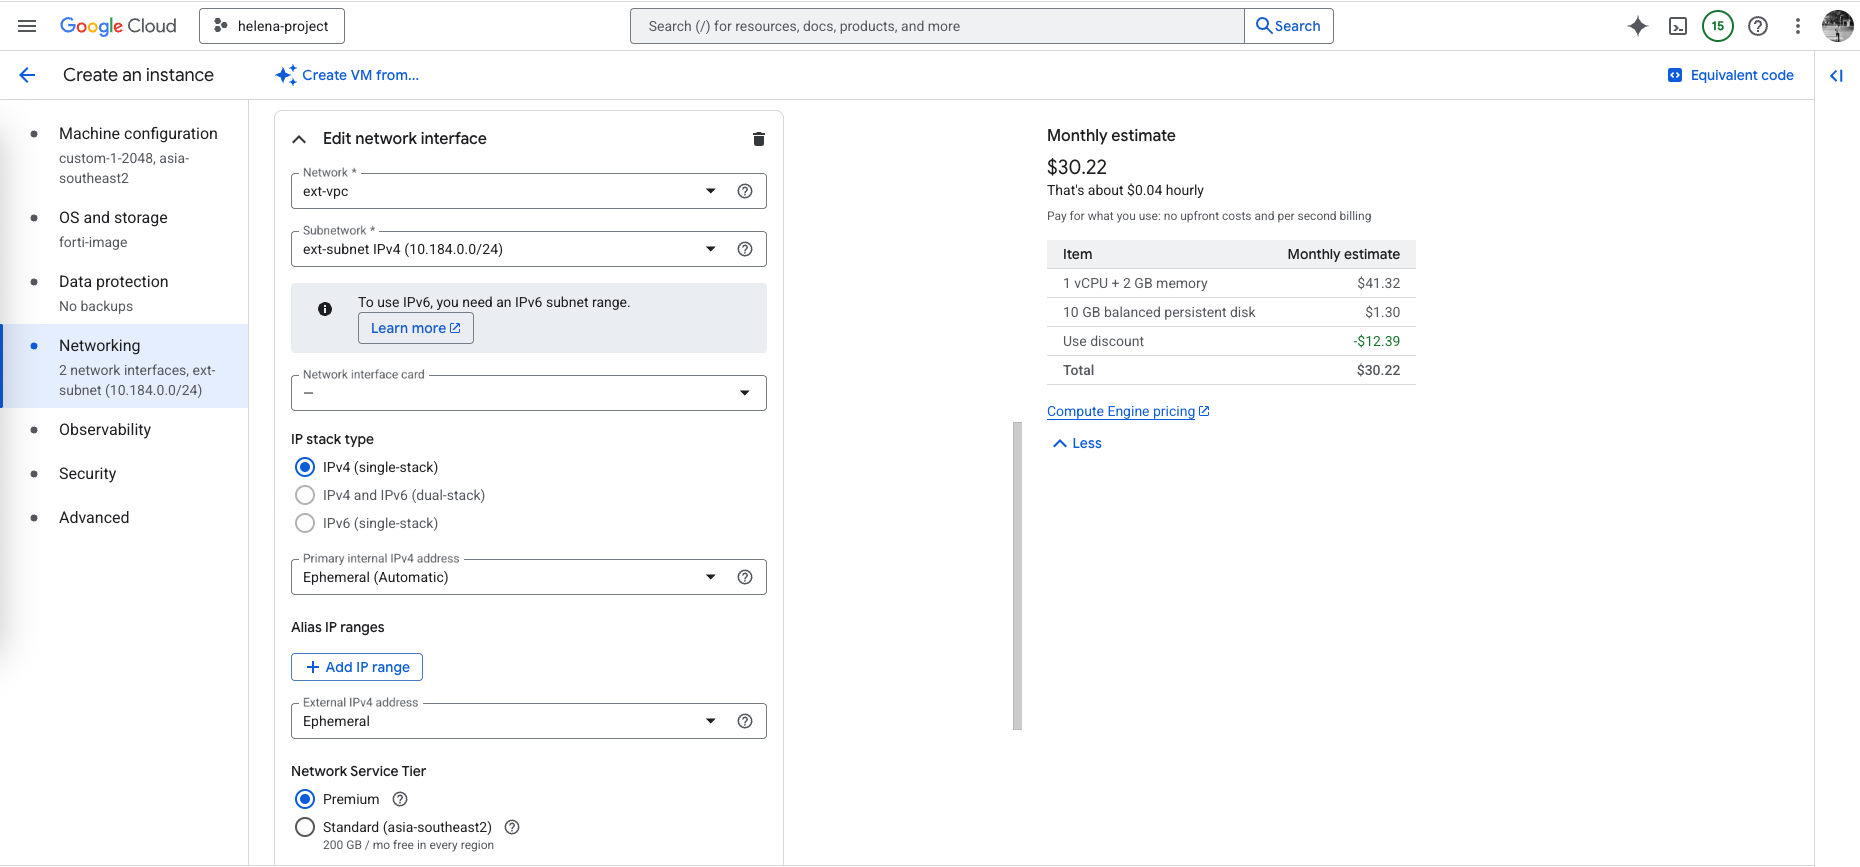
Next we create the external facing interface using ext-vpc with an external IP address configured
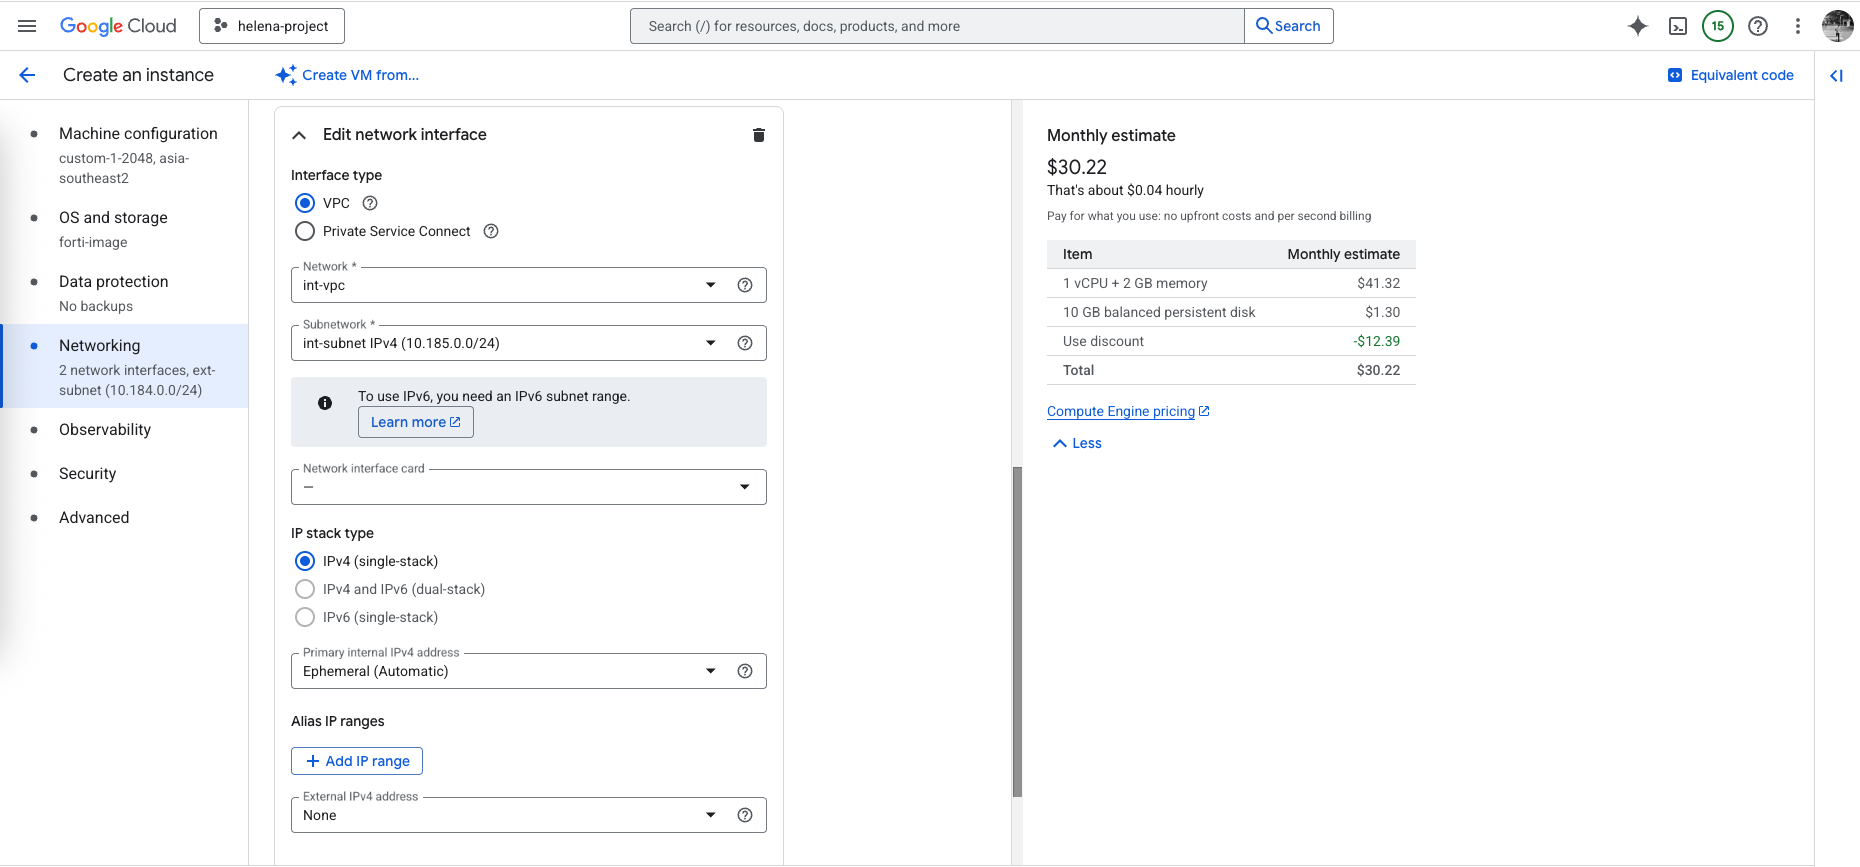
Then we create the second interface, which is the internal facing interface using int-vcp, but this time we don’t configure the external IP address
Hit create and the firewall should be up and running
To do initial configuration, enable remote console and connect to serial console, the default credential is admin with password being the instance ID
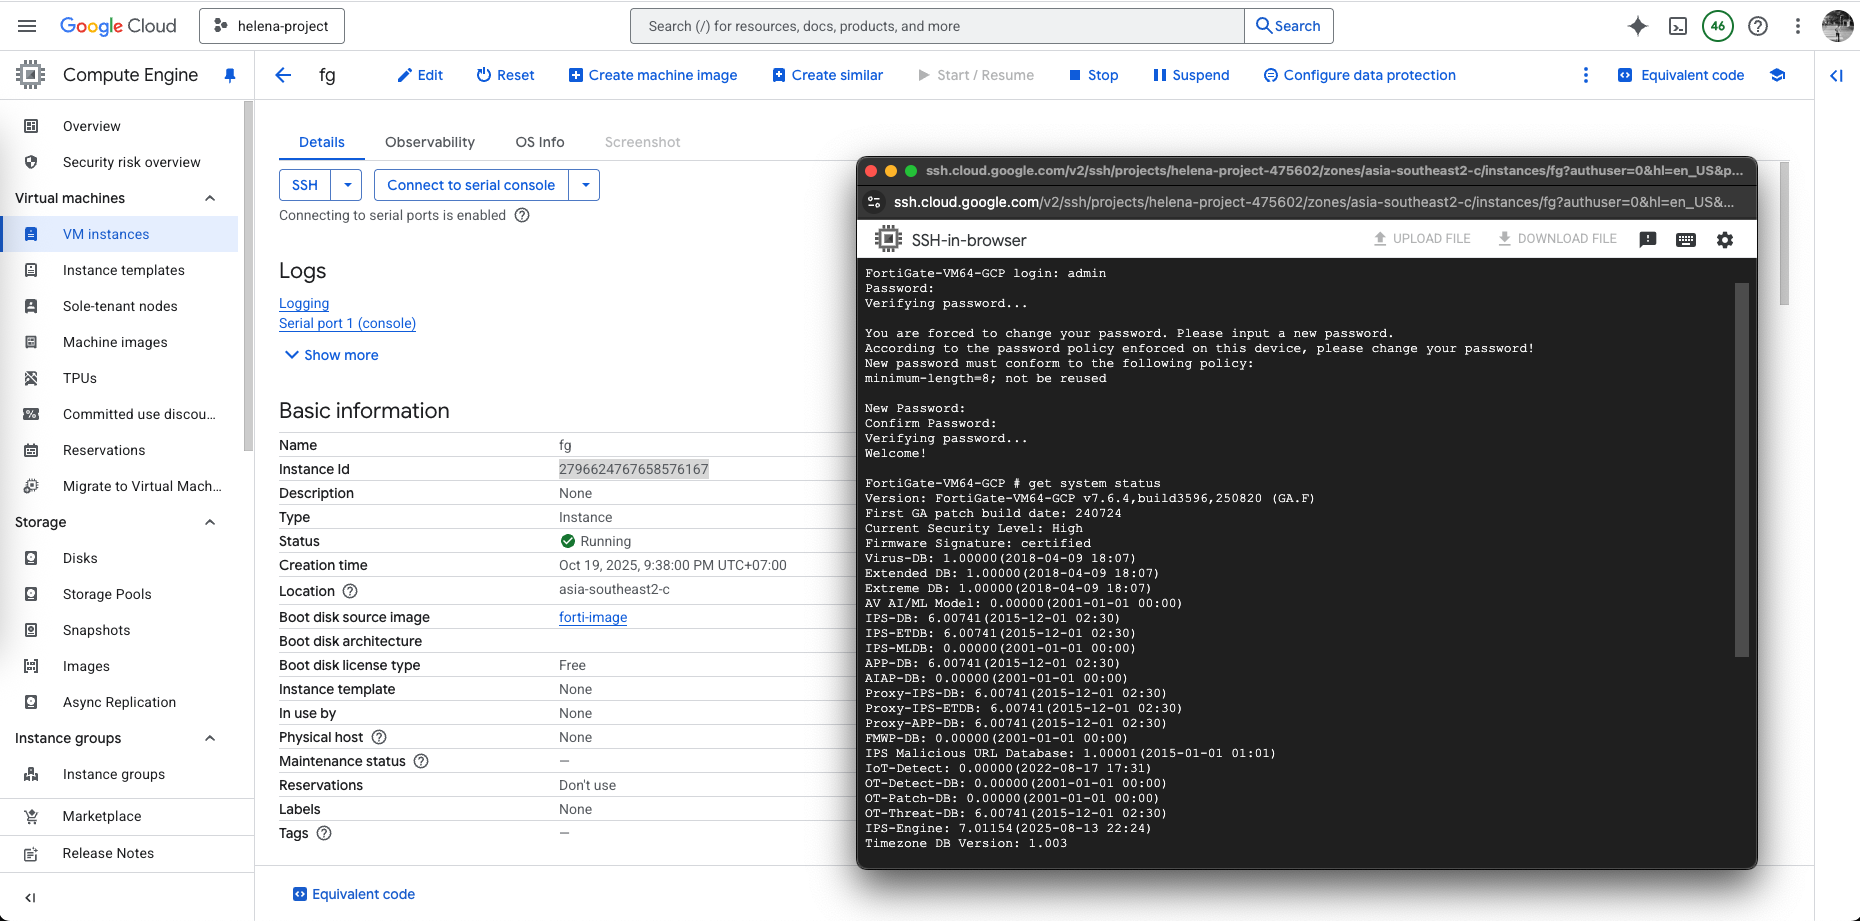
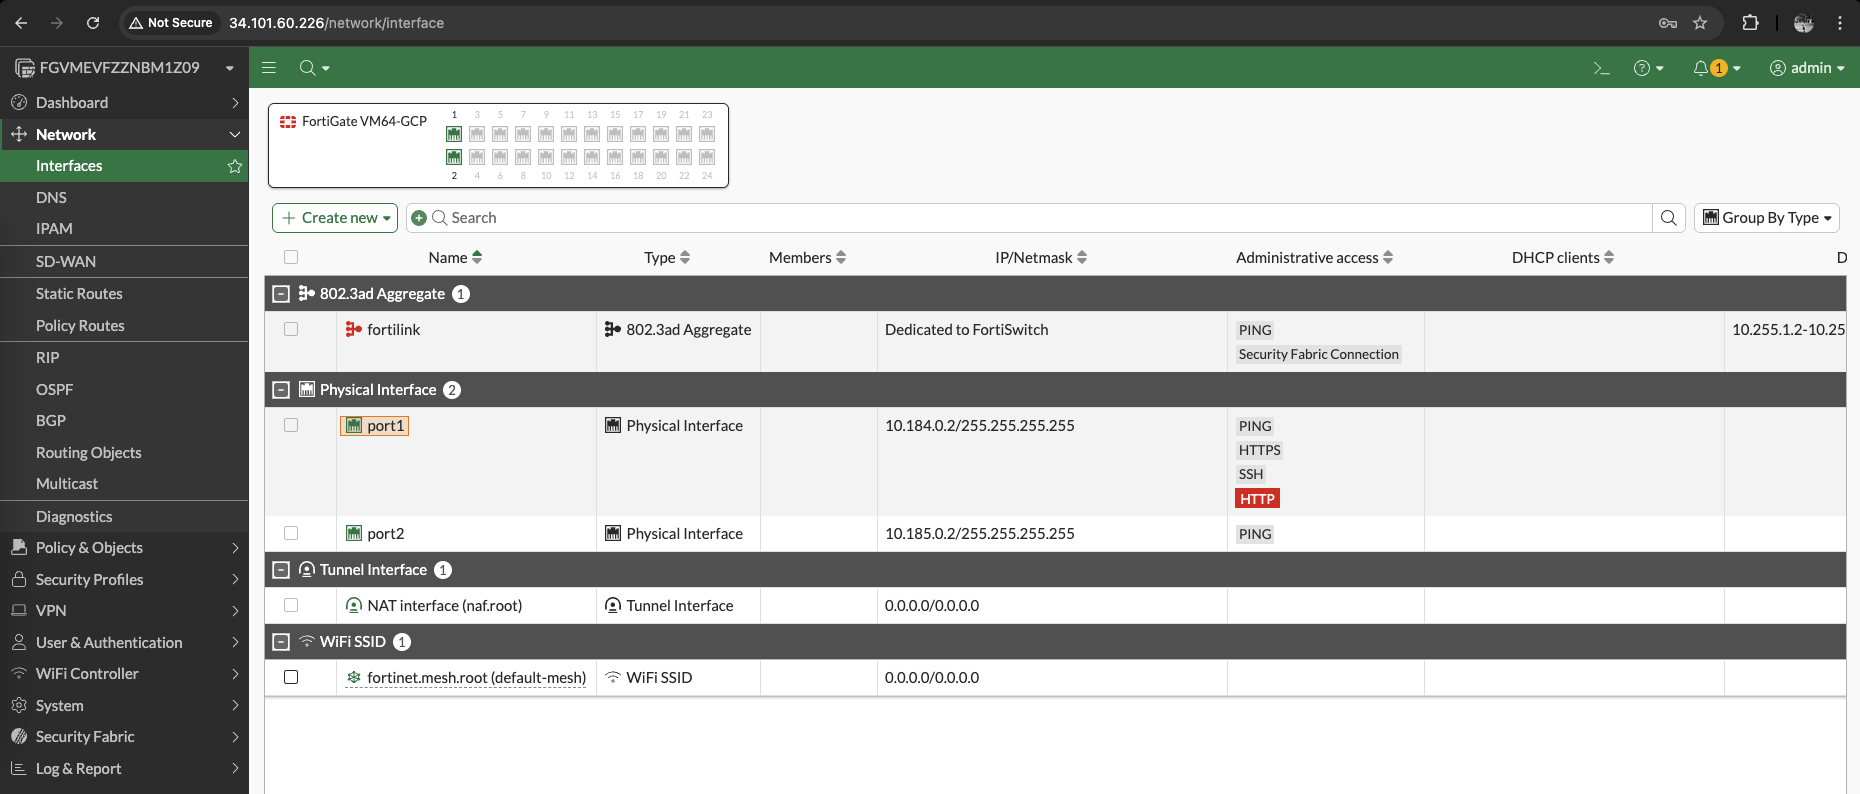
After running through the initial wizard and license configuration, now the firewall is up with 2 interfaces configured as planned
Routing Through Fortigate
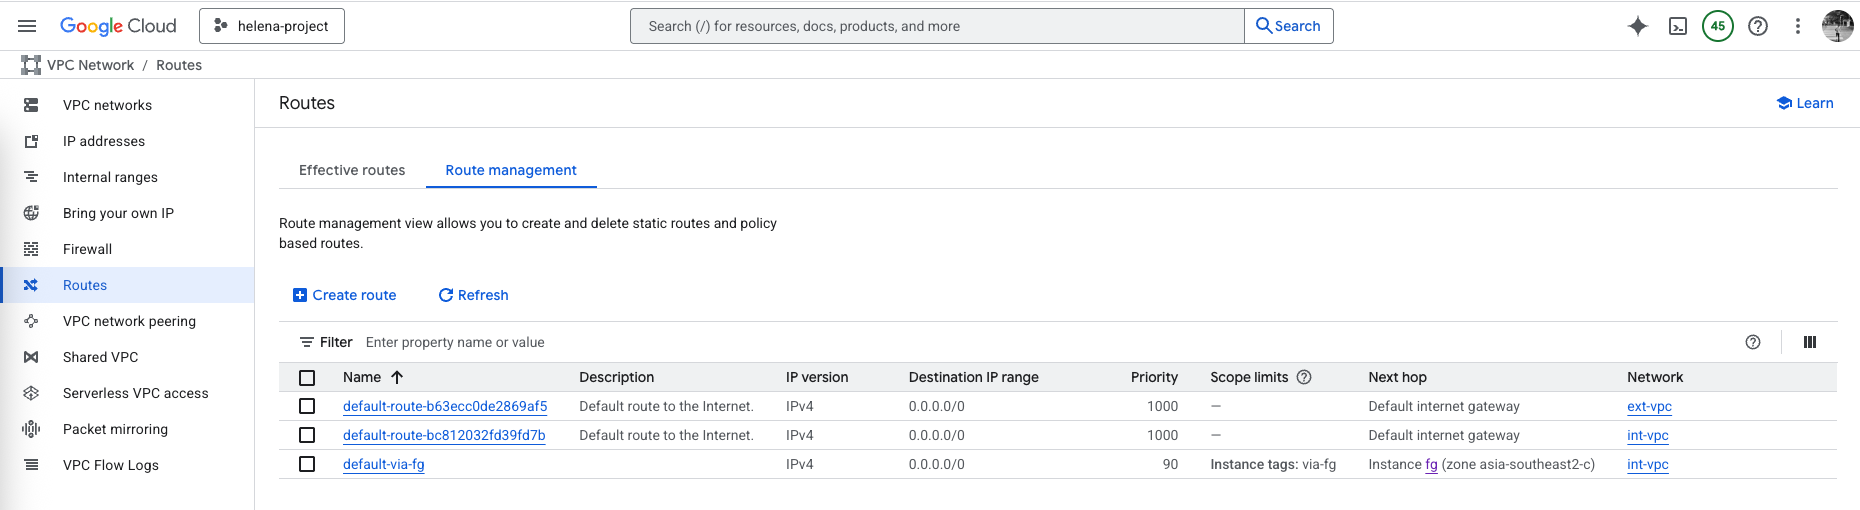
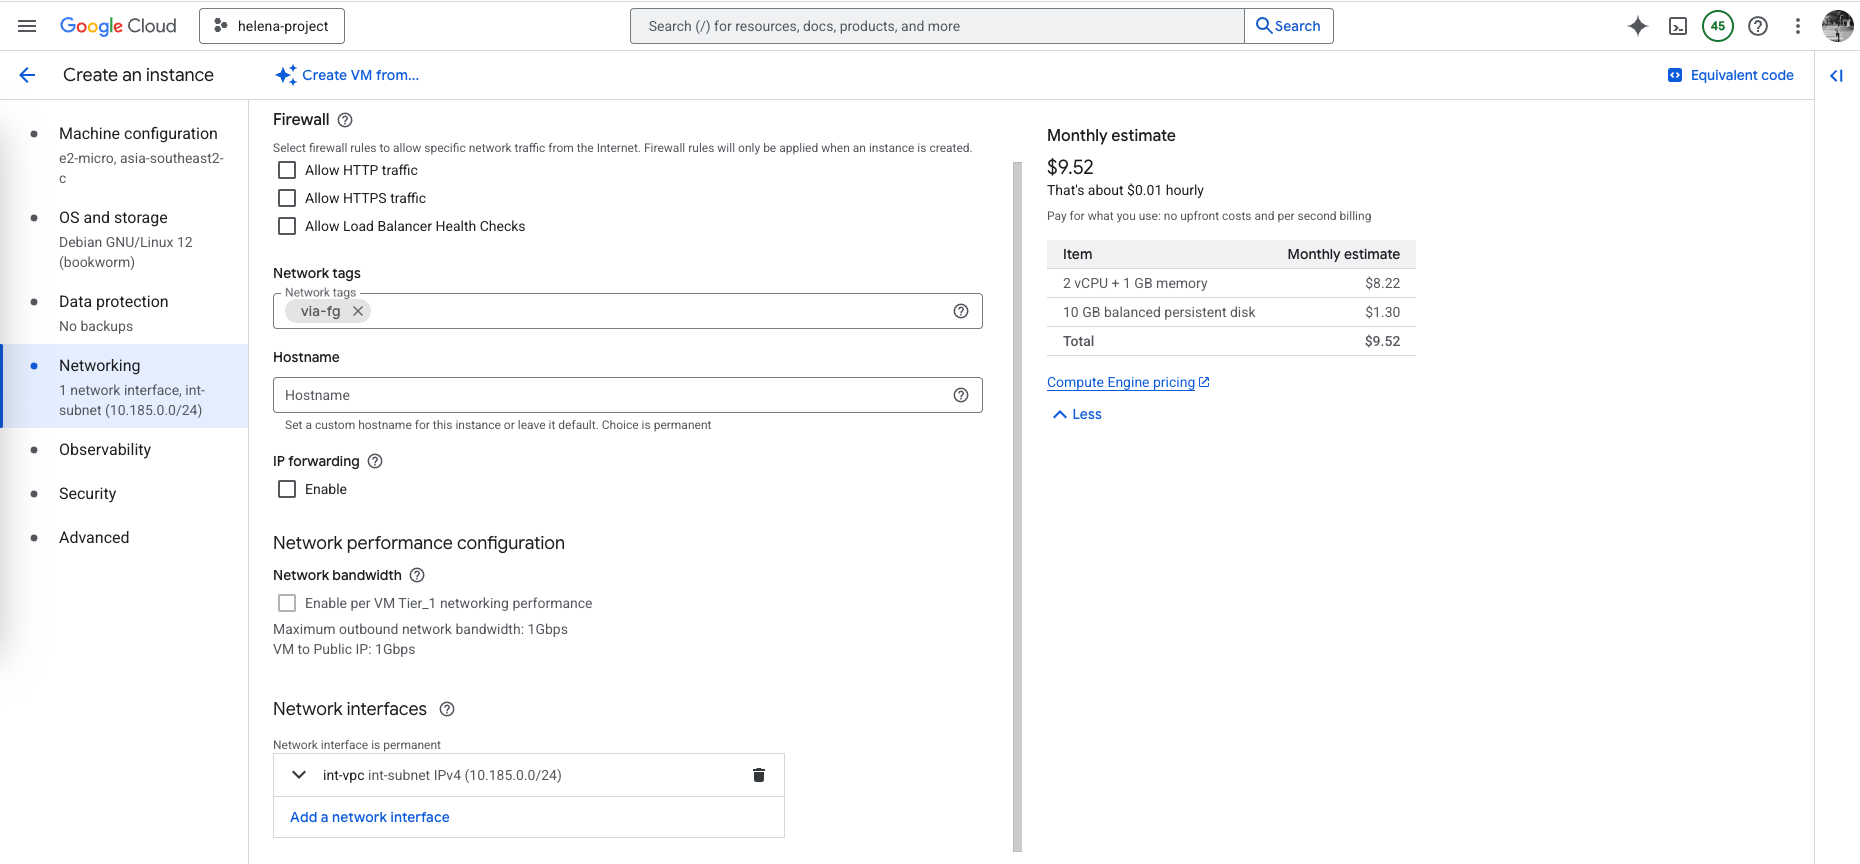
The next step is to send traffic from int-vpc to go through our fortigate before reaching ext-vpc and finally to the internet, to do that we’ll go to VPC Network » Routes, then add a new route for int-vpc to send all traffic to fortigate. We give this route tag ‘via-fg’ which we will later put on VM that we want this route to be applied on
Then lets create that VM, here we deploy a simple linux VM on the int-vpc, we give this VM a ‘via-fg’ tag so the default route is sent to the fortigate
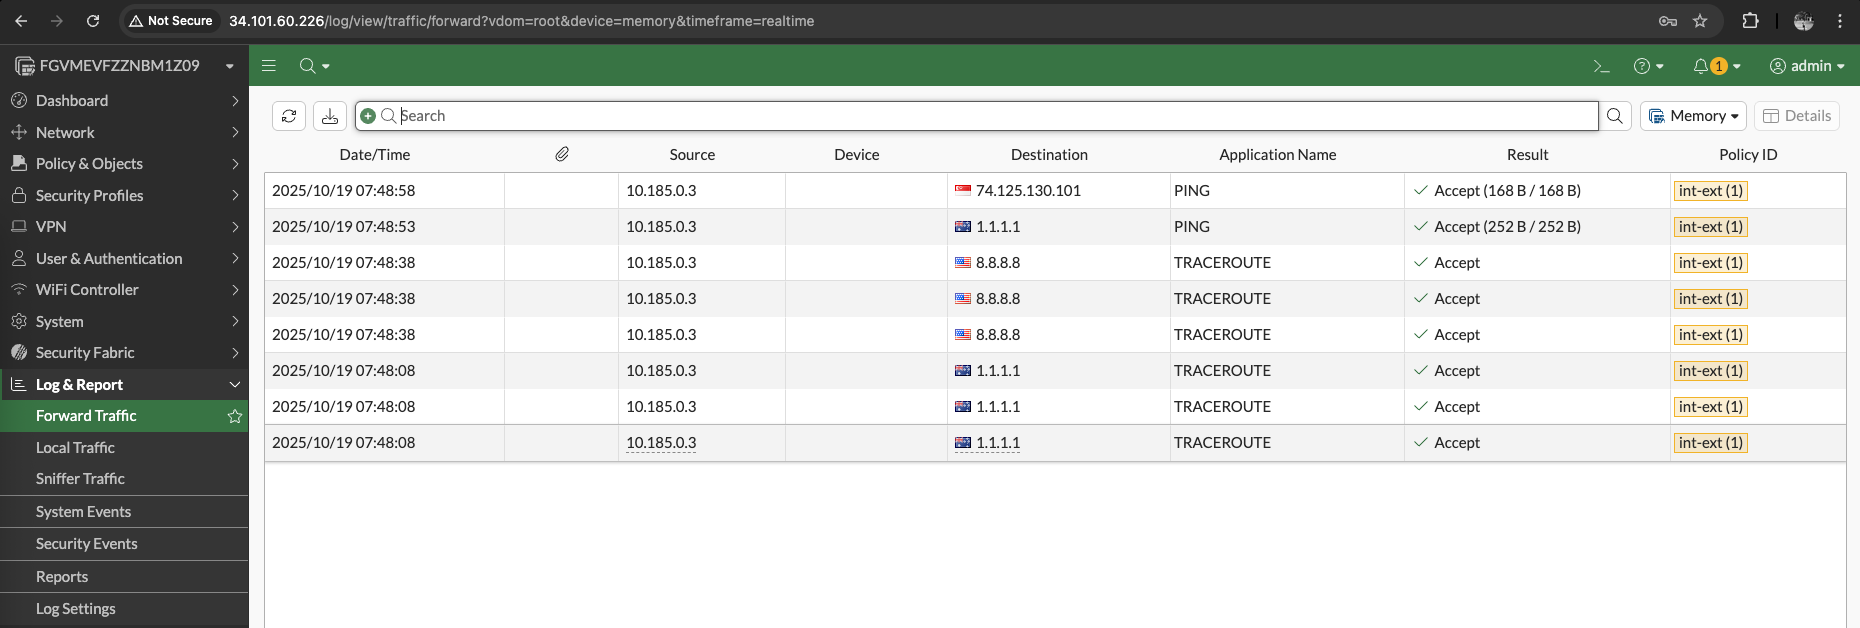
And after the VM is running, we can test it by accessing the internet, confirming the traffic is sent to the fortigate to reach the internet
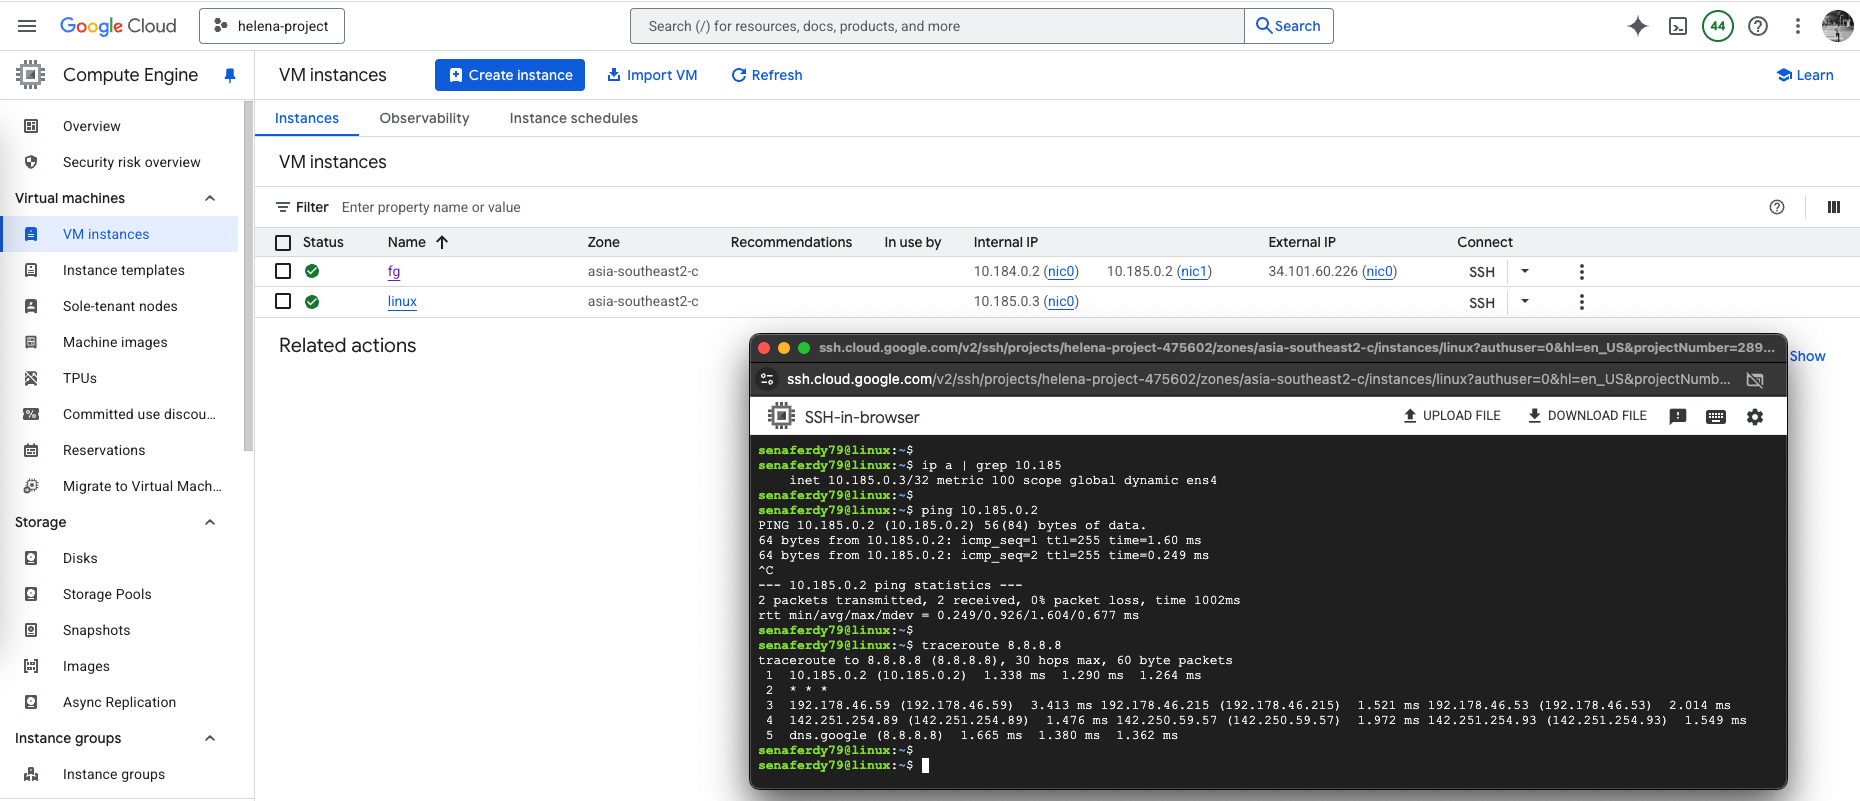
We can also confirm this by seeing the traffic logs from the linux VM going through our fortigate before reaching the internet